10 Kitchen Trash Can Ideas That Will Actually Make You Love Your Kitchen Again
This article was created in line with Trends Oraa’s research and content standards.
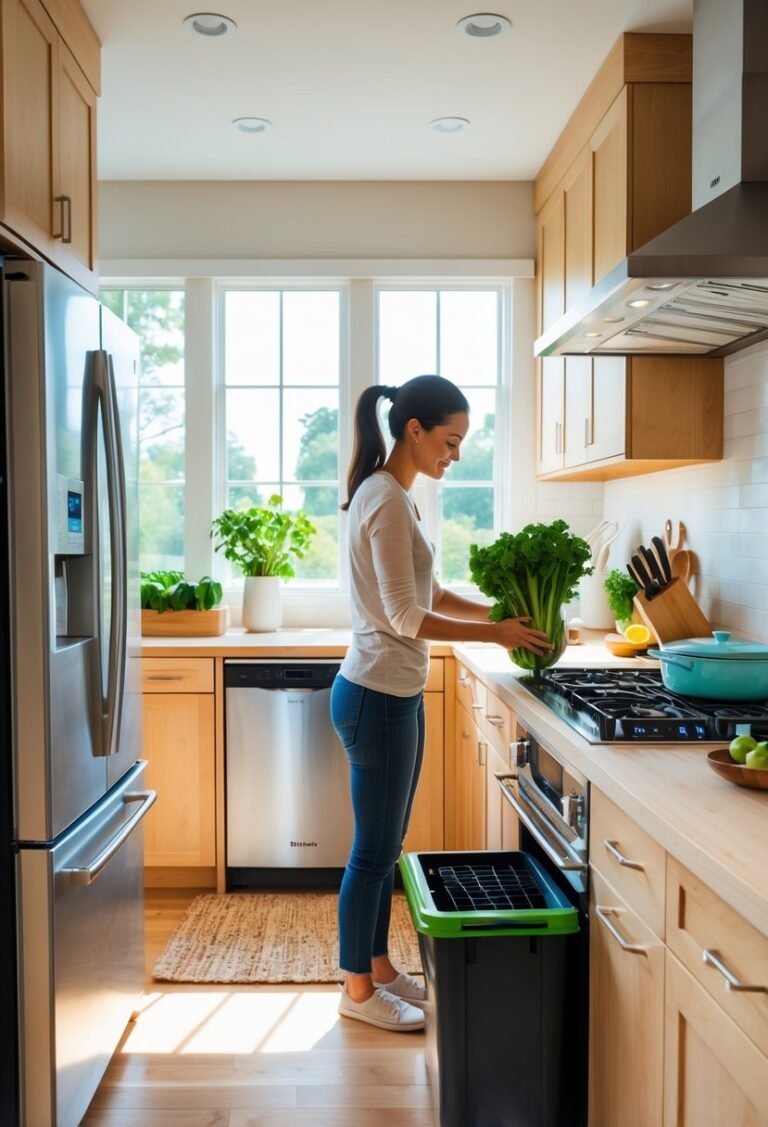
Your kitchen looks beautiful. Until someone spots the trash can.
That ugly, bulky, lid-flapping bin sitting in the corner is the one thing ruining your otherwise gorgeous kitchen — and honestly? You deserve better than that.
In this post, I’m sharing 10 kitchen trash can ideas that are stylish, smart, and totally functional. Whether you’re working with a tiny apartment galley or a sprawling farmhouse kitchen, there’s something here that will transform the most overlooked corner of your home. And trust me — by idea #6, you’re going to want to rethink your entire kitchen storage game.
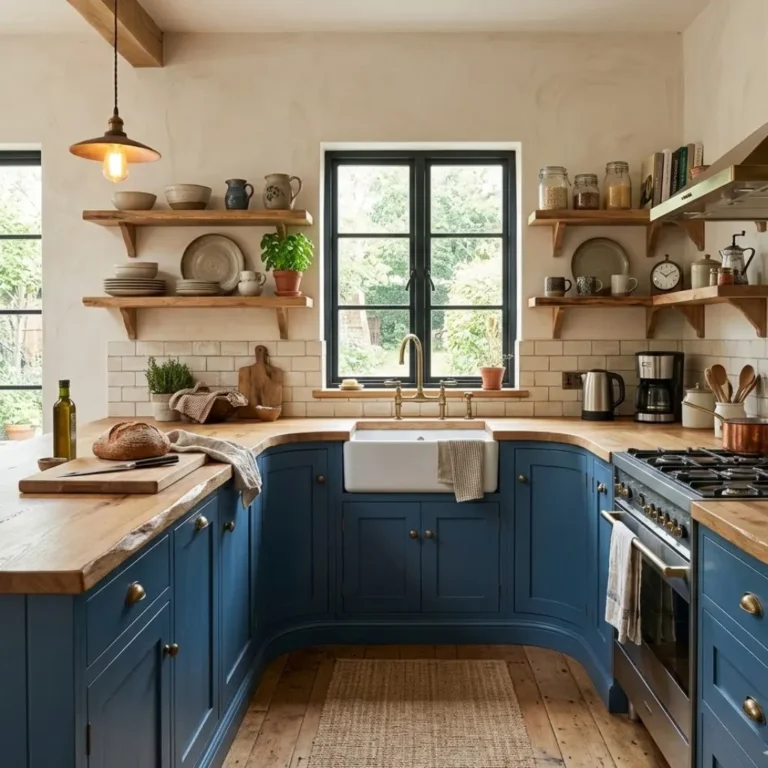
You might also love our viral guide on Kitchen Countertop Ideas — because a great trash can deserves an equally gorgeous kitchen to live in!
Let’s dive in.
Why Your Trash Can Actually Matters More Than You Think
Here’s the thing most people overlook: your trash can is one of the most-used items in your entire kitchen. You open it dozens of times a day. It sits in your eyeline constantly. And yet, most of us just grab whatever’s on sale at Target and call it a day.
But here’s the important part — the right trash can doesn’t just hold garbage. It can free up floor space, eliminate odors, make recycling effortless, and genuinely make your kitchen feel more designed and intentional.
The ideas below range from budget-friendly DIY hacks to splurge-worthy built-in solutions. I’ve broken each one down so you can actually picture it in your own kitchen, whether you rent or own.
Ready? Let’s get into it.
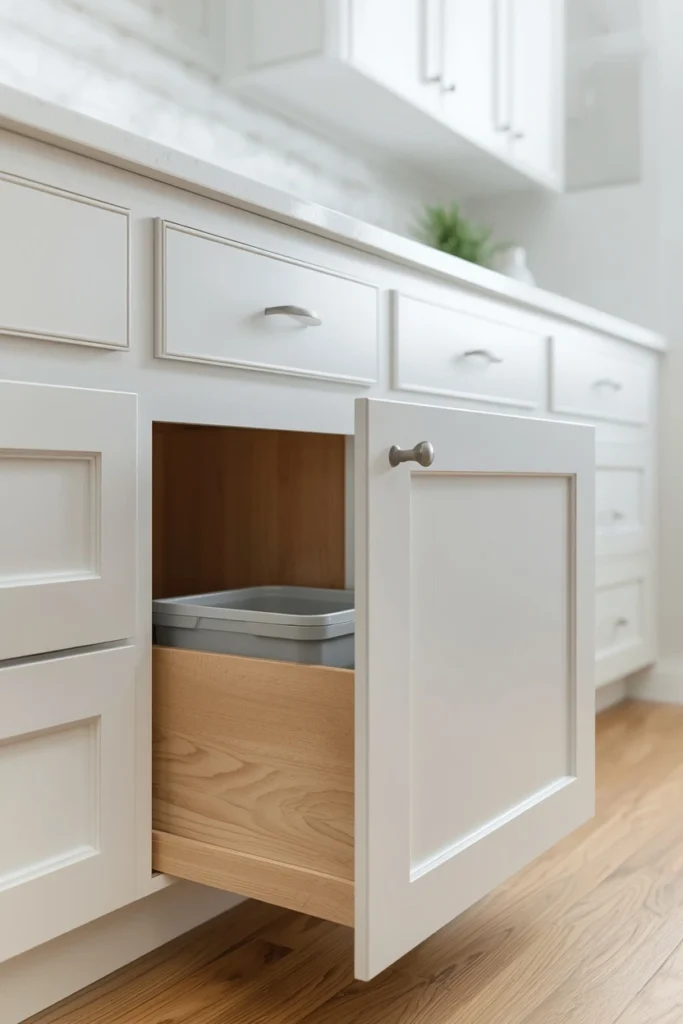
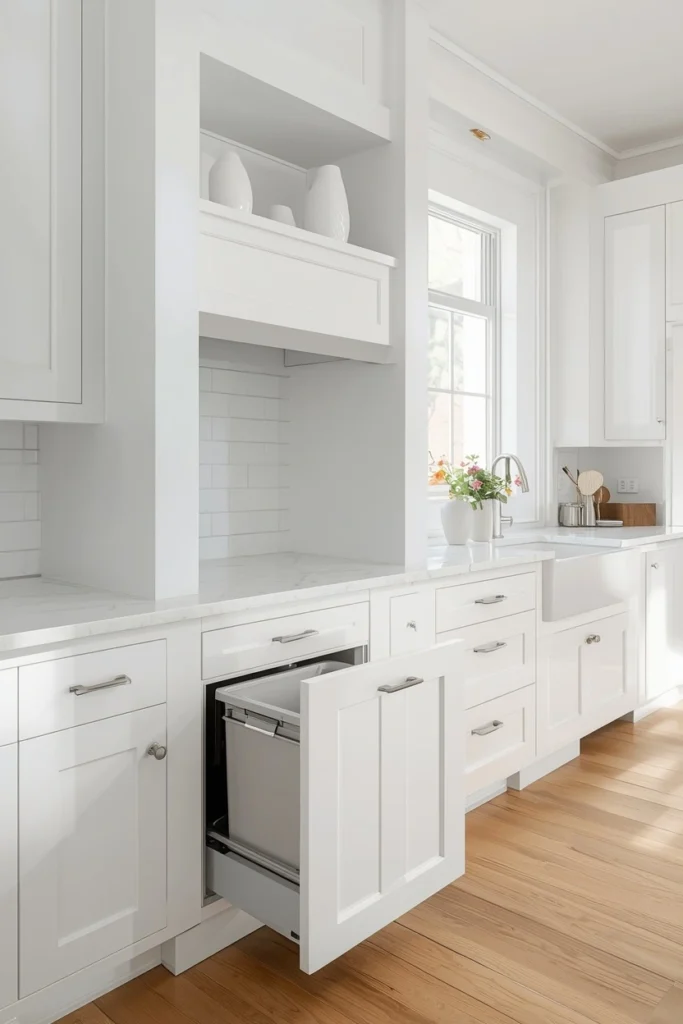
1. The Pull-Out Cabinet Trash Can
What You’re Seeing
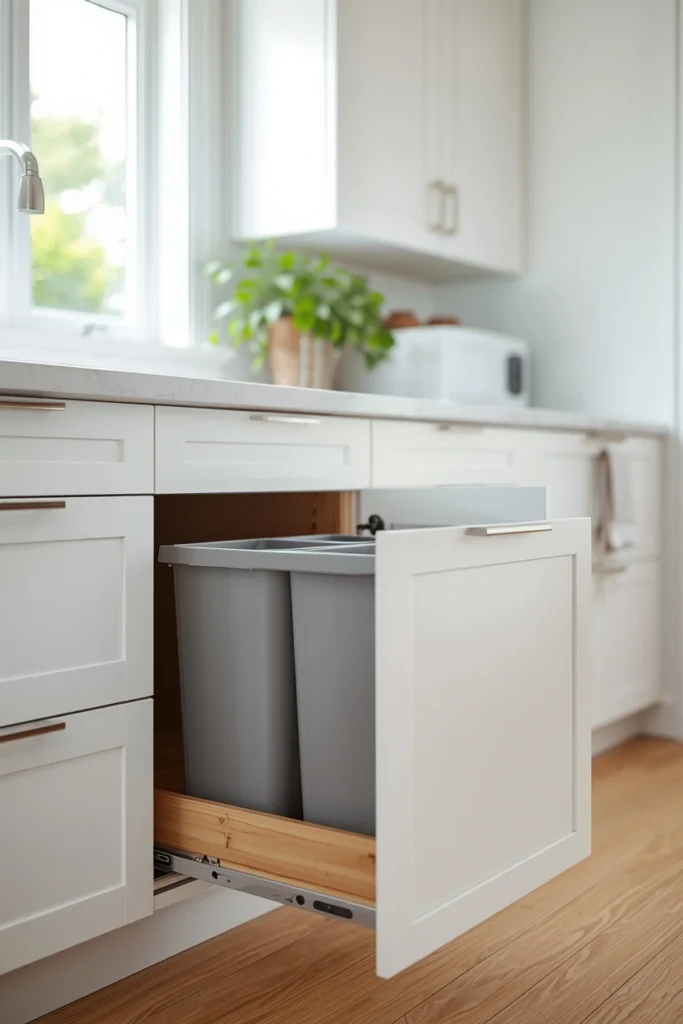
This is the gold standard of kitchen trash can ideas — a pull-out drawer system installed inside a lower cabinet, usually right under the sink or next to the dishwasher. The bin sits on a sliding track mounted to the cabinet floor, so it glides out smoothly when you need it and tucks completely out of sight when you don’t.
Many versions include a dual-bin setup, with one side for trash and the other for recycling. The bins themselves are usually removable for easy emptying, and the entire system can be retrofitted into most standard 15-inch or wider base cabinets without a full remodel.
Expert Tip: Look for pull-out systems from Rev-A-Shelf or Hafele — these have soft-close mechanisms so the drawer doesn’t slam when you close it with full hands. Worth every penny.
Why It Works: This solution makes your kitchen look cleaner and feel more spacious instantly. There’s zero visual clutter, no odor escaping into the room, and guests will never even know where you throw things away. If you’re staging your home for sale or just want a more polished look, this is the single best upgrade you can make under $100.
2. The Stainless Steel Sensor Trash Can
What You’re Seeing
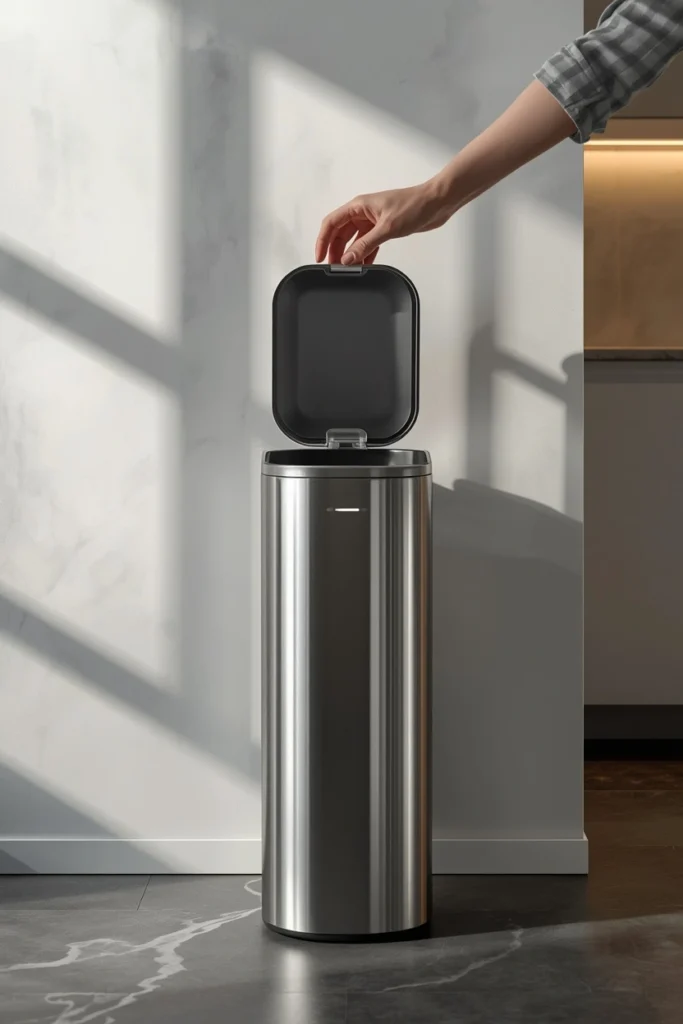
Picture a sleek, fingerprint-resistant stainless steel can — tall and slim, with a lid that opens automatically the moment your hand hovers over it. No touching required. These sensor-activated trash cans have come a long way in the last few years, and the top models now stay closed reliably, have long battery life, and look genuinely beautiful on a kitchen floor.
Brands like Simplehuman have basically turned the humble trash can into a design object, with models ranging from basic sensor lids to voice-activated ones that open when you say the word.
Expert Tip: Go for a narrow, tall rectangular can rather than a wide round one. Rectangular cans tuck more easily against walls or inside cabinet runs, and they actually hold more volume per square foot of floor space.
Why It Works: Touchless operation is a genuine quality-of-life upgrade — especially when you’re handling raw meat, fish, or sticky messes. Your hands stay cleaner, cross-contamination risk drops, and the lid seals so reliably that odors are virtually non-existent. This is the kind of thing you buy once and wonder how you ever lived without.
Which of these first two ideas fits your kitchen best — hidden away or out in the open? Drop your answer in the comments — I love hearing what works for real kitchens!
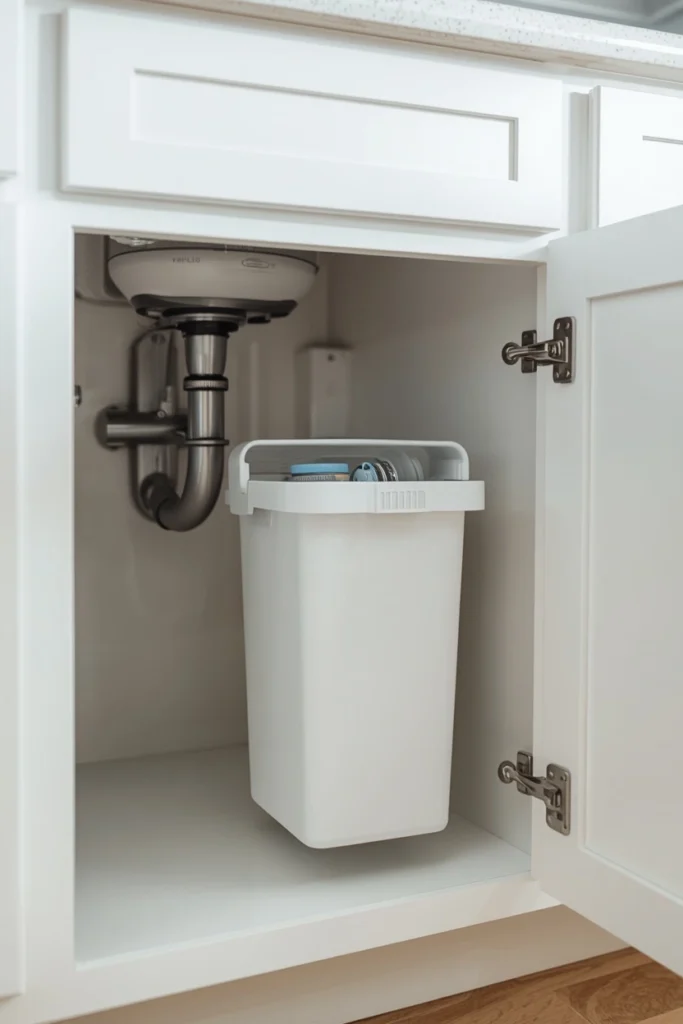
3. The Under-Sink Tension Rod Hack
What You’re Seeing
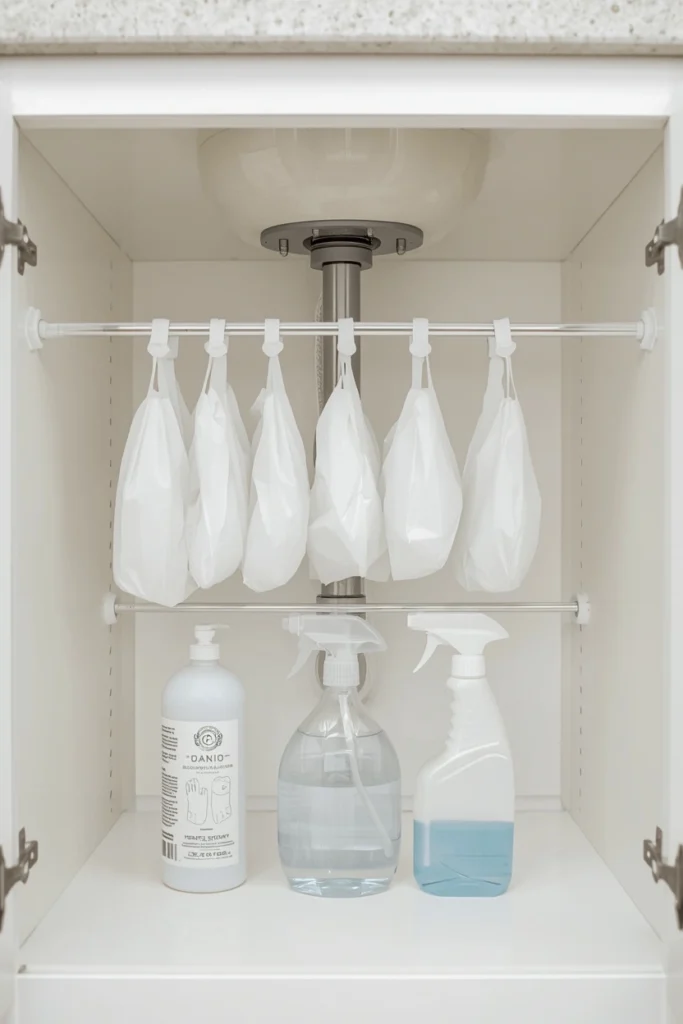
This one is a brilliant, low-cost solution hiding in plain sight. Inside your under-sink cabinet, a tension rod is stretched horizontally across the width of the cabinet opening, and small plastic bags (think grocery bags or produce bags) are looped over the rod, hanging down into the cabinet space. It essentially turns the interior of your cabinet into a small-bag trash station for light kitchen waste.
This setup is especially popular for smaller trash needs — fruit peels, used paper towels, coffee grounds — so you’re not walking to the main bin constantly.
Expert Tip: Layer two rods — one near the top for hanging bags, and one lower for hanging cleaning spray bottles. You’ll double your under-sink organization in one swoop, which is a hack most people miss entirely.
Why It Works: This costs almost nothing and takes five minutes to set up. If you’re renting and can’t install pull-out hardware, this is your best friend. It keeps the sink cabinet tidy, makes small waste disposal fast and convenient, and means you’re actually using every inch of that under-sink space that most of us totally waste.
Most people don’t know this — you can also use this system with a small hanging mesh bin (available on Amazon for under $10) instead of loose bags, which looks much cleaner and is easier to empty.
Buying Guide: How to Choose the Right Kitchen Trash Can
Before we get to ideas 4 through 10, let’s pause here because this is something I wish someone had told me before I wasted money on three different bins that were completely wrong for my kitchen.
Step 1: Measure Your Space First
Sounds obvious, but most people skip this. Measure the exact floor footprint available for a trash can before you shop. If you’re looking at pull-out or cabinet options, measure the interior width and depth of the cabinet. A can that’s an inch too wide is a can you’ll be returning.
Step 2: Consider Your Household Size
For a single person or couple, a 7-10 gallon can is usually plenty. For a family of four, go 13 gallons minimum. For larger families, a 16-gallon dual-bin setup (trash + recycling) is worth every dollar. Choosing a bin that’s too small means you’re emptying it constantly, which gets old fast.
Step 3: Prioritize Lid Mechanism
This matters more than aesthetics. Your options are:
- Swing-top lids — great for quick tossing, but odors escape more easily
- Step-open lids — hands-free, sturdy, excellent for households with pets
- Sensor/touchless lids — premium experience, batteries required
- No lid / open-top — only works for offices or low-odor waste
Step 4: Think About Bag Fit
One of the most annoying things in life is a trash bag that doesn’t fit the bin. Before buying, check if the brand sells custom-fit liners — Simplehuman does, and they make a real difference because the bag doesn’t slip down inside.
Budget Breakdown
| Option | Price Range | Best For |
|---|---|---|
| Tension rod hack | $3 – $8 | Renters, supplemental bin |
| Basic step can (plastic) | $15 – $30 | Budget-friendly, small kitchens |
| Stainless slim step can | $40 – $70 | Stylish, mid-range kitchens |
| Sensor trash can | $80 – $160 | Premium feel, touchless priority |
| Pull-out cabinet insert | $50 – $150 | Clean look, homeowners |
| Built-in custom cabinet | $200 – $600+ | Full kitchen remodel level |
Here’s where it gets interesting — the mid-range stainless step can tends to offer the best value for most households. Sensor cans are lovely, but if the batteries die at the wrong moment, you’re left fighting a sealed lid with full hands. Step cans are mechanical, silent, and reliable for years.
4. The Wicker Basket with Liner
What You’re Seeing
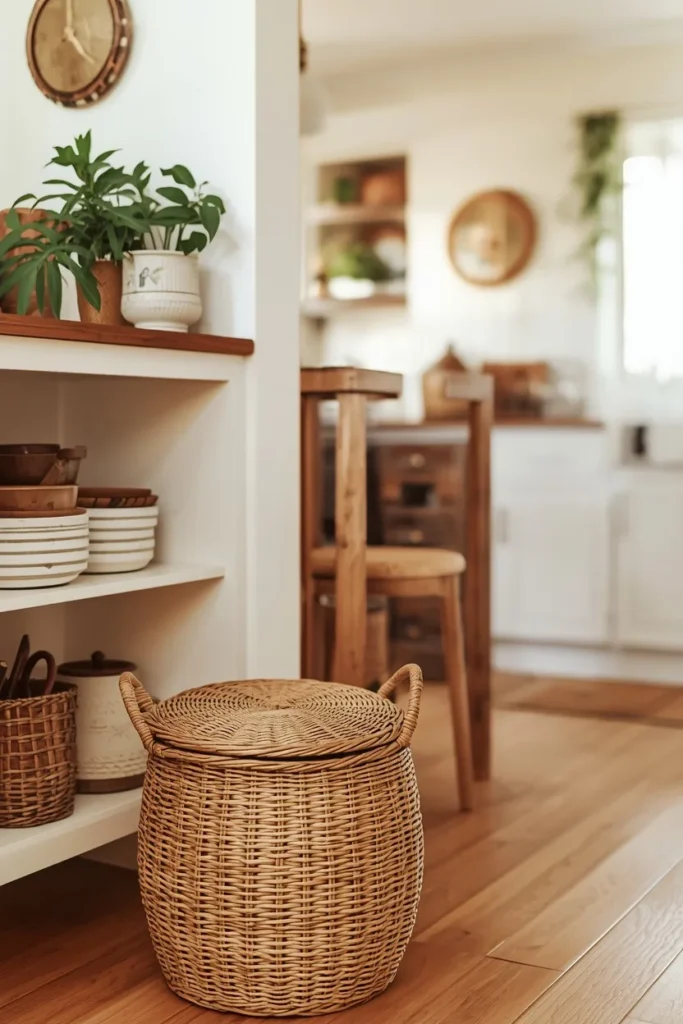
For the cottage-core, boho, or farmhouse kitchen aesthetic, this idea is quietly brilliant. A natural wicker or rattan basket sits on the kitchen floor or inside an open lower shelf, with a simple plastic liner dropped inside. The result is a trash can that looks like intentional home decor rather than, well, a trash can.
Wicker baskets with lids give you even more control over the look — you can find beautiful options with leather handles, whitewashed finishes, and seagrass weaves that blend seamlessly into a cozy kitchen.
Expert Tip: Always use a waterproof liner bag and spray the interior of the basket with a light coat of polyurethane to protect the natural fibers from moisture and odors over time.
Why It Works: This idea transforms something purely functional into something that adds to your kitchen’s character. It’s especially effective in open-layout kitchens where the trash area is visible from the living room — instead of hiding an eyesore, you’re displaying a design piece. Cost is low, style payoff is high.
5. The Built-In Cabinet Toe-Kick Drawer
What You’re Seeing
This is the sneakiest, most space-efficient kitchen trash can idea on the list. The toe-kick — that recessed panel running along the base of your kitchen cabinets — typically hides 3–4 inches of completely unused space. A toe-kick drawer system turns that dead space into a pull-out trash or recycling bin that slides out at floor level.
Yes, you do have to bend down slightly to use it, which means it works best as a secondary bin for light waste (like sweeping crumbs from the counter) rather than your primary garbage. But the space reclamation is genuinely impressive.
Expert Tip: Pair a toe-kick bin with a counter-mounted compost crock so the most frequently generated kitchen waste never hits the floor level at all.
Why It Works: This solution is essentially invisible. When closed, there is no trash can visible anywhere in your kitchen. For minimalist and high-design kitchens, that “where does the garbage go?” effect when guests visit is priceless. And you’re using space that literally every kitchen has but almost nobody uses.
Now, avoid this mistake — don’t install a toe-kick bin in a wet area directly under the sink. Moisture and spills can warp the drawer and damage the interior over time. Keep it in a dry zone like under an island or prep cabinet.
6. The Counter-Mounted Cutting Board Bin
What You’re Seeing
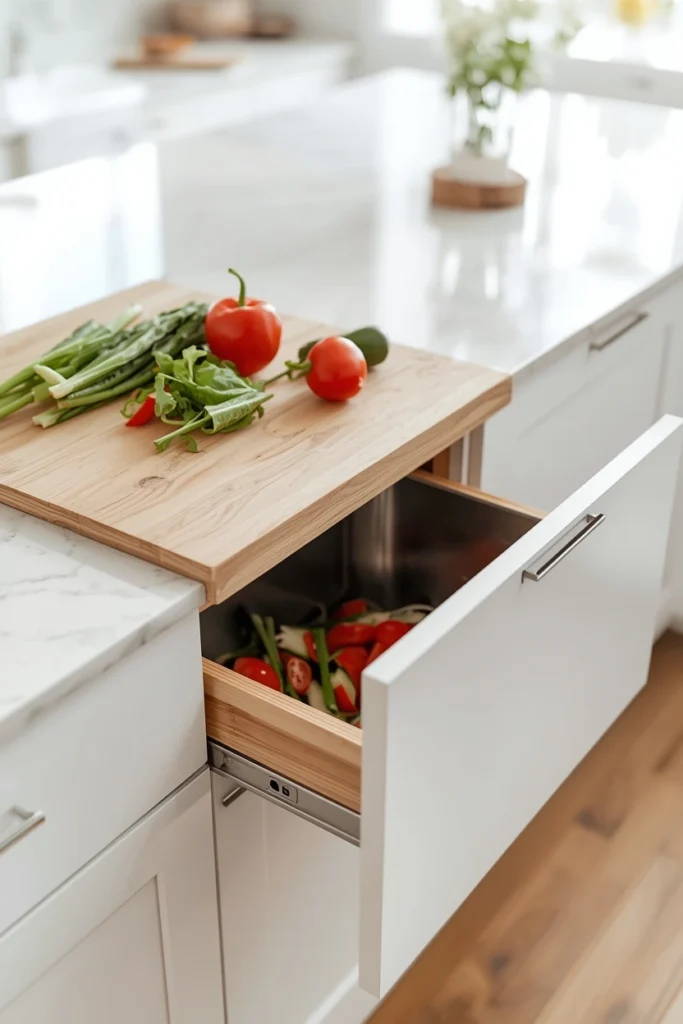
This clever setup involves a cutting board with a built-in hole or sliding panel that drops directly into a bin below — or alternatively, a small countertop compost/prep catcher that sits right on the counter surface. You chop vegetables, sweep cuttings straight through the hole, and they fall neatly into the container below. Zero mess, zero trips across the kitchen.
Some versions are full cutting-board-plus-cabinet-bin combos that sit on the counter, while others are designed to fit over an open drawer where a small bin is nestled inside.
Expert Tip: Get one with a removable, dishwasher-safe bin insert. If the insert isn’t easy to clean, you won’t keep up with it, and compost bins that don’t get cleaned regularly become a serious odor problem fast.
Why It Works: This idea solves the specific frustration of prep-time waste — all those onion skins, carrot tops, and coffee grounds that usually scatter across your counter before making it to the bin. Keeping a dedicated prep-area catcher eliminates that mess entirely and makes composting dramatically easier, because the effort barrier drops to nearly zero.
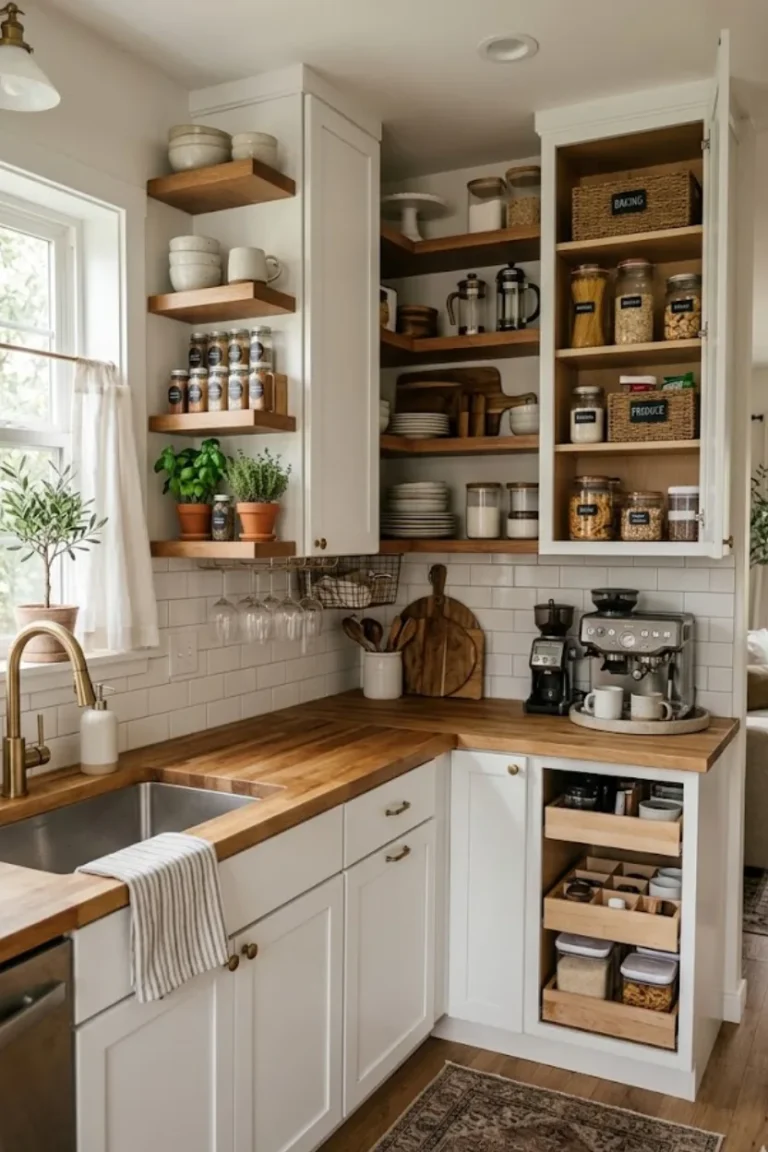
Speaking of smart kitchen upgrades — check out our guide on Organized Kitchen Shelving Ideas for even more space-saving inspiration!
7. The Hanging Door Bin
What You’re Seeing
A slim bin that hooks directly over the inside of a cabinet door — most commonly the cabinet door under the sink or directly below the main prep area. These bins are typically narrow and shallow (usually 1–2 gallons), designed specifically for quick-grab waste during cooking. They hang on an over-door mount and remove easily for emptying.
Some versions come in a set of two or three stacked bins on the same door, creating a mini sorting station for trash, recycling, and compost all in one door’s footprint.
Expert Tip: Choose a bin with ventilation slots if you’re using it for food waste. Airflow prevents moisture from building up inside, which is the main cause of unpleasant smells in small enclosed bins.
Why It Works: This is the perfect solution for anyone who has completely run out of floor space or cabinet interior space. The door is already there — you’re just using the back of it, which is one of the most consistently ignored surfaces in any kitchen. It keeps your primary trash can reserved for larger waste while the door bin handles the constant small tossing during meal prep.
What’s your biggest kitchen organization frustration right now — trash placement, counter clutter, or something else entirely? Tell me in the comments, and I might feature your question in a future post!
8. The Double-Bin Recycling Station on Wheels
What You’re Seeing
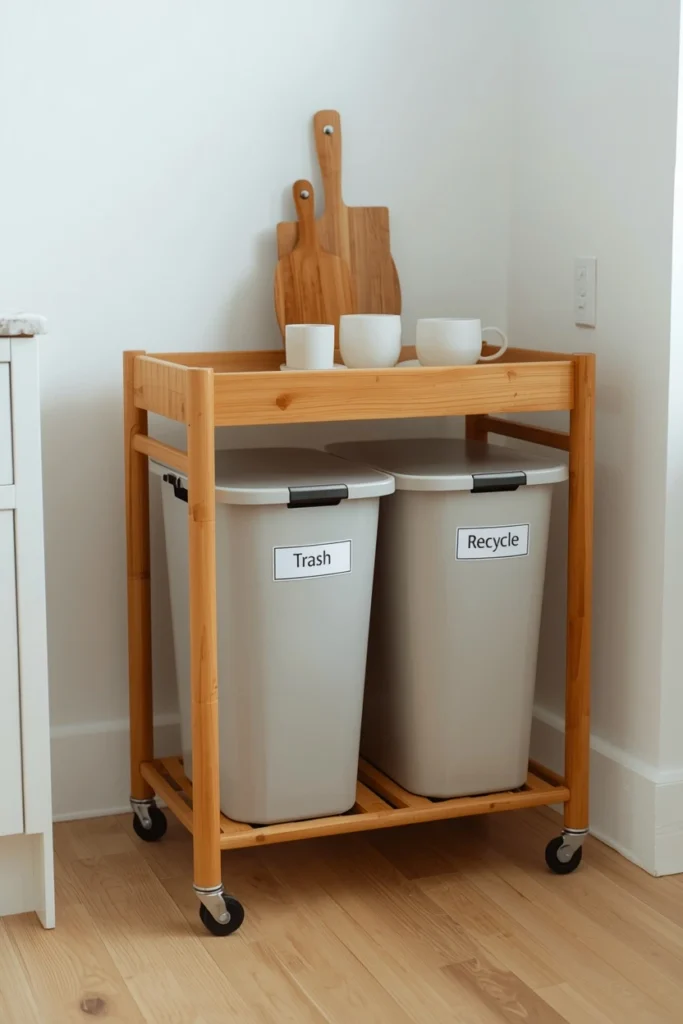
A freestanding wooden or metal frame holding two or three removable bins side by side, often on locking casters so it can roll out for access and roll back to its corner or pantry spot. These stations typically label each bin clearly — trash, recyclables, compost — and the whole unit looks intentional and organized rather than haphazard.
Many of the more stylish versions are made from bamboo or whitewashed pine and look genuinely furniture-like rather than utilitarian.
Expert Tip: Keep it inside a pantry or closet if you have one. The roll-out design means you can tuck it fully out of sight during dinner parties, then wheel it back out for everyday use. Best of both worlds.
Why It Works: For families who are serious about recycling and composting, a single bin is always a frustrating compromise. This setup gives every waste stream its own dedicated home without requiring any installation or drilling. The casters make it genuinely flexible — move it to wherever you’re working that day. And the organized, labeled look actually encourages the whole household to sort waste correctly.
9. The Magnetic Fridge-Side Bin
What You’re Seeing

A slim, flat bin that attaches to the side of your refrigerator via heavy-duty magnetic strips. These are usually 1–2 gallon size, shallow enough not to block foot traffic, and designed for quick disposal of small kitchen waste without ever needing to walk across the room.
The magnetic attachment means zero installation — it goes on and comes off in seconds, which is ideal for renters or anyone who moves frequently.
Expert Tip: Use this specifically for paper recycling — receipts, cardboard packaging, paper towels — rather than food waste. Paper doesn’t smell, so the open-top magnetic bin stays hygienic and odor-free indefinitely.
Why It Works: Think about where you actually generate waste most often. It’s at the counter, near the fridge, during meal prep — not at the far end of the kitchen where the main bin often ends up. The magnetic fridge-side bin puts a disposal option exactly where you are, which means less mess traveling across the kitchen and fewer things landing on the counter “just for a second” before eventually making it to the bin.
Here’s where it gets interesting — some newer models include a magnetic paper towel holder on one side and a bin on the other, essentially turning your fridge side into a full utility station. Wildly clever use of otherwise dead space.
10. The Custom Built-In Trash Drawer with False Front
What You’re Seeing
This is the pinnacle of kitchen trash can ideas — a fully custom built-in drawer that looks identical to every other cabinet drawer in your kitchen. The front panel is a matching false drawer face, so when it’s closed, it’s completely invisible and indistinguishable from storage drawers. Open it, and there’s a full-size trash bin (sometimes with a separate recycling insert) sitting on smooth drawer slides.
This is typically part of a full kitchen renovation or a cabinet upgrade project, but there are also retrofit kits that let you convert an existing lower cabinet with a drawer-front into this configuration without a full remodel.
Expert Tip: If you’re renovating, ask your cabinet maker to install a soft-close drawer slide with a push-to-open mechanism — no handle needed. The result is a seamless, handle-free cabinet front that’s visually indistinguishable from decorative panels. Interior designers love this look.
Why It Works: This solution offers every advantage of the pull-out cabinet bin but taken to a more refined, intentional level. The trash can becomes a fully integrated part of your kitchen’s design rather than a retrofitted afterthought. For anyone who’s investing in a kitchen remodel, this is absolutely worth adding to the scope. The impact on the finished look is dramatic — your kitchen finally feels like it was designed by someone who thought about everything.
Most people don’t know this — you can achieve a very similar look without a full renovation by purchasing an IKEA SEKTION base cabinet with drawer fronts and a Rev-A-Shelf pull-out bin insert. Total cost? Around $200–$300 versus thousands for a custom build.
If you’re already thinking about a kitchen refresh, don’t miss our post on Kitchen Makeover Ideas — full of gorgeous before-and-afters!
Final Thoughts: The Trash Can You Deserve
Here’s the thing — your kitchen should feel good from every angle. Not just when the counters are clean and the dish rack is empty, but also in the corner where the garbage lives.
Every single idea on this list — from the $5 tension rod hack to the custom built-in false-front drawer — will make your kitchen function better and look more intentional. And the best part? You don’t have to commit to a renovation to get started. Even swapping a clunky round bin for a slim stainless step-can, or adding a pull-out insert to one existing cabinet, makes a visible and immediate difference.
Start with one idea. Try it. See how it changes the way your kitchen feels.
And if you found this post helpful, I think you’re really going to love our guide on Small Kitchen Ideas — it’s packed with layout tricks, storage hacks, and design inspo for making every inch of your kitchen work harder and look better.
You’ve got this. Your dream kitchen is closer than you think.