8 Easy Steps To Build a DIY Pergola
This article was created in line with Trends Oraa’s research and content standards.
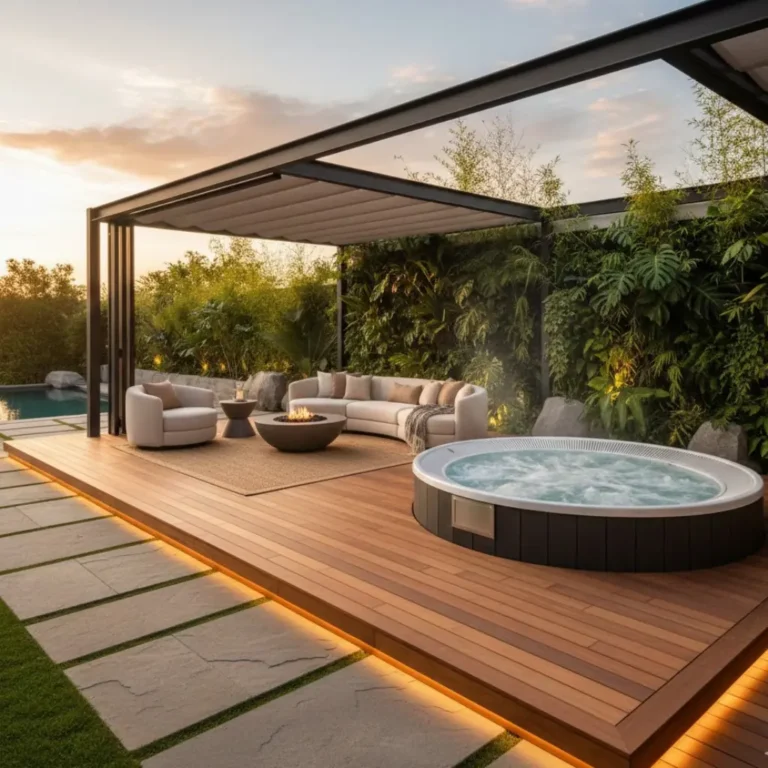
A pergola can completely transform an ordinary backyard into a stylish and relaxing outdoor retreat. Whether you want a shaded lounge area, an outdoor dining spot, or a beautiful garden feature, a DIY Pergola is one of the best projects you can build yourself. It adds structure, improves curb appeal, and creates a cozy space for entertaining friends and family.
The best part is that you do not need professional construction experience to create one. With careful planning, the right tools, and a step by step approach, you can build a sturdy pergola that looks custom made for your yard.
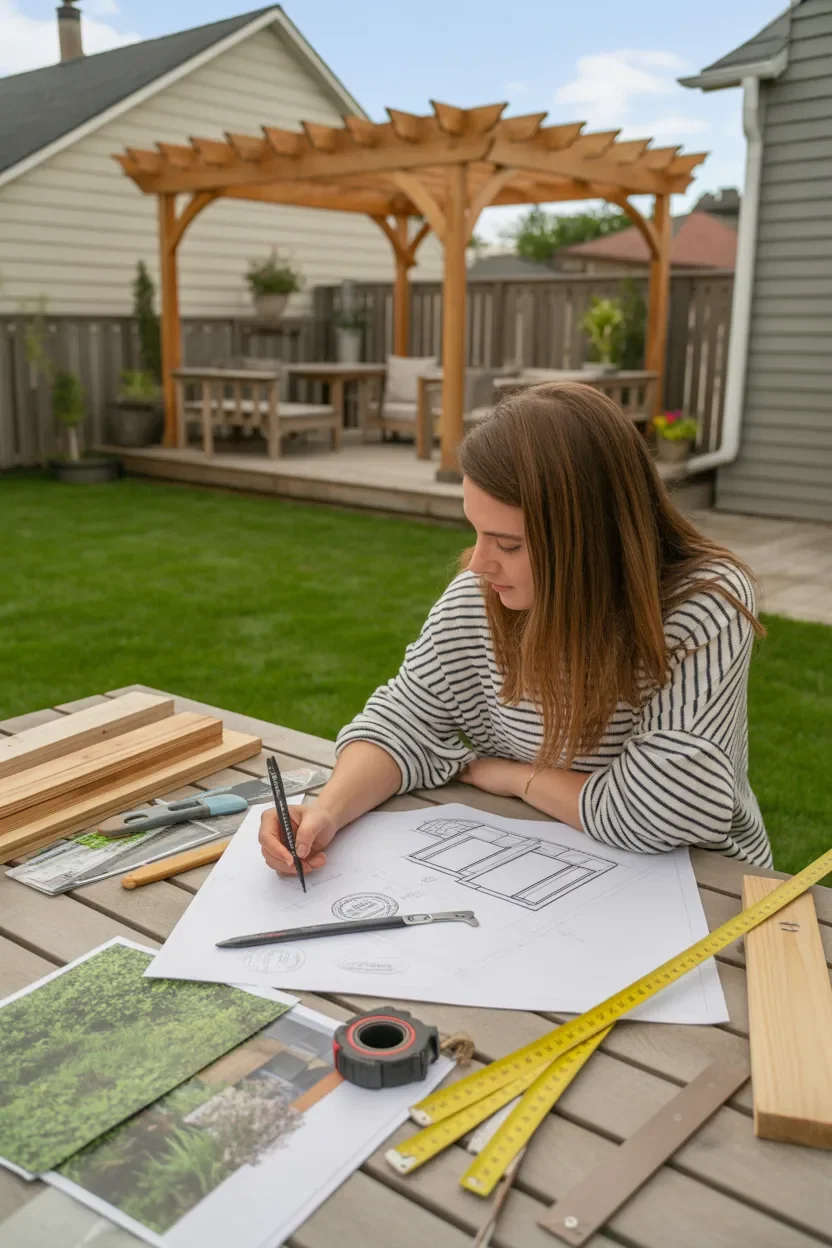
Step 1: Plan Your DIY Pergola Design Carefully
Before buying materials, spend time planning the exact style and size of your pergola. Think about where it will sit in your backyard and how you want to use the space. Some homeowners build pergolas over patios, while others create garden walkways or outdoor dining areas.
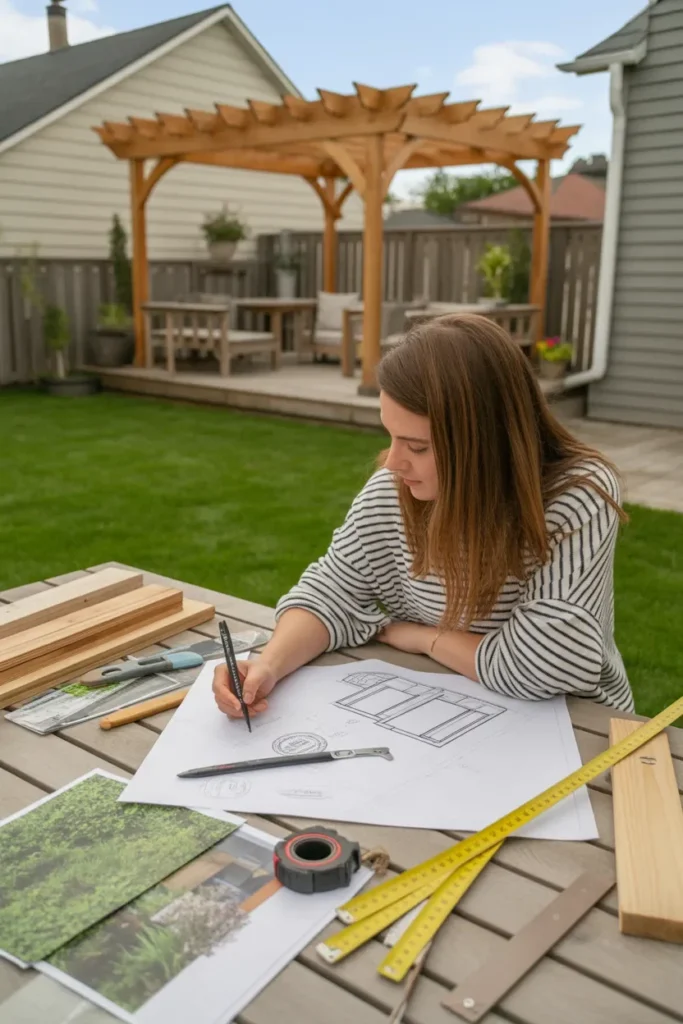
Measure the space carefully and decide whether you want a freestanding pergola or one attached to your home. Consider the height, width, and roof beam spacing to ensure the structure feels balanced. A larger pergola works beautifully beside outdoor seating areas inspired.
You should also check local building regulations before starting. Some areas require permits for outdoor structures above a certain size. Planning ahead helps you avoid expensive mistakes and keeps the project running smoothly.
Sketching your design on paper can also make material calculations much easier. It gives you a clear vision of the final result and helps you stay organized during construction.
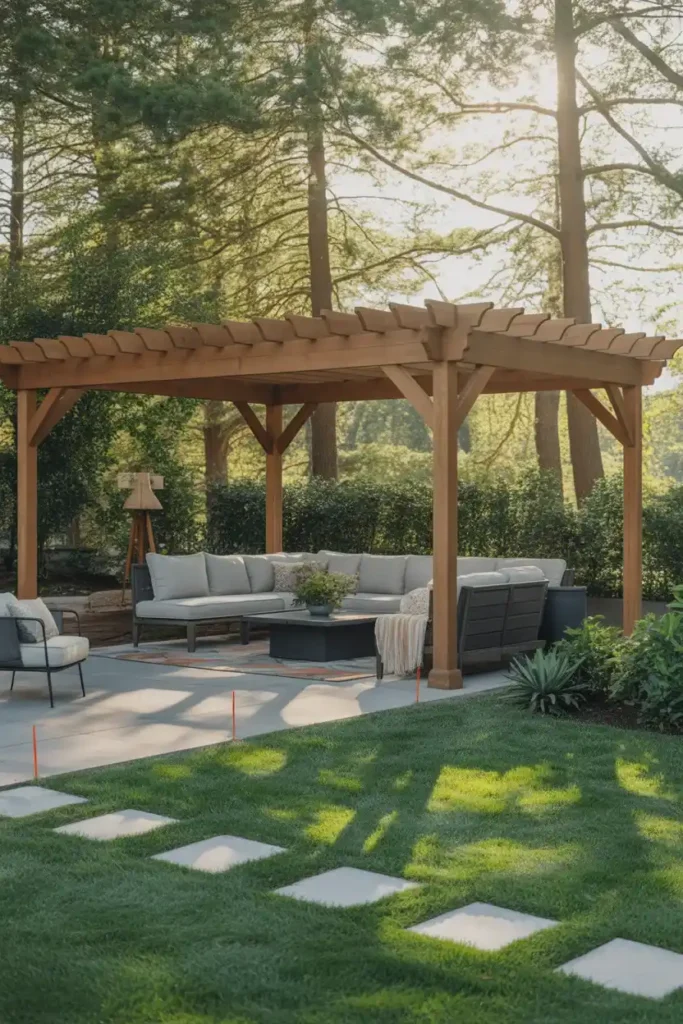
Step 2: Choose the Best Location for Your DIY Pergola
The location of your pergola affects comfort, shade, and the overall appearance of your yard. Most people place pergolas near patios, pools, gardens, or outdoor kitchens to create a natural gathering area.
Look for a level surface with good drainage. Avoid areas where water collects after rain because moisture can weaken wood over time. If your backyard already includes landscaping features like pathways or flower beds, try positioning the pergola where it complements those elements naturally.
A pergola placed near a garden can create a peaceful retreat, especially when paired with ideas from these <a href=”https://trendsoraa.com/vintage-garden-decor-ideas/”>vintage garden decor ideas</a>. You can also build it beside a grilling station using inspiration from this <a href=”https://trendsoraa.com/diy-grill-station-cheap/”>DIY grill station guide</a>.
Pay attention to sunlight throughout the day. If you want maximum afternoon shade, position the pergola where beams can block harsh evening sun. Smart placement makes the structure far more comfortable during hot summer months.
Step 3: Gather Materials and Tools for the DIY Pergola
Once your design is finalized, it is time to gather all necessary materials. Most pergolas are built using pressure treated lumber, cedar, or redwood because these woods resist moisture and insects well.
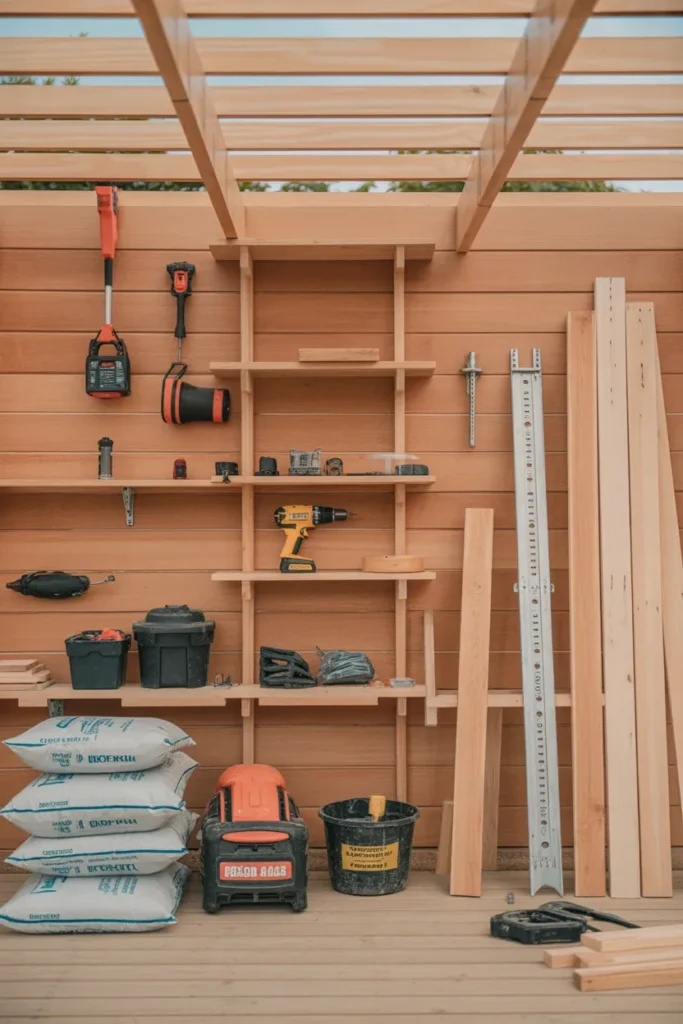
You will typically need wooden posts, support beams, rafters, screws, concrete mix, brackets, wood stain, and sealant. Choosing high quality hardware is important because outdoor structures face constant weather exposure.
Essential tools include a circular saw, drill, level, tape measure, ladder, post hole digger, and safety gear. Having everything prepared before starting saves time and prevents interruptions during the project.
Cedar is one of the most popular choices because it naturally resists rot and gives pergolas a warm, elegant look. If you enjoy rustic outdoor spaces, you may also like these <a href=”https://trendsoraa.com/outdoor-fire-pit-design-ideas/”>outdoor fire pit design ideas</a> to pair with your pergola setup.
Organizing tools and materials into separate sections before construction begins will make each step easier and more efficient. Preparation is one of the biggest secrets to a successful DIY project.
Step 4: Mark and Prepare the Pergola Foundation
A strong pergola starts with a stable foundation. Begin by marking the exact placement of each post using stakes and string. Double check all measurements to ensure the layout is perfectly square before digging.
Most pergola posts require holes around 24 to 36 inches deep depending on your climate and soil conditions. Deeper holes provide better stability, especially in areas with strong winds or heavy rain.
After digging the holes, pour a small layer of gravel at the bottom for drainage. Position the posts carefully and use a level to keep them perfectly straight before adding concrete. Allow the concrete to cure completely before continuing construction.
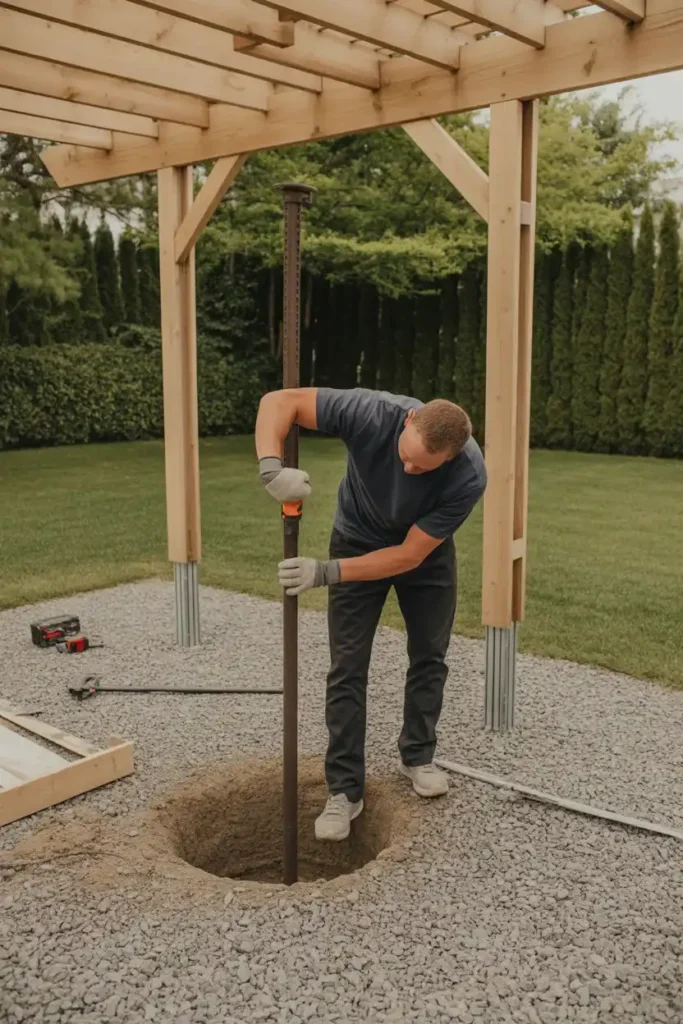
A well prepared foundation prevents future shifting and keeps the pergola structurally secure for years. Backyard upgrades like these also pair beautifully with <a href=”https://trendsoraa.com/10-walkway-ideas-to-install-by-yourself-cheaply/”>DIY walkway ideas</a> that create a polished outdoor design.
Taking your time during this stage is essential because even small alignment mistakes can affect the entire structure later.
Step 5: Install the Main Support Beams
Once the posts are fully secure, the next step is attaching the horizontal support beams. These beams form the primary frame of the pergola and hold the roof rafters in place.
Use heavy duty brackets and exterior screws to secure each beam tightly. Many DIY builders temporarily brace the beams during installation to keep everything level and stable while working.
For a decorative appearance, you can cut curved or angled beam ends before installation. These small details make a simple pergola look professionally crafted without adding much extra work.
Wide support beams create a bold architectural look that works especially well in modern backyards. If you enjoy stylish outdoor entertaining spaces, these <a href=”https://trendsoraa.com/backyard-bar-ideas/”>backyard bar ideas</a> can help you design the perfect setup around your pergola.
Carefully recheck measurements and levels after each beam is installed. Proper alignment keeps the roof structure balanced and visually appealing from every angle.
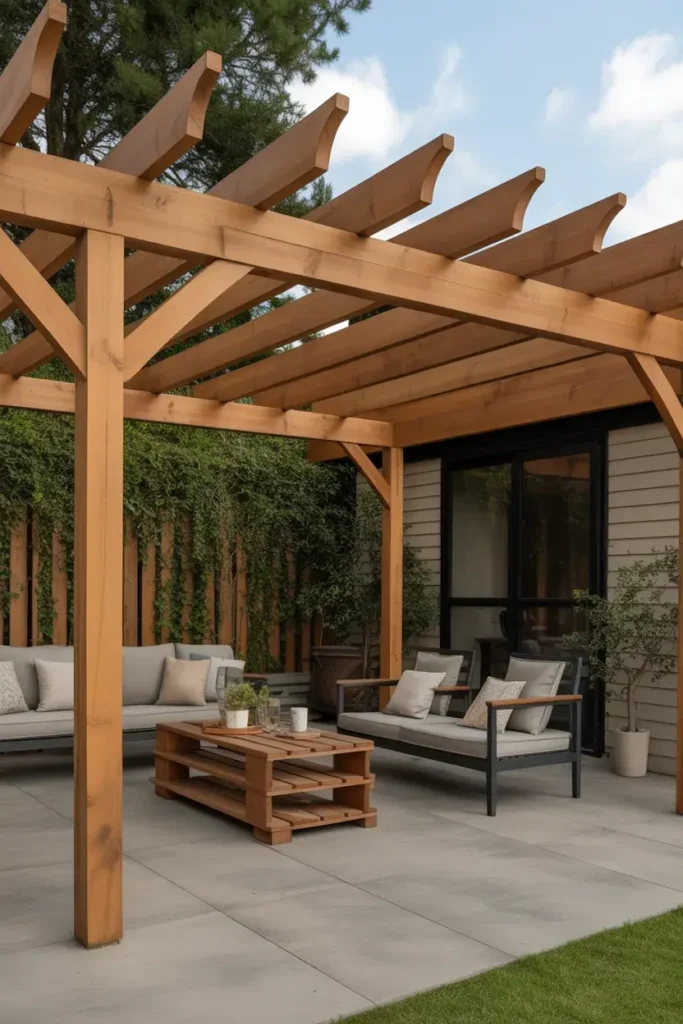
Step 6: Add Rafters and Decorative Roof Slats
The rafters create the classic pergola roof design that provides partial shade while keeping the space open and airy. Install the rafters evenly across the top beams using consistent spacing for a clean and symmetrical appearance.
Many homeowners space rafters between 12 and 18 inches apart depending on how much sunlight they want to filter. Closer spacing creates more shade, while wider gaps allow more natural light into the seating area.
Decorative roof slats can also be added above the rafters for extra texture and style. These smaller slats create beautiful shadow patterns throughout the day and give the pergola a more custom appearance.
Pergolas become even more inviting when combined with cozy outdoor furniture inspired by these <a href=”https://trendsoraa.com/patio-dining-set-ideas/”>patio dining set ideas</a>. Comfortable seating helps transform the space into a true outdoor living area.
At this stage, the structure will finally start looking like a finished pergola. Seeing the design come together is often the most exciting part of the entire project.
Step 7: Stain and Protect Your DIY Pergola
Outdoor wood structures need proper protection from rain, sunlight, and moisture. Applying stain and sealant not only improves the appearance of the wood but also extends the life of your pergola significantly.
Before staining, sand rough edges and clean the surface thoroughly. Choose a stain color that complements your home and outdoor decor style. Natural cedar tones remain popular because they create a warm and timeless appearance.
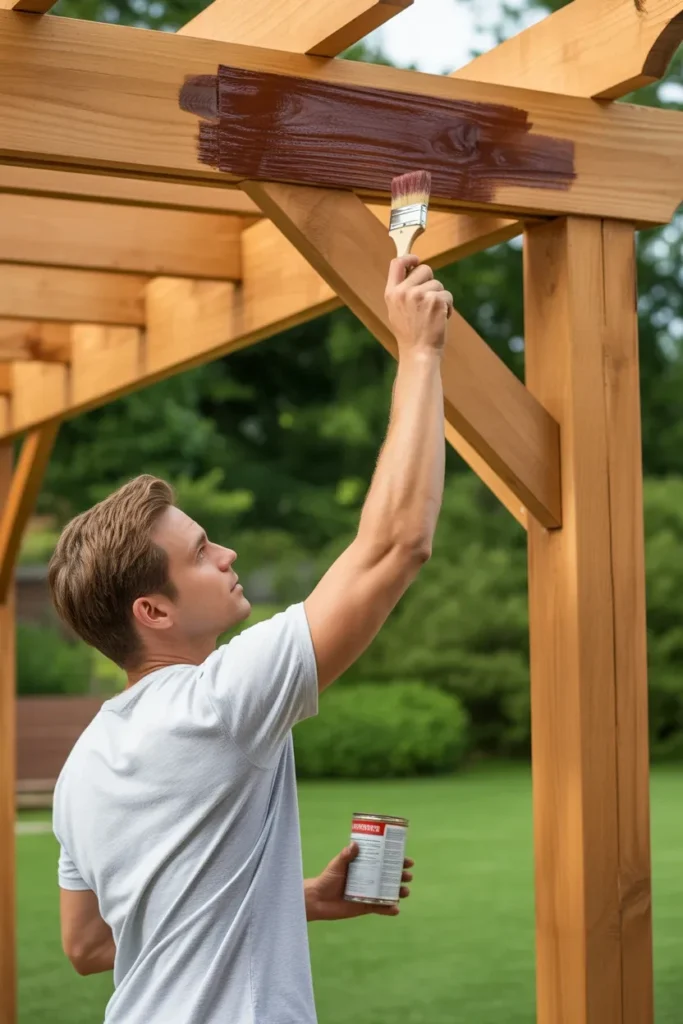
Weather resistant sealants protect against cracking, fading, and water damage. Reapplying protective coatings every few years helps keep the pergola looking fresh and durable.
For a more luxurious backyard atmosphere, pair your pergola with elegant landscaping and lighting inspired by these <a href=”https://trendsoraa.com/patio-awning-ideas/”>patio awning ideas</a> and creative <a href=”https://trendsoraa.com/night-light-ideas/”>night light ideas</a>.
A properly sealed pergola can last for many years with minimal maintenance, making it a worthwhile investment for any outdoor space.
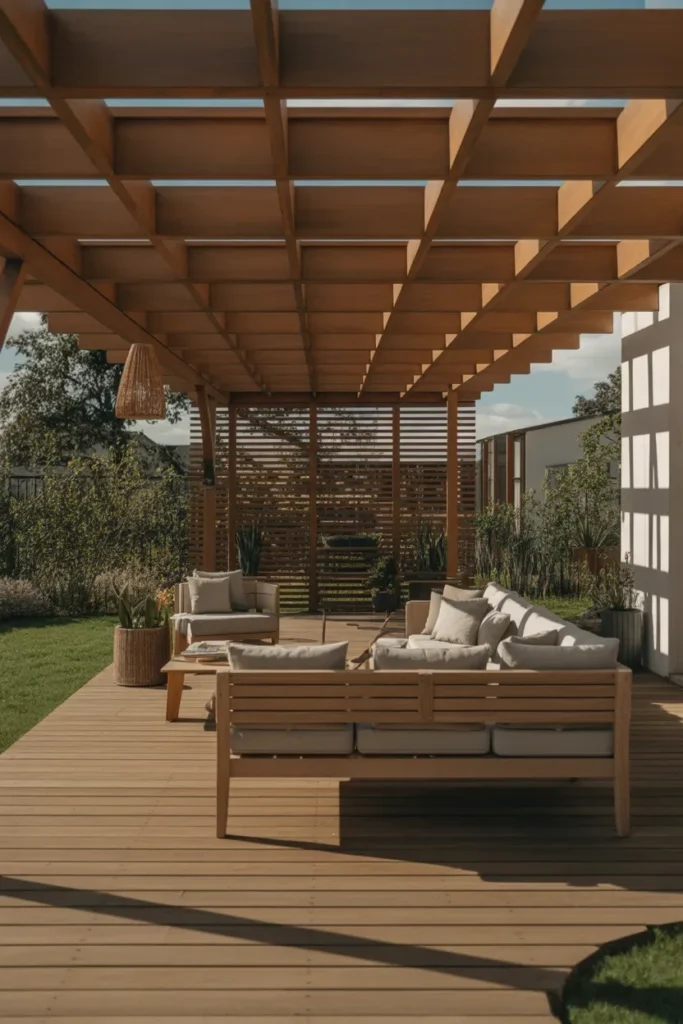
Step 8: Decorate Your DIY Pergola for a Cozy Outdoor Retreat
The final step is decorating the pergola to match your personal style and outdoor needs. This is where your project truly becomes an extension of your home.
Add outdoor curtains, string lights, climbing plants, or hanging planters to create a comfortable and inviting atmosphere. Many homeowners also install outdoor sofas, dining tables, or fire pits beneath their pergolas for year round enjoyment.
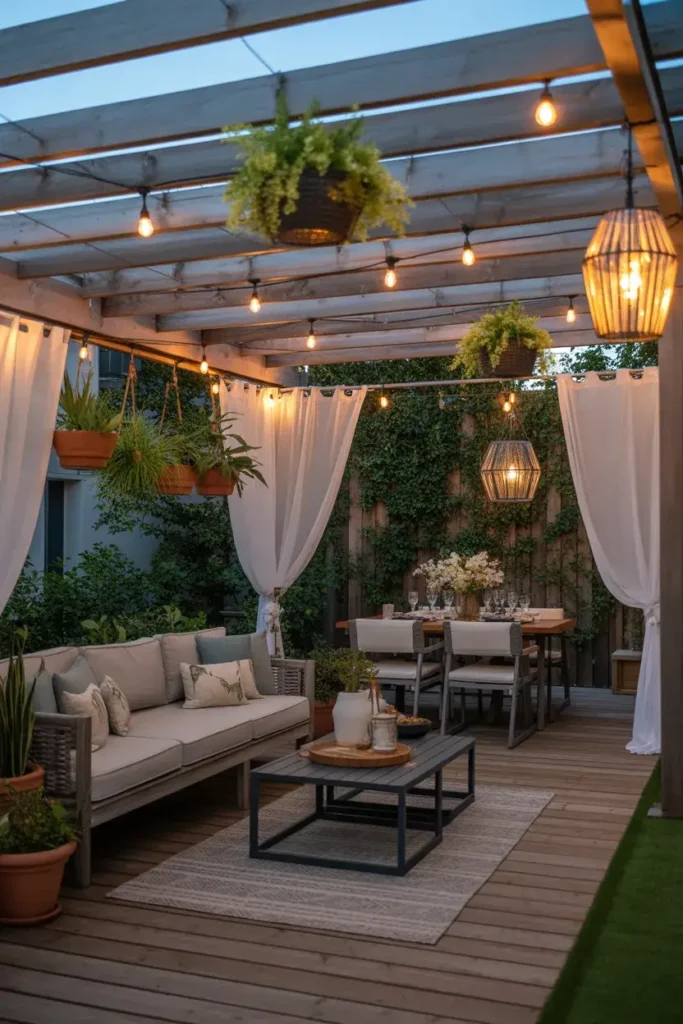
Climbing vines such as jasmine or wisteria can create natural shade and soften the appearance of the structure beautifully. You can also place potted plants around the base for a lush garden inspired look.
If you enjoy outdoor gardening projects, these <a href=”https://trendsoraa.com/diy-elevated-garden-bed-plans/”>DIY elevated garden bed plans</a> and <a href=”https://trendsoraa.com/10-creative-ladder-herb-gardening-ideas-on-a-budget/”>ladder herb gardening ideas</a> pair perfectly with a pergola setup.
You can even add a small outdoor lounge area inspired by these <a href=”https://trendsoraa.com/mexican-patio-ideas/”>Mexican patio ideas</a> for a colorful and relaxing backyard retreat.
Common DIY Pergola Mistakes to Avoid
One of the biggest mistakes beginners make is skipping the planning stage. Incorrect measurements or poor placement can create costly problems later. Always measure multiple times before cutting wood or setting posts.
Another common issue is using untreated lumber. Outdoor wood must resist moisture and insects, otherwise the pergola may weaken much faster than expected. Investing in quality materials saves money in the long run.
Improper post alignment is another challenge. Even slightly uneven posts can make beams and rafters difficult to install correctly. Using a level during every stage helps maintain structural accuracy.
Many people also underestimate how important drainage is around the foundation. Water buildup near posts can lead to long term damage and instability. Gravel and proper grading help prevent these issues effectively.
Best Decorating Ideas for a DIY Pergola
There are countless ways to personalize a pergola once construction is complete. Some homeowners prefer minimalist designs with clean lines and neutral furniture, while others create lush garden retreats filled with greenery.
Outdoor curtains add softness and privacy while also helping block sunlight. String lights create a cozy atmosphere during evenings and make the space perfect for entertaining guests.
Hanging swings or hammocks can turn a pergola into a relaxing escape for reading or afternoon naps. You can also create a dining space underneath for outdoor family meals and weekend gatherings.
Pergolas work especially well alongside landscaping upgrades like these <a href=”https://trendsoraa.com/small-front-yard-landscaping-ideas/”>small front yard landscaping ideas</a> and stylish <a href=”https://trendsoraa.com/west-facing-garden-design-ideas/”>west facing garden design ideas</a>.
Adding outdoor rugs, lanterns, and weather resistant cushions can make the area feel just as comfortable as an indoor living room.
Why a DIY Pergola Is Worth Building
A pergola adds beauty, function, and value to almost any home. It creates a dedicated outdoor space where people can relax, entertain, and enjoy fresh air comfortably.
Unlike fully enclosed structures, pergolas maintain an open and airy feel while still providing shade and architectural interest. They also work well in both small and large backyards.
Building your own pergola can save thousands of dollars compared to hiring contractors. It also gives you complete freedom to customize the design, materials, and layout according to your preferences.
Whether you prefer a rustic garden pergola or a sleek modern outdoor lounge, this project can dramatically improve your backyard experience. Combined with thoughtful landscaping and cozy seating, a pergola becomes one of the most enjoyable features of any outdoor space.
Final Thoughts
Building a DIY Pergola may seem intimidating at first, but breaking the project into simple steps makes it far more manageable. From planning the design to decorating the finished structure, every stage contributes to creating a beautiful outdoor retreat you can enjoy for years.
By choosing durable materials, preparing a strong foundation, and focusing on thoughtful details, you can build a pergola that looks both stylish and professional. The result is a relaxing backyard feature that enhances your outdoor lifestyle while increasing the beauty of your home.
If you are planning more outdoor upgrades, you may also enjoy these <a href=”https://trendsoraa.com/outdoor-patio-ideas/”> outdoor patio ideas</a>, creative <a href=”https://trendsoraa.com/small-front-porch-ideas/”> small front porch ideas</a>, and inspiring <a href=”https://trendsoraa.com/backyard-basketball-court-ideas/”> backyard basketball court ideas</a> for even more backyard inspiration.