15 Cheap Garden Projects Using Twigs That Will Transform Your Outdoor Space
This article was created in line with Trends Oraa’s research and content standards.
Your Garden Deserves Better. Your Wallet Agrees.
Look around your yard after a windstorm. Free materials. Everywhere. Most people rake them up and throw them away — and that’s honestly such a missed opportunity.
Twigs are one of the most underrated materials for DIY garden projects, and today I’m going to prove it with 15 budget-friendly ideas that look like they cost a fortune. Whether you have a sprawling backyard or a tiny balcony garden, there’s something on this list that will make you stop scrolling and say, “I need to make that this weekend.”
You might also love our viral guide on 15 DIY French Drain Ideas another genius way to upgrade your outdoor space on a budget!
Before we dive in, a quick note: you don’t need any special skills for these projects. I’ve broken every single one down into simple steps anyone can follow. Grab a cup of coffee, settle in, and let’s get creative.
What You’ll Need Before You Start
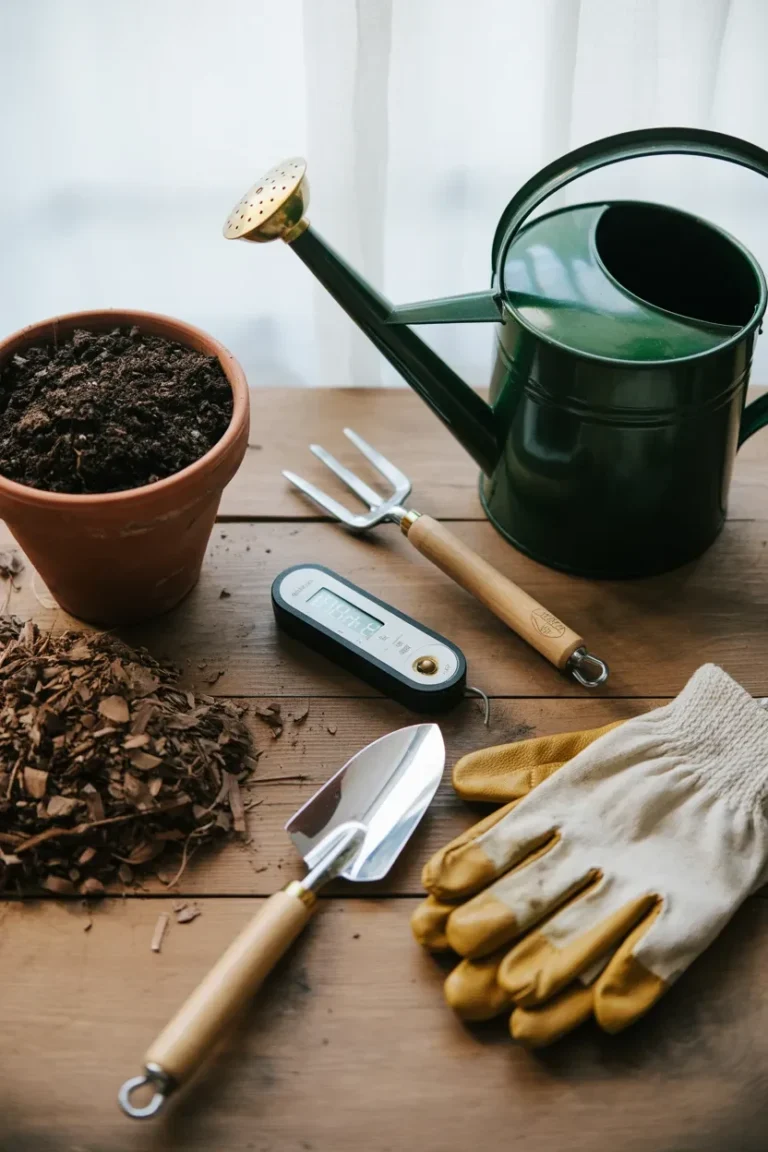
Before jumping into the ideas, here’s a quick materials checklist that covers almost every project on this list:
- Fallen twigs and small branches (free from your yard!)
- Twine, jute rope, or zip ties
- Hot glue gun and glue sticks
- Wire cutters or garden snips
- A bucket of water (for soaking flexible branches)
- Basic acrylic paint (optional, for decorative projects)
- Wooden stakes or bamboo (for structural support)
Most of these you probably already own. The rest cost less than $10 total at your local dollar store or craft shop.
15 Stunning DIY Garden Projects Using Twigs
1. Rustic Twig Garden Border Edging
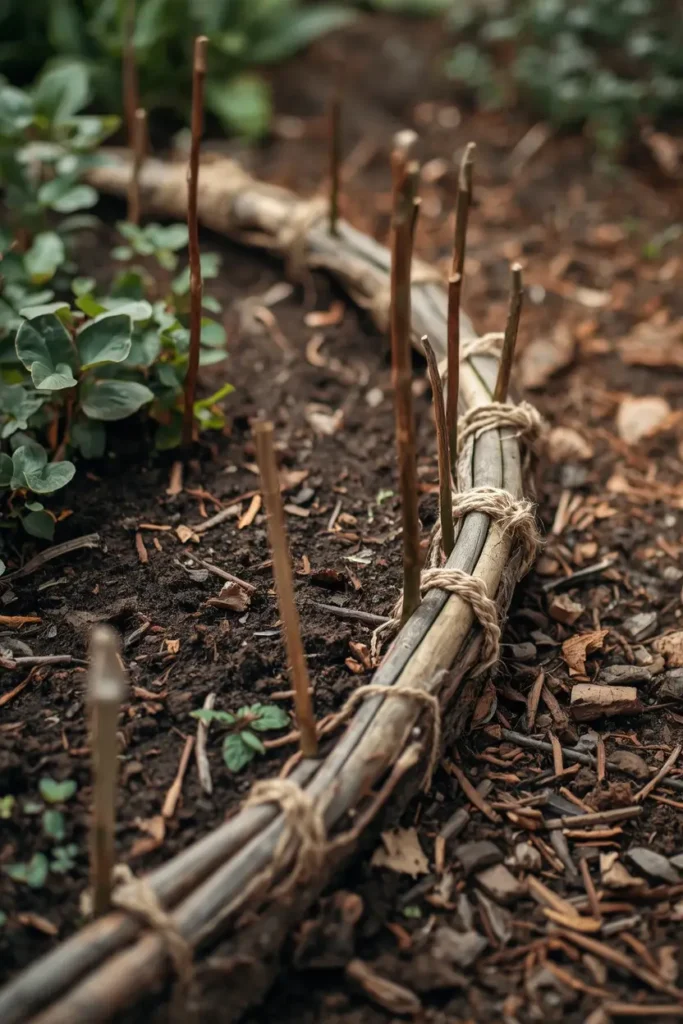
What you’re seeing: A winding garden bed border made entirely from gathered twigs, pushed firmly into the soil at slight angles and woven together with jute twine. The natural, earthy tones blend seamlessly with the mulch and plants behind it, creating a fairy-tale cottage garden look without spending a single dollar on store-bought edging.
This is genuinely one of my favorite DIY garden projects because it’s so forgiving — there’s no wrong way to do it. The more imperfect and organic it looks, the better. You’ll want twigs that are roughly pencil-thick and at least 8–10 inches long so they anchor well in the ground. Push them about 3 inches deep, angled slightly outward for stability, and then weave thinner, more flexible twigs horizontally between them for that classic wattle-fence effect.
🌿 Expert Tip: Soak your thinner weaving twigs in water overnight before you start. They become incredibly pliable and won’t snap as you bend them into place.
✅ Why It Works: Store-bought plastic garden edging fades, cracks, and looks cheap within a season. Twig edging, on the other hand, actually looks better as it ages and weathers. It also decomposes naturally into the soil over time, adding organic matter without any landfill waste. This is sustainability and style working together perfectly.
2. Twig Teepee Plant Support Trellis
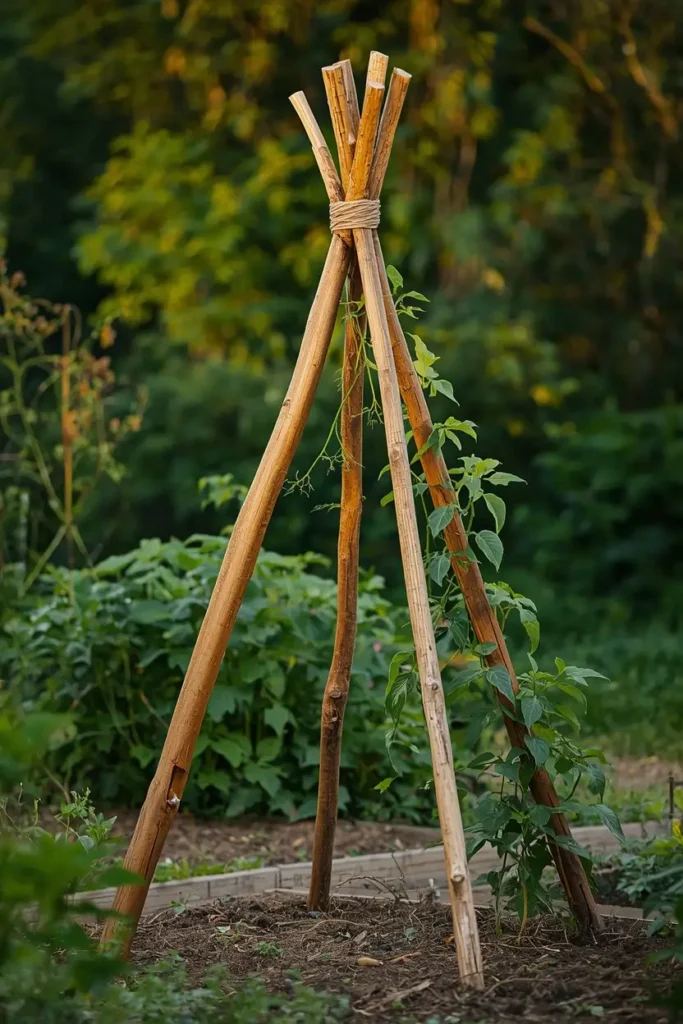
What you’re seeing: Three to five long, sturdy branches leaned together at the top and lashed with twine to form a classic teepee structure. Climbing plants like beans, sweet peas, cucumbers, or morning glories twine up the structure beautifully, turning a simple functional garden support into a living sculpture in your vegetable patch.
This is one of those DIY garden projects that serves double duty as decor AND function. You’ll want branches that are at least 5–6 feet long and reasonably straight for this one. Push the bottoms about 6 inches into the soil to keep it stable in wind. The classic version uses five branches, but three works just fine for smaller gardens or container growing on a balcony.
🌿 Expert Tip: Add a few extra horizontal twigs lashed between the legs at different heights. This gives climbing plants more “grab points” and makes the trellis dramatically sturdier in heavy rain or wind.
✅ Why It Works: Metal and wooden trellises at garden centers easily run $25–$60. A twig teepee costs absolutely nothing, looks infinitely more charming in a cottage or kitchen garden, and can be composted at the end of the season rather than cluttering your garage.
💬 Which project are you most excited to try first? Drop a comment below — I’d love to know!
3. Woven Twig Garden Fence Panel
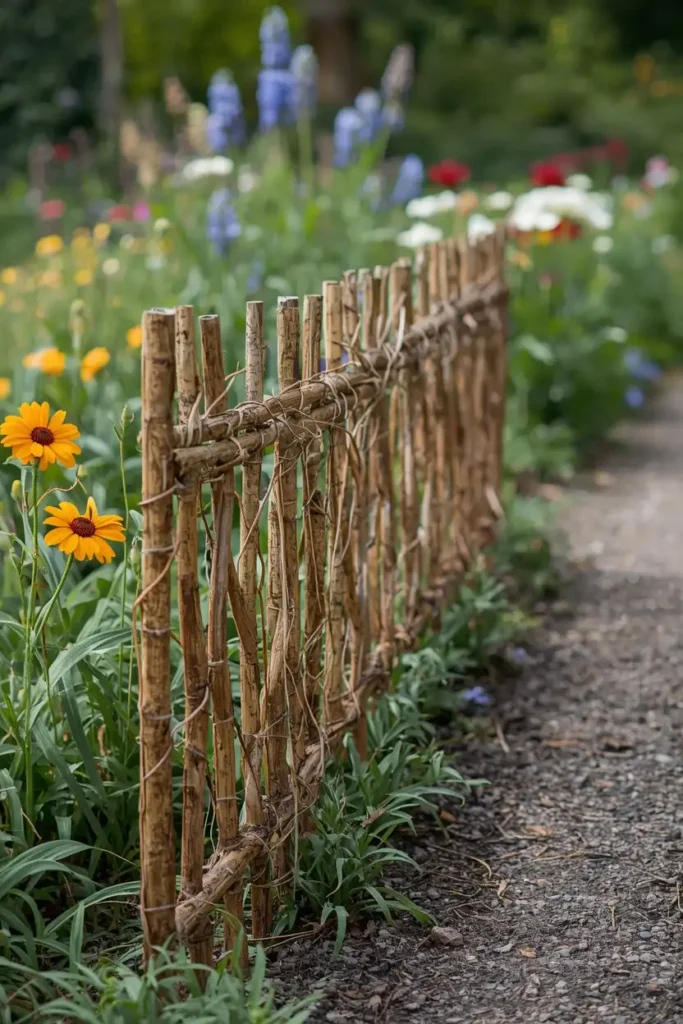
What you’re seeing: A low, decorative fence panel made from vertical stakes driven into the ground, with thinner, more flexible twigs woven horizontally between them in an over-under pattern. The finished panel looks like something straight out of an English cottage garden and creates a beautiful natural divider between garden beds, pathways, or seating areas.
The key to this project is finding your “uprights” (thicker, straight twigs that serve as the vertical posts) and your “weavers” (long, thin, flexible shoots that you’ll bend back and forth between them). Hazel, willow, and dogwood shoots are ideal weavers if you have them, but any flexible young branch will do. Space your uprights about 6–8 inches apart and drive them at least 4 inches into the soil for stability.
🌿 Expert Tip: Start weaving from the bottom up, and alternate which side each new weaver starts on. This creates the structural “locking” effect that makes the panel strong without any fasteners or glue.
✅ Why It Works: This centuries-old technique — known as wattle fencing — has been used in English kitchen gardens for over a thousand years. It’s proven, beautiful, completely free, and adds that dreamy, editorial garden aesthetic that gets saved obsessively on Pinterest.
4. Twig Wreath for the Garden Gate

What you’re seeing: A circular wreath made from bent, bundled twigs wired together into a ring shape, decorated with dried flowers, seed heads, moss, or small pinecones. Hung on a garden gate, shed door, or fence post, it creates a stunning rustic welcome that transforms the entire mood of your outdoor space.
You’ll need a bundle of long, flexible young branches — grape vine, willow, or wisteria shoots are perfect, but any springy branch works. Bundle them together and bend them into a circle, overlapping the ends and securing with floral wire or twine. Layer more branches around the ring, weaving them in as you go, until you have a wreath that’s 2–3 inches thick. Then decorate however your heart desires.
🌿 Expert Tip: Make your wreath in late winter or early spring when branches are most flexible. Let it dry completely (about a week) before decorating — this prevents warping and mold.
✅ Why It Works: A comparable wreath at a home décor store or farmer’s market can cost $30–$80. Yours costs nothing but an afternoon’s creativity and will have everyone asking where you bought it. It also changes beautifully with the seasons as you swap out the decorative elements.
5. Twig Bundle Wind Chime
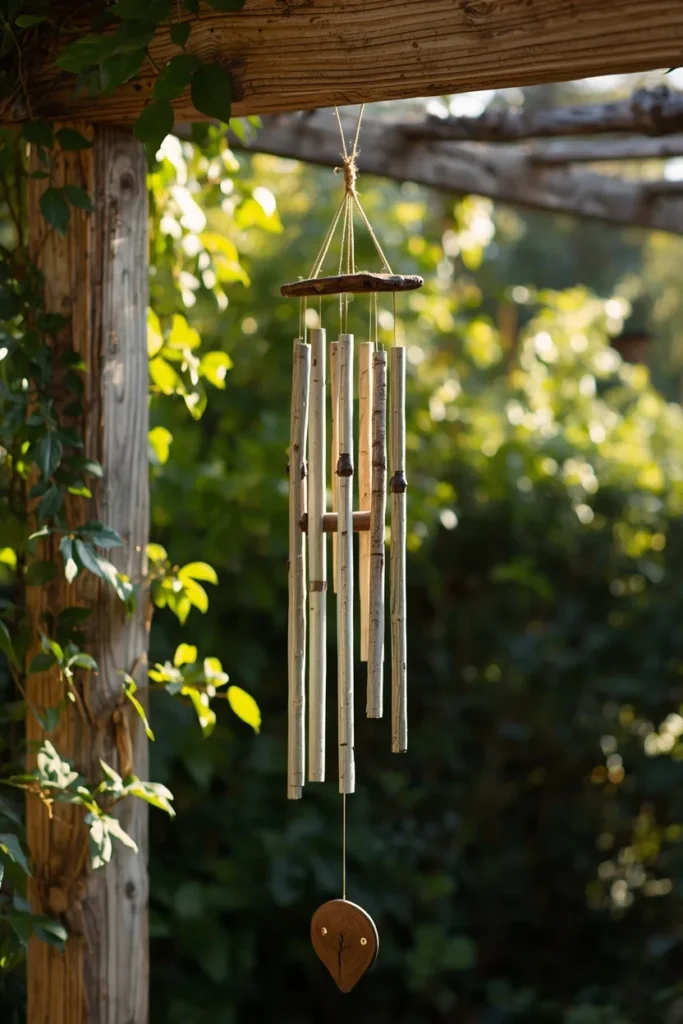
What you’re seeing: A collection of smooth, straight twigs of varying lengths suspended from a horizontal branch or driftwood piece using fishing line or twine. As the wind moves through them, they click together softly, creating a gentle, meditative garden sound. Some versions are left natural; others are painted in earth tones or whitewashed for a more curated look.
Collect twigs that are as straight and smooth as possible — dried oak, birch, or cherry branches work beautifully. Sand the ends lightly if they’re rough. The key to good sound is variation: cut twigs to slightly different lengths (4 inches, 5 inches, 6 inches, 7 inches) so they strike each other at different pitches when they swing. Tie them at different heights from a horizontal “anchor” branch using varying lengths of twine.
🌿 Expert Tip: Rub a thin coat of outdoor beeswax or linseed oil on your finished wind chime. It deepens the color of the wood beautifully AND weatherproofs it so it lasts through multiple seasons outdoors.
✅ Why It Works: Wind chimes add a sensory dimension to garden spaces that purely visual elements can’t achieve. They create what garden designers call “auditory texture” — a layer of gentle natural sound that makes an outdoor space feel immersive and alive. And this one is completely free.
💰 Budget Breakdown: How Much Do Twig Projects Actually Cost?
Here’s the honest truth about the real cost of these DIY garden projects — because I know you want to know before you invest your weekend.
Materials you’ll find for FREE:
- All twigs and branches (your yard, local park after a storm, or ask neighbors)
- Fallen pinecones, seed heads, dried grasses for decoration
- River stones for weighting down structures
Materials that cost under $5:
- Jute twine or garden wire: $2–$4 at dollar stores or garden centers
- Hot glue gun sticks (a full pack): $3–$5
- Basic acrylic craft paint (if decorating): $1–$2 per color at dollar stores
Materials that cost $5–$15:
- Fishing line or invisible thread for hanging projects: $5–$8
- Floral wire for wreaths and bundles: $4–$7
- A bag of small cable ties (useful backup to twine): $5–$10
Tools you likely already own:
- Scissors or garden snips
- A bucket for soaking
- A hammer or mallet for driving stakes
Honest total for ALL 15 projects combined: Under $20–$30 if you shop smart. Most single projects cost $0–$5 in supplemental materials. For context, a single decorative garden trellis at a home and garden store costs $35–$80. A set of garden border edging runs $20–$50. A garden wreath? $30–$100.
The savings here are genuinely significant, and the results — because they’re made from natural, organic materials — often look MORE beautiful and intentional than mass-produced alternatives. Natural materials just belong in gardens in a way that plastic and powder-coated metal never quite do.
One thing to invest in: A good hot glue gun. Not the cheapest dollar-store version (the glue doesn’t hold outdoors), but a mid-range crafting glue gun around $15–$20. It’ll be the tool you reach for on every single one of these projects.
6. Twig Letter or Monogram Garden Art
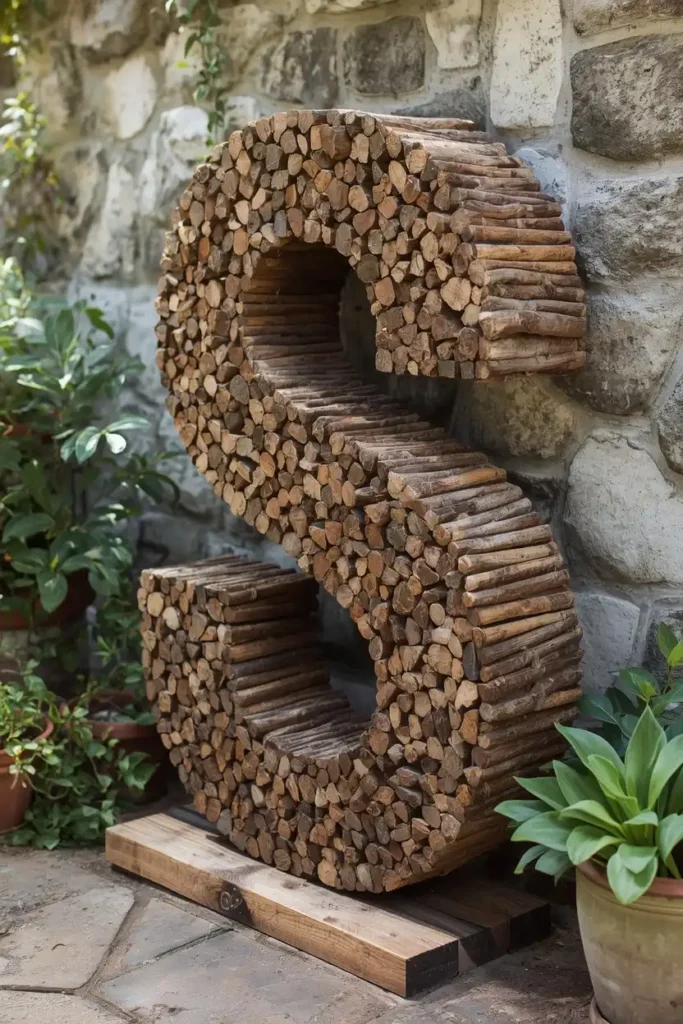
What you’re seeing: Large decorative letters or monograms spelled out using carefully arranged and glued twigs in a mosaic-style pattern. These are mounted on a painted wooden base and displayed against a garden wall, fence, or propped against a planter. They look stunning in rustic, farmhouse, and cottagecore gardens.
Sketch your letter lightly on a piece of plywood or thick cardboard cut to size. Then start filling in the letter shape with short sections of twig, roughly ¼ to ½ inch in diameter, laid side by side like a mosaic and hot-glued in place. Work in small sections and keep the twig lengths consistent for a cleaner look. Seal with outdoor Mod Podge when done.
🌿 Expert Tip: Mix twig species for natural color variation. Birch twigs are pale and creamy; oak is darker brown; cherry has a warm reddish tone. Mixing these without paint creates a naturally beautiful, multi-toned texture.
✅ Why It Works: Monogram garden art is enormously popular on Pinterest, and store-bought versions in metal or resin run $40–$120. The twig version has a warmth and organic character that manufactured pieces simply can’t replicate — and it costs you an afternoon and a glue stick.
7. Twig Garden Marker Stakes
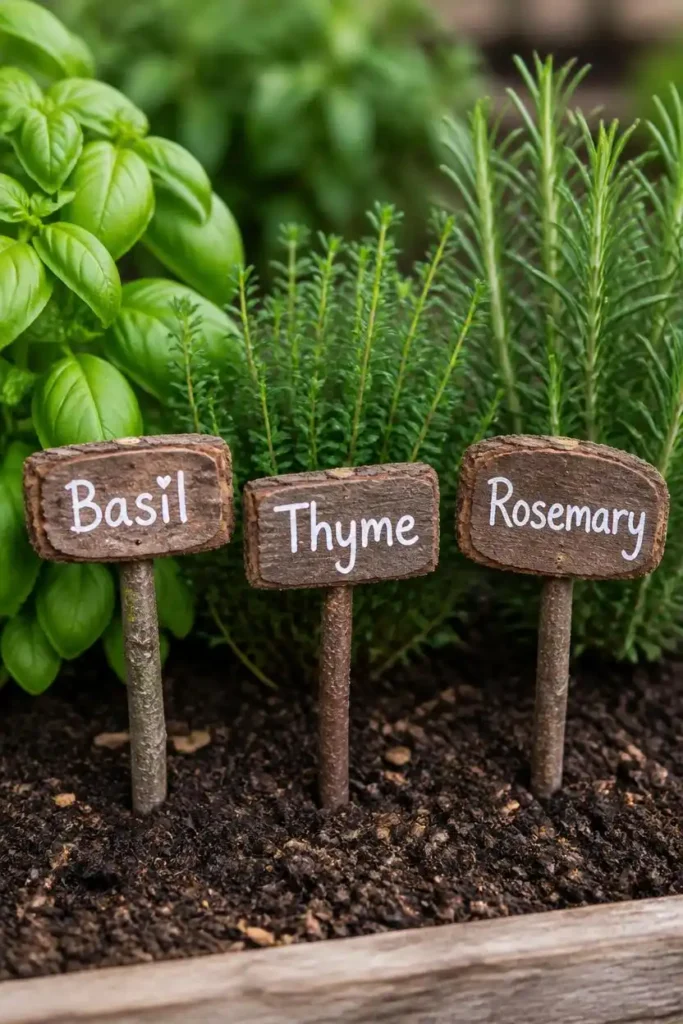
What you’re seeing: Flat, smooth sections of bark or small wooden discs wired to short twig stakes, with plant names hand-lettered in waterproof marker or wood-burned onto the surface. These are pushed into the soil at the base of herbs, vegetables, or flowers to label what’s growing — and they look wildly charming poking out of a kitchen garden bed.
Find flat-surfaced bark pieces or slice thin cross-sections from a larger branch if you have a saw. Sand the face smooth. Use a woodburning tool, permanent outdoor marker, or even a white paint pen to write the plant name. Attach to a stake twig using hot glue or tight twine wrapping. Seal with exterior varnish for longevity.
🌿 Expert Tip: Coat the finished markers with two thin layers of exterior polyurethane spray. This keeps them legible and intact through an entire season of rain, sun, and watering.
✅ Why It Works: Garden markers are a small detail that make a garden feel genuinely tended and loved. The handmade, natural quality of twig markers also photographs beautifully — relevant if you share your garden on social media. And they cost essentially nothing.
💬 Do you label your garden beds, or do you go by memory? I used to wing it until I accidentally planted two entire rows of basil thinking one was parsley. Lesson learned!
8. Twig Bundle Outdoor Vase Wrap
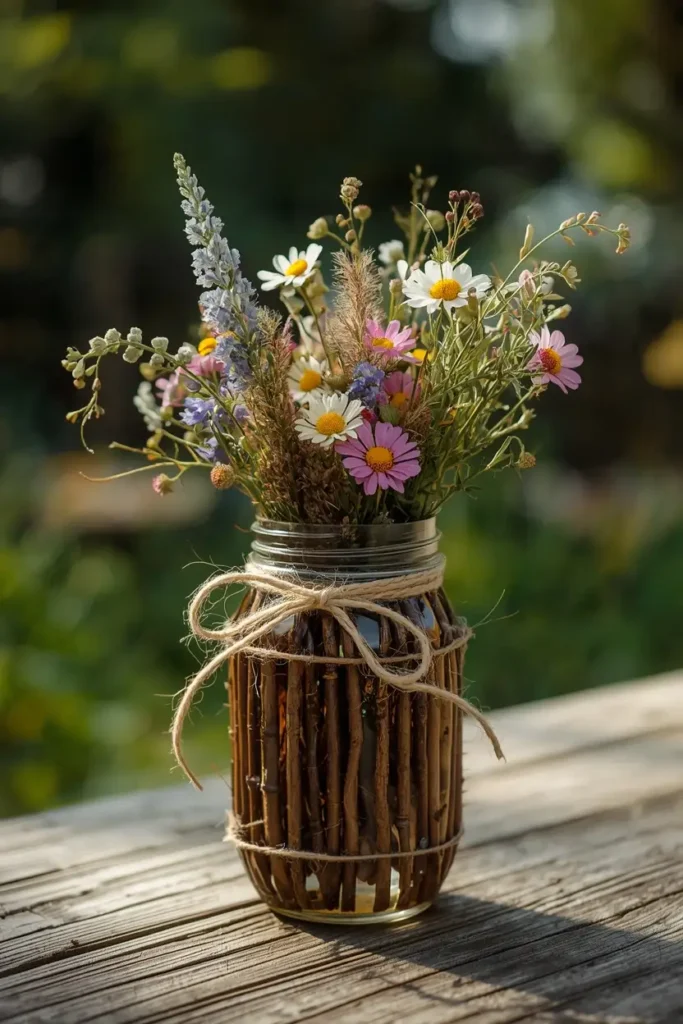
What you’re seeing: A simple glass jar, tin can, or vase wrapped entirely in short, uniform twig sections bundled tightly together and secured with jute twine tied in a bow. Filled with wildflowers, dried grasses, or fresh herbs from the garden, these vases look absolutely stunning on outdoor tables, porch steps, or garden walls.
Cut your twigs to uniform height — slightly taller than the container you’re wrapping. Apply a thin bead of hot glue to the container and press twigs against it one by one, working around the circumference. Hold each one for 10–15 seconds while the glue sets. Once the whole container is covered, wrap with two or three rows of jute twine tied tightly, and finish with a bow.
🌿 Expert Tip: Before gluing, lay all your cut twigs out and sort by thickness. Use your more uniform twigs on the outside face and reserve oddly shaped ones for filler pieces at the back. This takes an extra five minutes but makes the finished product look significantly more polished.
✅ Why It Works: This project completely transforms cheap or ugly containers into boutique-quality outdoor vases. It’s one of those DIY garden projects that genuinely looks better than anything you’d find in a décor store — and it costs you nothing beyond a few squirts of hot glue.
9. Miniature Twig Fairy Garden Furniture
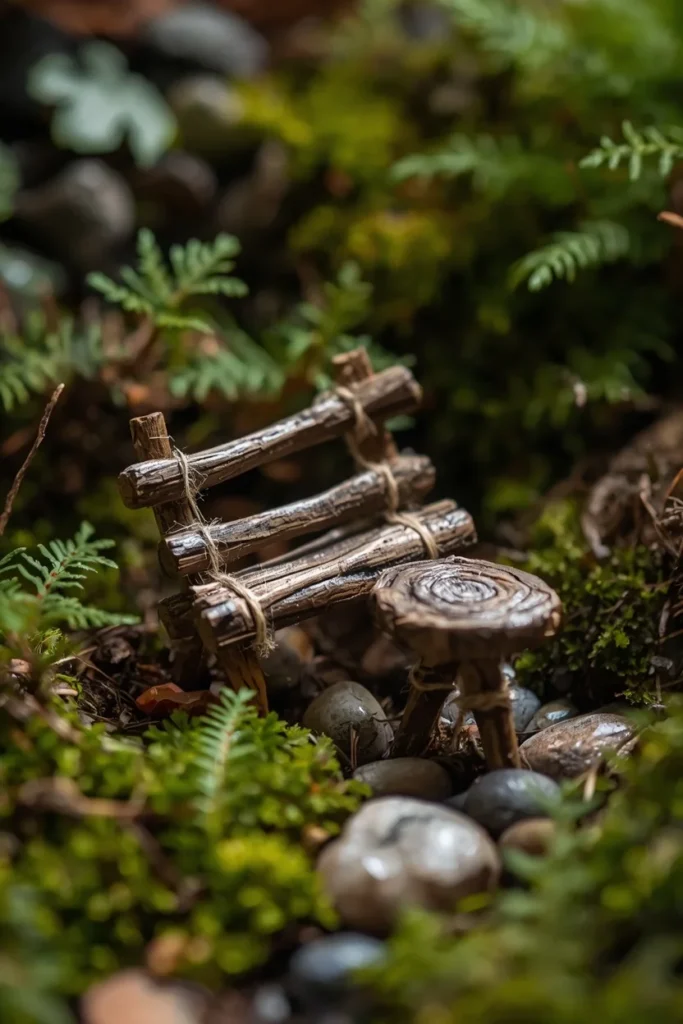
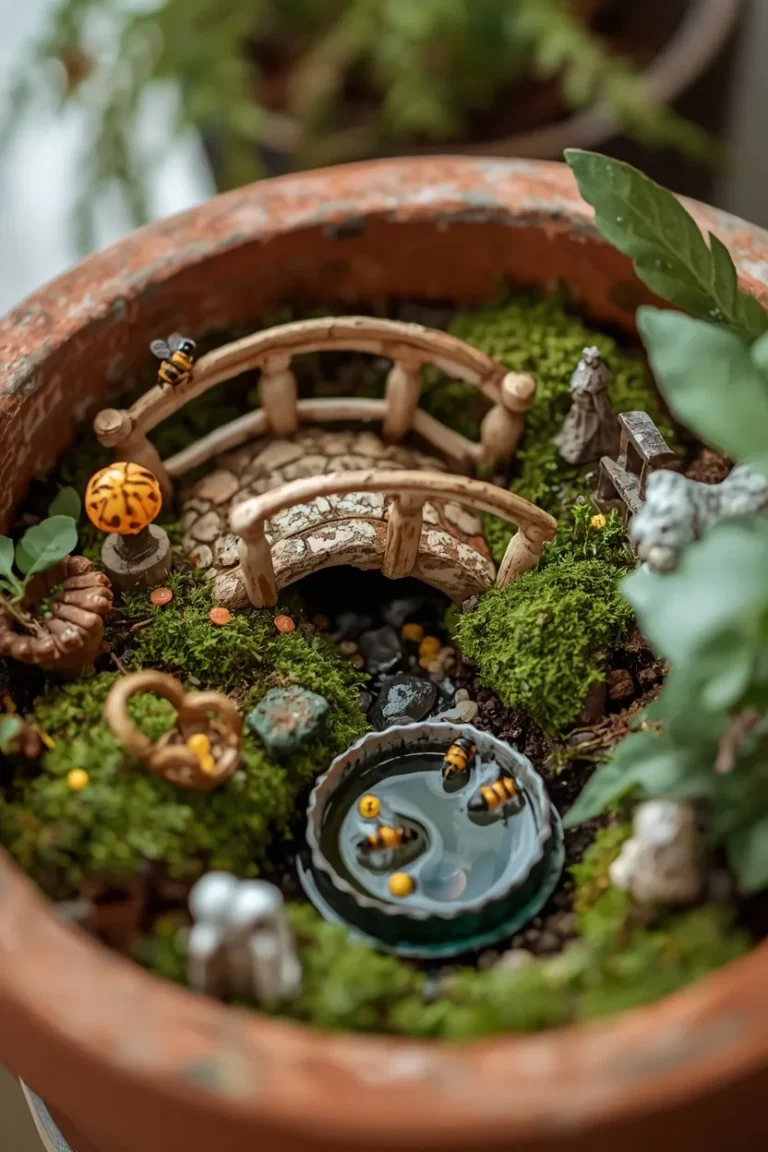
What you’re seeing: Tiny furniture pieces — a bench, a table, maybe a little arbor — constructed entirely from small-diameter twigs lashed together with thin twine or secured with hot glue. Placed in a container garden, a mossy corner of the yard, or a dedicated fairy garden, these details create an enchanting miniature world that kids and adults both adore.
The bench is the easiest starter piece: four equal-length twig “legs,” two longer twigs as side rails, and three or four flat twigs laid across the top as the seat. The whole thing is assembled with hot glue. A table is just four legs with a flat twig surface on top. The joy of this project is that “perfectly imperfect” is actually the aesthetic goal.
🌿 Expert Tip: Look for forked twigs — the natural Y-shapes make incredibly strong table and chair legs without any cutting or joining required. They’re structural AND beautiful.
✅ Why It Works: Fairy garden accessories at craft stores run $3–$15 per tiny piece, and they look plasticky up close. Twig furniture looks genuinely organic and magical in a way that manufactured alternatives don’t. This is also one of the best DIY garden projects to do with kids.
10. Twig Ladder Herb Planter
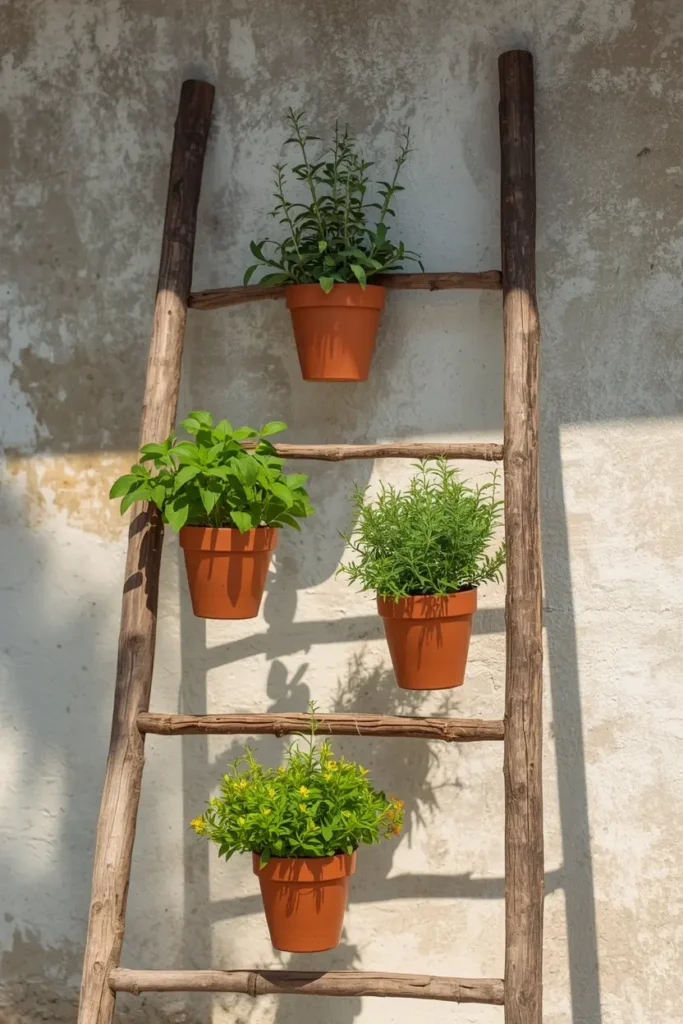
What you’re seeing: A small, rustic ladder made from two parallel branches connected by evenly spaced horizontal rung twigs, leaned against a wall or fence and fitted with hanging planters or small potted herbs on each “rung.” Trailing thyme, mint, basil, and rosemary drape over the edges, creating a lush vertical herb garden that takes up almost no ground space.
Build your ladder from two straight branches about 4–5 feet long. Lash horizontal rung branches between them every 10–12 inches using sturdy twine or wire. Hang small baskets, tin can planters, or terracotta pots from each rung with S-hooks or additional twine. Lean against a sunny wall and fill with your favorite kitchen herbs.
🌿 Expert Tip: Seal the ladder with outdoor wood sealant before use — this extends its life dramatically and prevents the wood from rotting where it contacts moisture from the planters. A $6 can of sealant spray can protect the whole ladder in 10 minutes.
✅ Why It Works: Vertical gardening is one of the smartest strategies for small spaces, and this twig ladder version works just as beautifully as the $80 cedar versions sold at garden retailers. If you’ve been looking at balcony garden ideas or small-space gardening, this project is perfect for maximizing every inch of your outdoor space.
11. Twig Bundled Lantern Frame
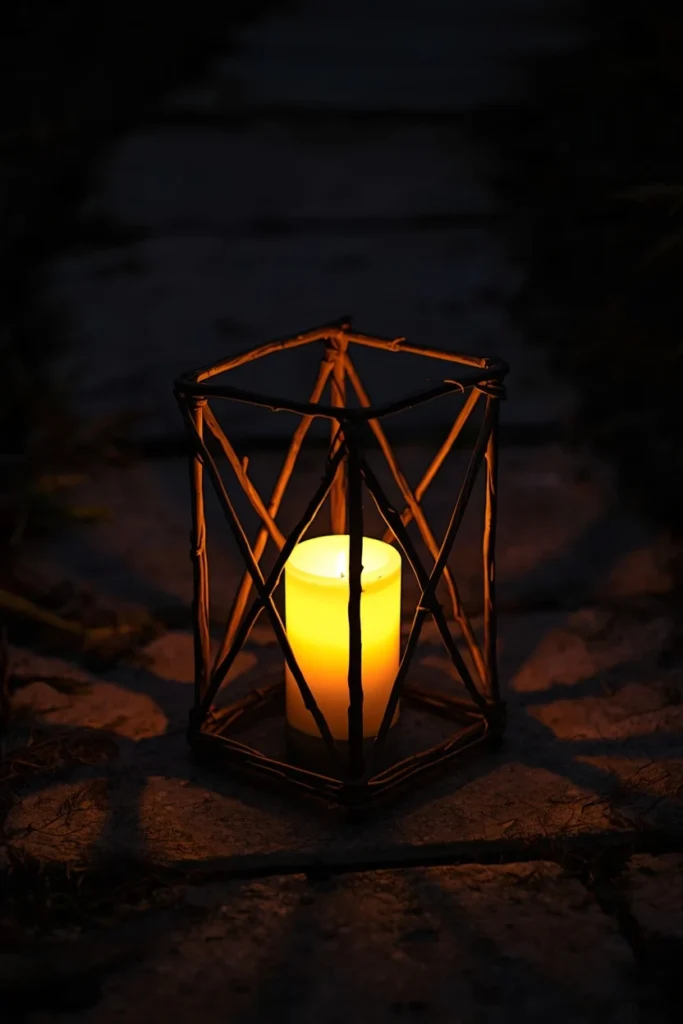
What you’re seeing: A geometric lantern frame constructed from longer, straight twigs lashed together at the corners to form a box or hexagonal shape, then fitted with a small candle or LED tealight inside. When lit at dusk, the light filters through the gaps between the twigs, casting the most beautiful organic shadow patterns across garden paths and patio surfaces.
This project requires some patience but is entirely achievable by a beginner. Build four equal rectangular frames from four twigs each, then connect them into a box shape with additional vertical corner pieces. The joints are the key — wrap tightly with waxed twine or floral wire and add a dab of waterproof wood glue for extra security. Use an LED candle inside, not a real flame, for safety.
🌿 Expert Tip: Use only perfectly dry, seasoned twigs for this project — green or damp wood will warp significantly as it dries, distorting your careful geometry. Collecting twigs in summer after a long dry spell gives you the best material.
✅ Why It Works: Outdoor lanterns add ambiance that transforms a garden from daytime to evening space. Rustic twig lanterns in this style sell for $25–$60 at boutique garden stores. Making your own costs practically nothing and gives you a completely unique piece that no one else has.
12. Twig Sunburst Mirror Frame
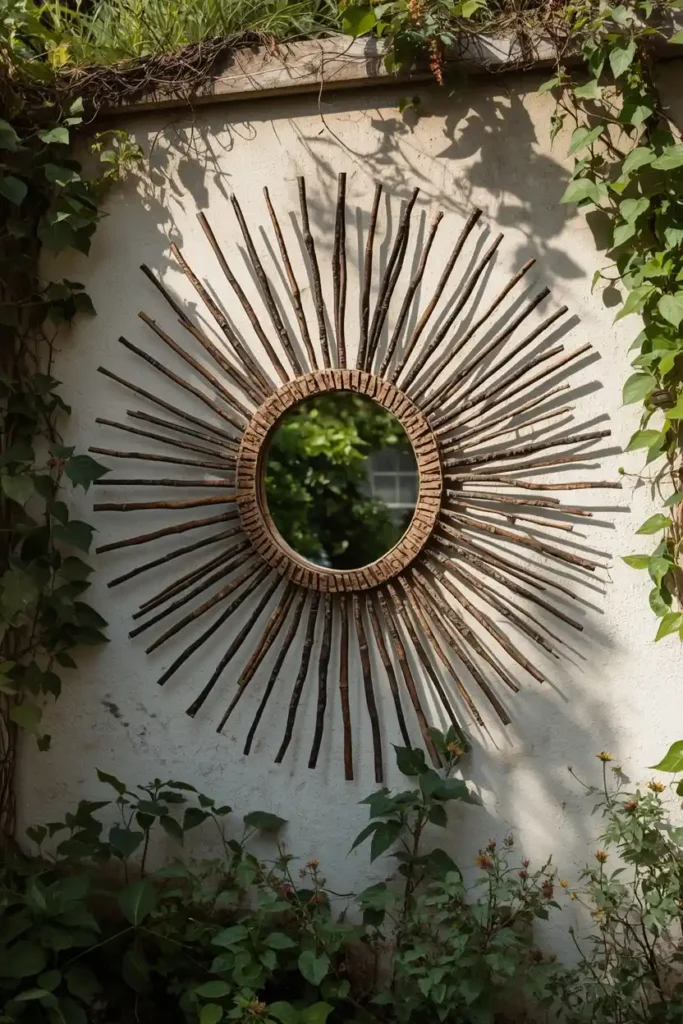
What you’re seeing: An outdoor mirror with a dramatic sunburst frame made from radiating twigs of graduated lengths fanning out from the mirror’s center. Mounted on a garden wall, fence, or the exterior of a shed, it reflects light and makes the garden feel larger, while the twig sunburst adds a bold decorative focal point that stops visitors in their tracks.
This one requires a small round mirror (thrift stores and dollar stores are perfect sources), a wooden backing disc, and a generous collection of straight twigs. Arrange the twigs in radiating rows around the mirror, hot-glue them to the backing board, and attach the mirror in the center. Alternate longer and shorter twigs for the classic sunburst effect.
🌿 Expert Tip: Spray the finished frame with a light coat of exterior matte varnish to protect it and slightly darken the twig color, which makes it look more intentional and “designed” rather than raw.
✅ Why It Works: Mirrors in outdoor spaces are a designer trick for making gardens feel twice as large. A decorative sunburst garden mirror at a home store costs $60–$150. Your twig version achieves the same visual impact for the cost of a $3 dollar-store mirror and an afternoon’s work.
13. Twig Honeybee and Insect Hotel
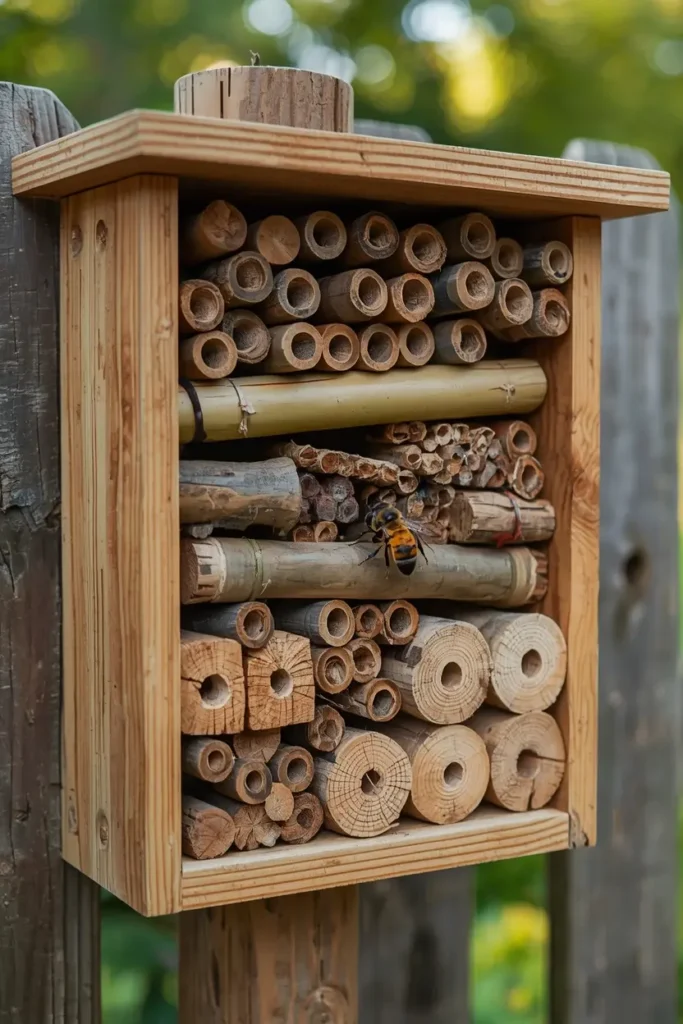
What you’re seeing: A wooden-frame structure divided into compartments, each filled with bundles of hollow twigs, bamboo sections, and drilled blocks of wood — creating a “hotel” where solitary bees, lacewings, and other beneficial garden insects can nest and overwinter. These insect hotels are genuinely functional garden tools that improve pollination and natural pest control in your beds.
Build or repurpose a simple wooden box frame. Fill different compartments with bundles of hollow twigs tied together (these mimic natural cavities where solitary bees nest), pine cones, rolled corrugated cardboard, and blocks of untreated wood drilled with holes of varying diameters (3–10mm). Mount it facing south or southeast at least 1 meter off the ground, sheltered from direct rain.
🌿 Expert Tip: Don’t be tempted to check if anything is living inside during the active season — you’ll disturb the occupants. Watch from a respectful distance. Once you see bees actively entering and exiting specific tubes, you’ll know your hotel is a success.
✅ Why It Works: This is the single most ecologically valuable project on this list. Solitary bees are dramatically more efficient pollinators than honeybees and are in serious decline. Providing nesting habitat directly supports your garden’s health and the wider ecosystem. It’s a DIY garden project that gives back far more than it takes.
💬 Have you ever tried attracting pollinators to your garden? I’d love to hear what’s worked for you — drop your tips in the comments!
14. Twig Art Installation: Woven Branch Wall Panel
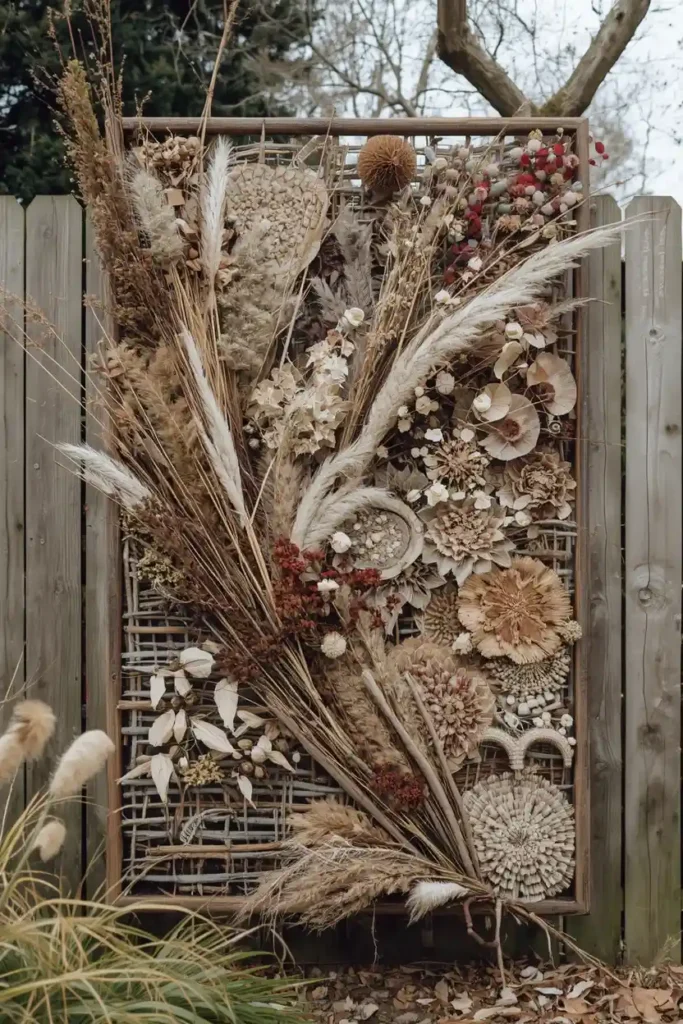
What you’re seeing: A large-scale decorative wall panel created by weaving branches of different textures, colors, and thicknesses into a loose, artistic tapestry-like composition, mounted on a simple frame and hung on a garden wall or fence. This is essentially outdoor fiber art — organic, textural, and completely unlike anything you’d find in a store.
This is the most artistic project on the list, and it rewards creative intuition more than technical precision. Build a simple rectangular frame from four sturdy branches lashed at the corners. Tie vertical “warp” strings or twine from top to bottom. Then weave horizontal branches, grasses, dried flowers, and thin twigs over and under the warp threads. Add feathers, seed heads, or small pinecones as you go.
🌿 Expert Tip: Work with your dominant color palette first — maybe all greys and browns — then add accent materials in a contrasting texture. Pale birch twigs against dark dried fern fronds, for example, creates a gorgeous natural chiaroscuro effect.
✅ Why It Works: Large-scale outdoor wall art is enormously expensive. Custom pieces from artisan markets run $150–$400+. This project lets you create something genuinely original, deeply personal, and completely free — and the organic materials mean it will naturally evolve in color and texture as it weathers, like a living artwork.
15. Twig Advent/Seasonal Branch Display
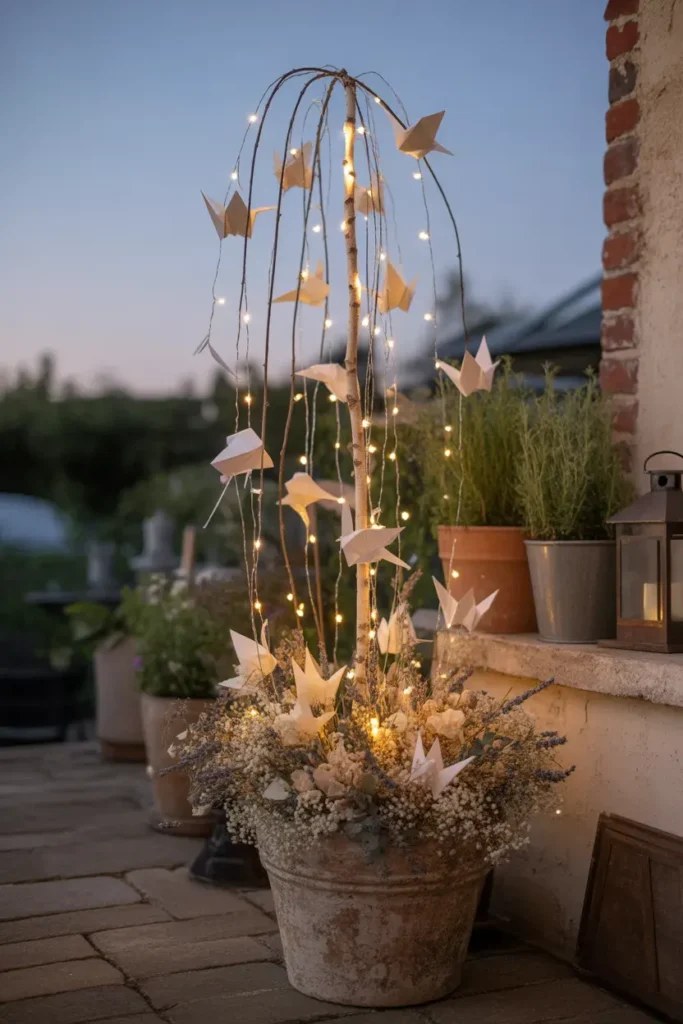
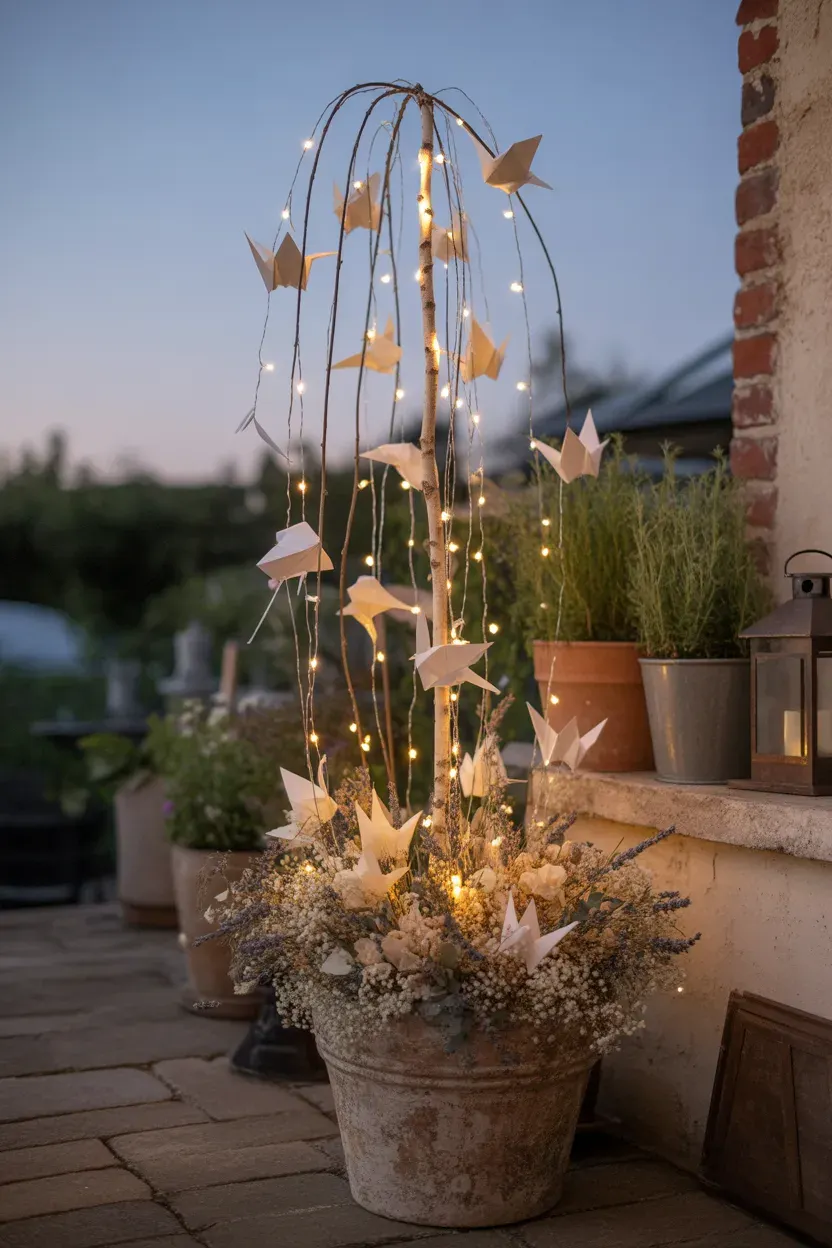
What you’re seeing: A tall, branching twig or small bare tree branch anchored in a weighted vase or bucket of sand, decorated seasonally with hanging ornaments, dried flowers, origami shapes, small photos, or nature finds. In winter it becomes a Christmas tree alternative; in spring it holds painted eggs; in autumn, tiny pumpkins and dried leaves. One structure that earns its place in your garden year-round.
Find a dramatic, well-branching twig — birch is the classic choice for its beautiful white bark, but any interesting branch works. Anchor it securely in a heavy container filled with dry sand, pebbles, or plaster. The decorations are entirely seasonal and entirely personal: this is your branch, your canvas.
🌿 Expert Tip: For winter displays, spray the branch lightly with artificial snow or white spray paint for a dusting effect. For spring, twist white fairy lights among the branches for magical evening ambiance on the patio.
✅ Why It Works: This is the most versatile project on the entire list — one afternoon of prep work gives you a year-round garden feature that evolves with the seasons. It’s sustainable, beautiful, completely free, and endlessly customizable. If you love vintage garden decor ideas, this twig display fits that aesthetic perfectly.
Pros and Cons of Using Twigs for Garden Projects
Like any material, twigs have genuine strengths and a few limitations worth knowing before you start.
✅ Pros:
- Completely free and abundantly available
- 100% natural, compostable, and zero-waste
- Ages beautifully and looks more organic over time
- No special tools or skills required for most projects
- Endlessly available — storms, pruning, and seasonal shedding provide a constant supply
- Visually unique — no two pieces are identical
⚠️ Cons:
- Durability is limited compared to treated wood or metal — most outdoor twig projects last 1–3 seasons
- Projects in very wet climates may need more frequent refreshing or resealing
- Requires some patience for projects requiring uniform sizes
- Some flexible weaving twigs are seasonal (best in early spring) and need to be planned ahead
Bottom Line: For decorative and semi-functional garden projects, twigs are genuinely one of the best free materials available. For heavy structural work (a full-height fence, a load-bearing pergola), you’d want treated lumber. But for everything beautiful, creative, and garden-forward on this list? Twigs win every time.
Final Thoughts: Your Garden, Your Canvas
I genuinely believe that some of the most beautiful gardens in the world cost almost nothing to create. The secret isn’t money — it’s noticing the incredible materials that are literally falling at your feet and having the courage to work with them creatively.
These 15 DIY garden projects using twigs are proof that constraint breeds creativity. When you commit to using what you have, you make things that are more personal, more original, and — honestly — more beautiful than anything mass-produced.
Start with just one project this weekend. The twig teepee trellis takes about 20 minutes. The garden markers take less than an hour. Once you make your first one and see how good it looks, you’ll be back for the rest of the list.
And if you’re ready for more outdoor inspiration, don’t miss our 15 Cheap Front Yard Flower Bed Ideas — another post packed with creative, budget-friendly ways to make your outdoor space the most beautiful on the block.
Now grab those twigs and get making. 🌿
Loved this post? Save it to your Pinterest boards so you can find it when you’re ready to start your next project! And tell me in the comments: which of these 15 projects are you planning to tackle first?