10 Innovative DIY Garden Trellis Ideas That Will Transform Your Backyard
This article was created in line with Trends Oraa’s research and content standards.
Your vines are everywhere. Your fence looks like chaos. You’ve pinned a hundred beautiful garden ideas — and done exactly none of them. Sound familiar?
Here’s the truth: a gorgeous, lush garden doesn’t require a landscaper or a big budget. It just needs one thing — a trellis. The right DIY garden trellis can turn a sad, overgrown corner into a Pinterest-worthy focal point in a single weekend. We’re talking climbing roses cascading over rustic wood frames, vegetables growing straight up in neat rows, and flowering vines framing your outdoor seating like something out of a French countryside cottage.
I’ve rounded up 10 innovative DIY garden trellis ideas that are beginner-friendly, budget-conscious, and genuinely beautiful. Grab your coffee, because you’re going to want to save every single one of these.
💚 Before you dive in: If you love clever DIY projects that stretch your dollar further, you’ll also want to check out our viral guide → 15 DIY Elevated Garden Bed Plans You Can Build This Weekend. It pairs perfectly with any of the trellis ideas below!
Whether you have a sprawling backyard, a cozy balcony, or a narrow side yard, there’s a trellis design here that fits your space and your skill level. Let’s get into it.
01
Bamboo Pole A-Frame Trellis
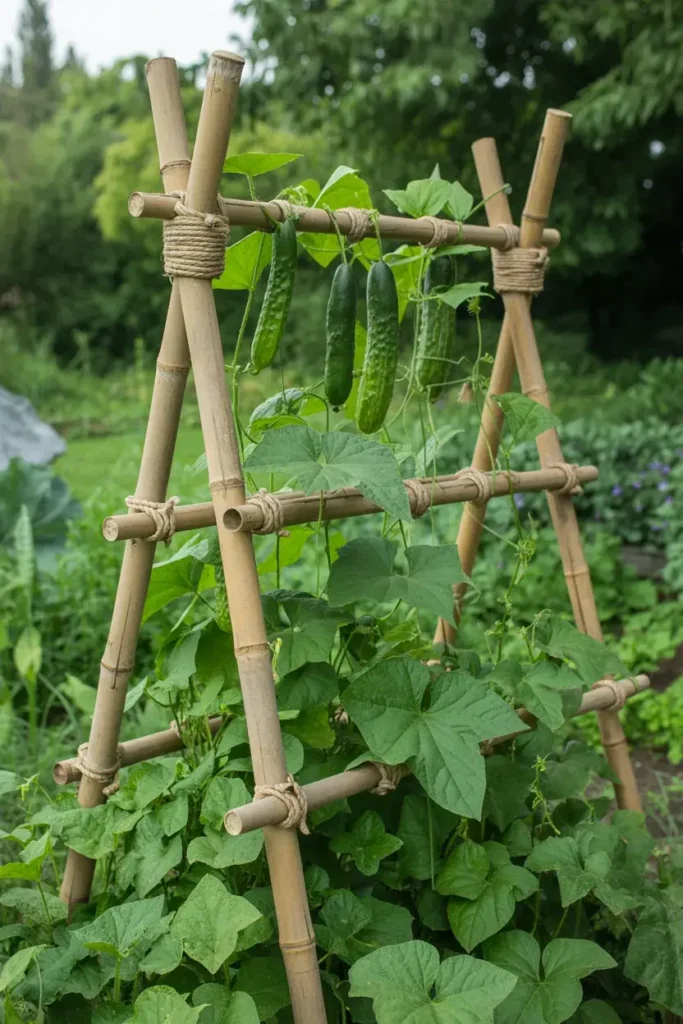
This classic structure is one of the most practical and visually satisfying DIY garden trellis ideas you’ll ever come across. Picture two sets of bamboo poles crossed at the top like a classic tepee, lashed together with natural twine, and planted in two parallel rows in your vegetable garden. The A-frame silhouette is both intentional and architectural — it looks designed, not improvised.
Bamboo poles are incredibly affordable (often $10–$15 for a bundle at any hardware or garden center), lightweight, and naturally resistant to moisture. You can build one of these in under an hour with zero woodworking experience. They work beautifully for pole beans, cucumbers, squash, and even lightweight flowers like sweet peas or nasturtiums.
✦ Expert TipSpace your bamboo pairs about 12–18 inches apart along the row, and angle them at roughly 45–60 degrees for maximum stability. Tie the top crossbar extra tight — that’s where all the load sits once your plants fill in.
Why It WorksThe A-frame naturally directs plants upward and inward, creating a ‘living tunnel’ effect that’s both functional and strikingly beautiful from a distance. It maximizes vertical growing space without casting too much shade on neighboring plants.
02
Repurposed Ladder Trellis
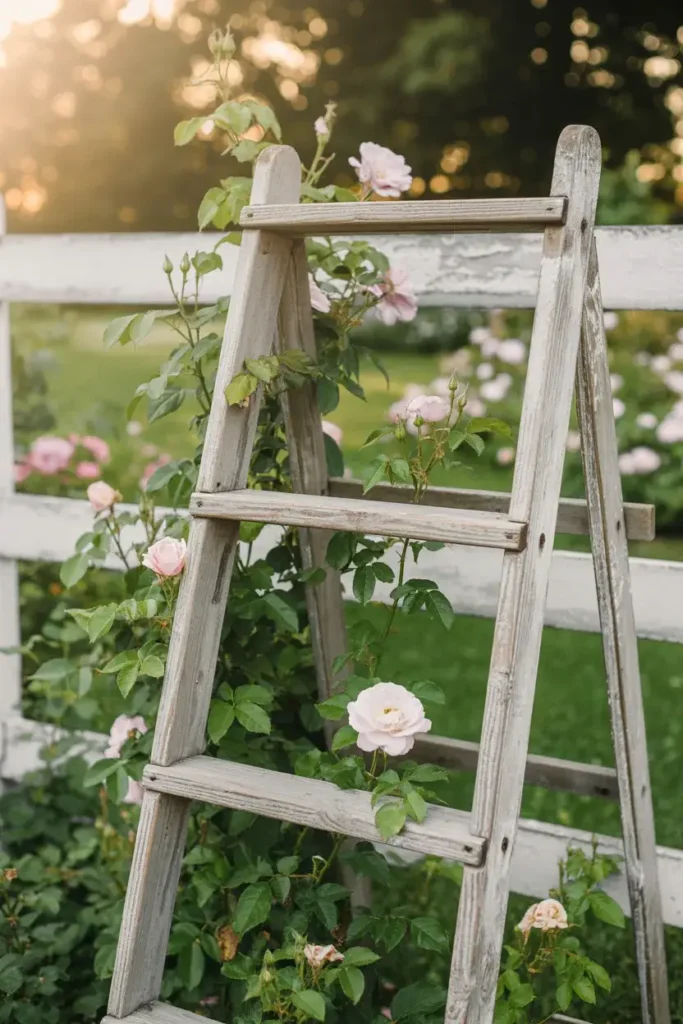
If you’ve been holding onto an old wooden ladder in your garage, this is its second life — and it’s a gorgeous one. Lean it against a fence, a wall, or set it freestanding between two anchor posts, and you instantly have a charming, rustic trellis that looks like it belongs in a farmhouse garden. The horizontal rungs serve as perfect support for weaving vines, training roses, or growing lightweight clematis.
This idea is especially popular on Pinterest because of its instant vintage appeal. An unpainted weathered ladder develops a patina that looks organic and intentional. If you’re starting with a newer ladder, try a quick coat of chalk paint in sage green or barn red for that coveted farmhouse-chic vibe. Seal it lightly with outdoor polyurethane so it survives rain and seasons.
✦ Expert TipIf your ladder doesn’t stand on its own, drive two rebar stakes into the ground behind the feet and zip-tie the ladder to them. This keeps it upright in wind without any permanent installation — ideal for renters!
Why It WorksThe ladder trellis has visual depth and dimension that flat trellises lack. The rungs create natural ‘shelves’ for trailing plants and give your garden a layered, intentional look that photographs beautifully from every angle.
‘Are you more drawn to rustic, natural materials like wood and bamboo — or do you prefer something more modern and geometric in your garden?’
💬 Drop your answer in the comments below! It’ll help you narrow down which of these trellis ideas is your perfect match.
03
PVC Pipe Grid Trellis
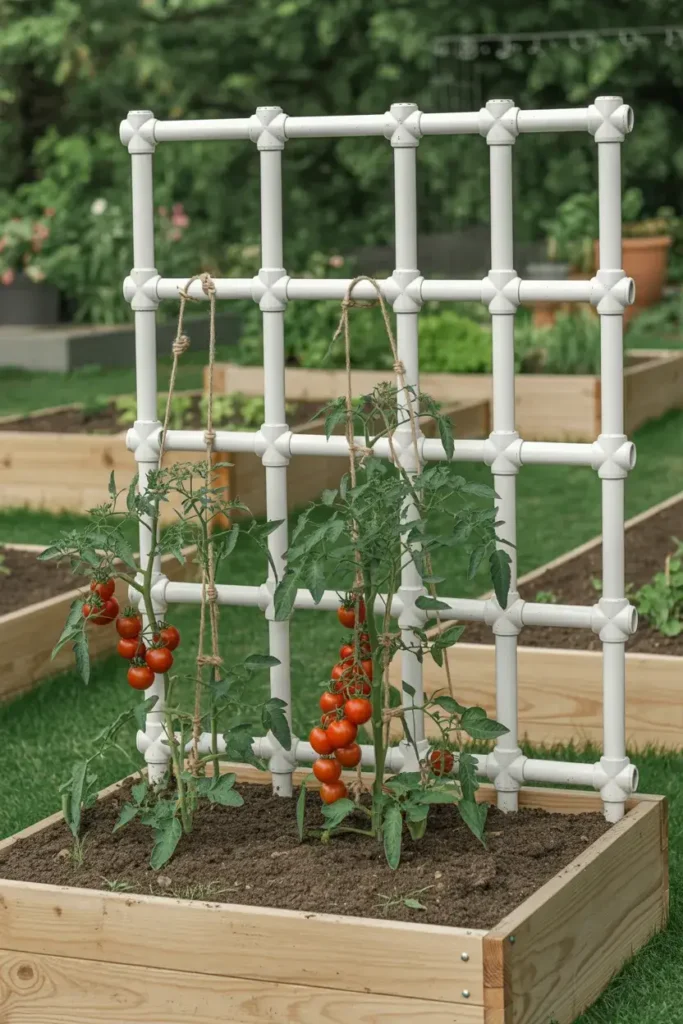
Don’t overlook PVC piping as a trellis material — it’s one of the most budget-friendly and durable options available. By cutting PVC pipe into equal lengths and connecting them with cross-fitting joints, you can create a clean, modern grid trellis that’s rigid, lightweight, and completely weatherproof. Unlike wood, PVC won’t rot, warp, crack, or attract pests.
This style works especially well for tomatoes, cucumbers, and indeterminate climbing plants that need a strong, stable framework to lean on all season. The grid spacing can be customized — tighter squares for small plants, wider openings for larger vines. A 4×4 foot PVC trellis can be built for under $20 using parts from your local hardware store. Paint it green or black with spray paint rated for plastic, and it almost disappears into the foliage.
✦ Expert TipUse ¾-inch diameter pipe for the best balance of strength and flexibility. Add end caps on all open pipe ends to prevent water from pooling inside — standing water in PVC can harbor mosquito larvae in warm months.
Why It WorksThe uniform grid creates consistent support at every plant height, meaning you’re not constantly retying or readjusting as the plant grows. The clean lines also give raised garden beds a polished, organized look that elevates the whole garden aesthetic.
04
Copper Pipe Fan Trellis
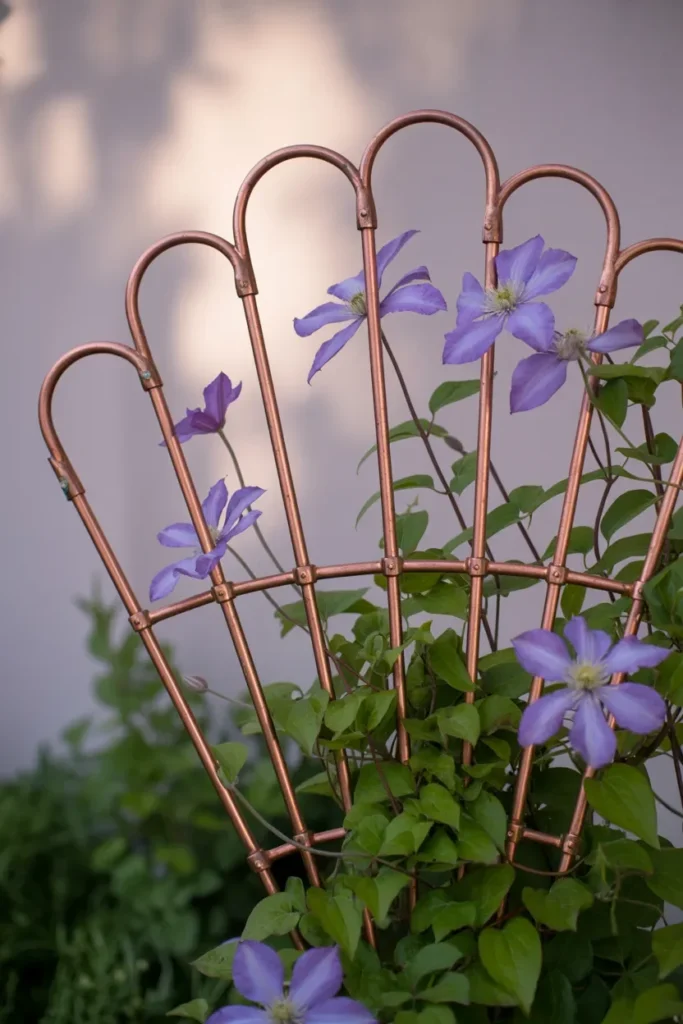
If you’re a fan of the elevated, designer-garden aesthetic you see in luxury lifestyle magazines, this is your trellis. Copper pipe fan trellises look like they cost a fortune — but a basic one can be assembled for around $30–$50 using copper plumbing pipe, end caps, and compression fittings from a hardware store. The fan shape radiates upward from a single base point, spreading out to create a graceful architectural form.
Copper naturally develops a stunning verdigris patina over time, shifting from bright metallic orange to a deep, aged green-blue. That means the older it gets, the better it looks. This trellis style is particularly beautiful for clematis, climbing hydrangea, and ornamental flowering vines that benefit from the spreading structure. Mount it against a light-colored wall for maximum visual drama.
✦ Expert TipIf you love the aged patina look immediately (without waiting years), apply a solution of salt and white vinegar to the copper surface and let it sit overnight. You’ll wake up to a beautifully weathered finish.
Why It WorksThe fan shape guides plant growth in a naturally elegant direction, mimicking the way ornamental grasses and flowering plants grow in the wild. It’s functional and sculptural at the same time — truly a piece of garden art.
05
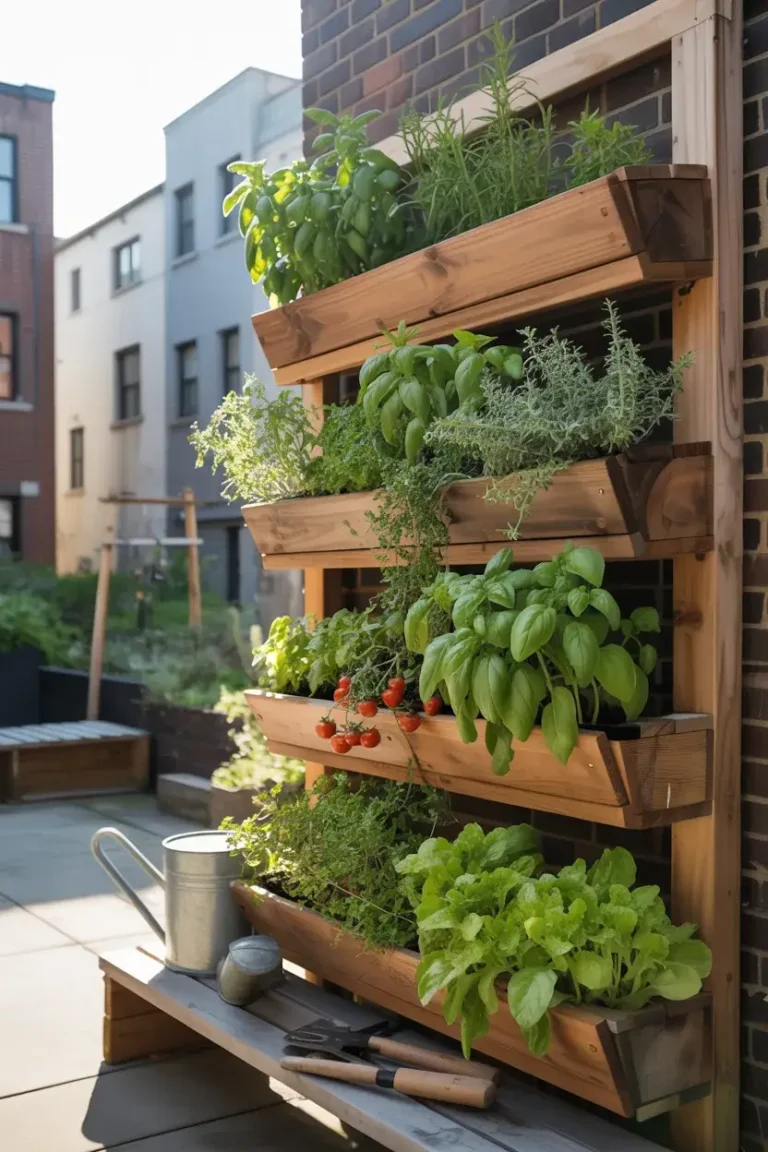
Wooden Pallet Vertical Garden Trellis
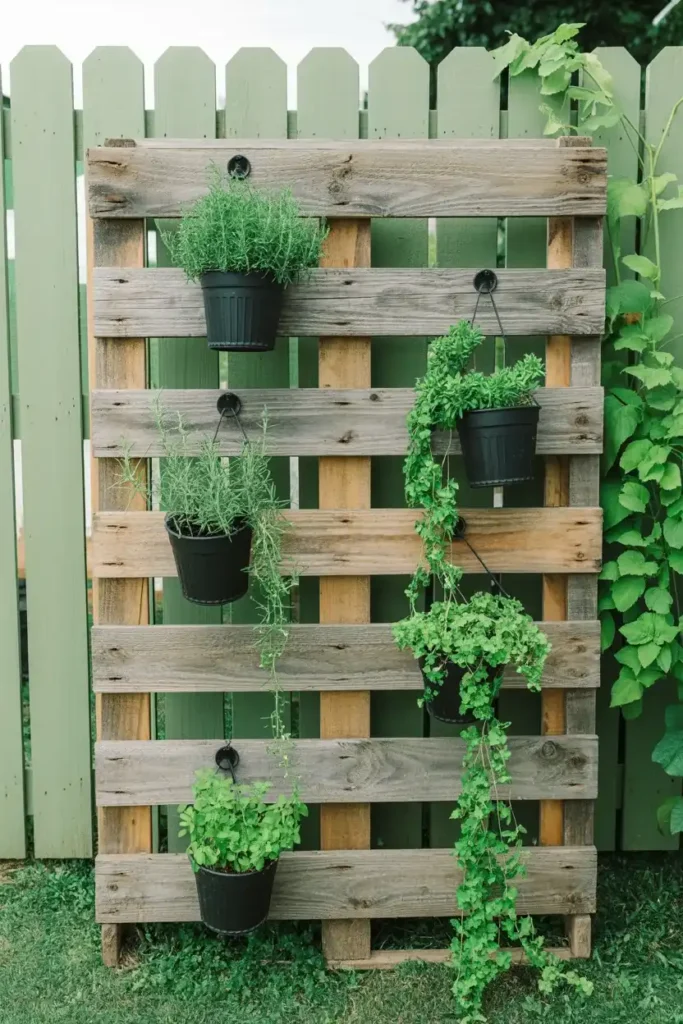
Free, sturdy, and instantly Instagram-worthy — the humble wooden pallet might just be the best raw material for DIY garden trellises. Stand a heat-treated pallet (look for the ‘HT’ stamp — never use methyl bromide-treated ones) on its end and lean it against a fence or mount it to posts, and you immediately have a vertical garden structure with built-in horizontal slats for attaching plants, hanging small pots, or weaving flexible vines.
This idea is incredibly versatile. Use it as a true trellis and train climbing plants through the gaps. Or add small hooks, wire baskets, or repurposed mason jars to the slats and create a vertical herb garden. Paint the pallet white or sage green for a cottage-garden feel, or leave it natural and weathered for that trendy reclaimed-wood look that’s dominated home decor for the past several years. Either way, you’re starting with a material that costs you exactly nothing.
✦ Expert TipBefore using any pallet outdoors, sand down the rough edges and treat with an outdoor wood stain or sealant. This prevents splinters and extends the life of the pallet dramatically — potentially adding 5–7 years to its outdoor lifespan.
Why It WorksPallets have a naturally open grid structure that creates visual rhythm without being too rigid or imposing. They also blend beautifully into naturalistic garden designs and can be repurposed, moved, or replaced without any significant cost or effort.
🛒 DIY Garden Trellis Buying Guide & Budget Breakdown
Before you pick up your tools, let’s talk materials. Choosing the right material for your DIY garden trellis isn’t just about aesthetics — it’s about matching the trellis to your plant’s weight, your climate, and how much maintenance you’re willing to do each year. Here’s a comprehensive breakdown of your options:
| Material | Average Cost | Durability | Best For | Maintenance |
|---|---|---|---|---|
| Bamboo poles | $10–$20 | 3–5 years | Vegetables, annual vines | Low – seal ends each season |
| Reclaimed wood / pallet | Free–$15 | 4–8 years (sealed) | Herbs, light climbers | Medium – annual resealing |
| Cedar lumber | $25–$60 | 10–15 years | Roses, heavy perennials | Low – naturally rot-resistant |
| PVC pipe | $15–$30 | 15–20+ years | Tomatoes, cucumbers | Very low – wipe clean |
| Copper pipe | $30–$80 | 20–30+ years | Ornamental vines, display trellises | Very low – patina is a feature |
| Cattle panel / wire mesh | $20–$40 | 10–20 years | Squash, pumpkins, cucumbers | Low – occasional rust treatment |
| Rebar + twine | $8–$20 | 2–3 years (twine) | Temporary or seasonal use | High – replace twine annually |
My personal favorite for beginners? Cedar lumber + galvanized wire mesh. It’s the sweet spot of durability, beauty, and affordability. A basic 4×6 ft cedar trellis frame with wire mesh infill can be built for around $35–$45 and will last a decade with minimal upkeep.
For container gardens or balconies, go with lightweight bamboo or PVC — you don’t want the extra weight of wood or metal in pots or on railings. For permanent garden beds with heavy roses or wisteria, invest in cedar or metal. The extra upfront cost is absolutely worth it — I’ve seen cheap wood trellises collapse under the weight of a mature climbing rose, taking years of growth with them. Don’t let that happen to you.
Pros & Cons of Building vs. Buying a Trellis
✅ DIY Pros
- Custom size and shape for your exact space
- Dramatically cheaper than store-bought
- Choose your exact materials and finish
- Satisfying sense of accomplishment
- Can be repaired or modified easily
- Great weekend project for all skill levels
⚠️ DIY Cons
- Requires time (2–6 hours per build)
- Needs basic tools (drill, saw, level)
- Results depend on your skill level
- Initial planning can feel overwhelming
- Some materials require sourcing effort
Bottom line: for most gardeners, the DIY route wins every time. The cost savings alone are significant — a comparable store-bought trellis can run $60–$200 — but the real payoff is getting something that fits your garden perfectly and reflects your personal style.
06
Cattle Panel Arch Trellis
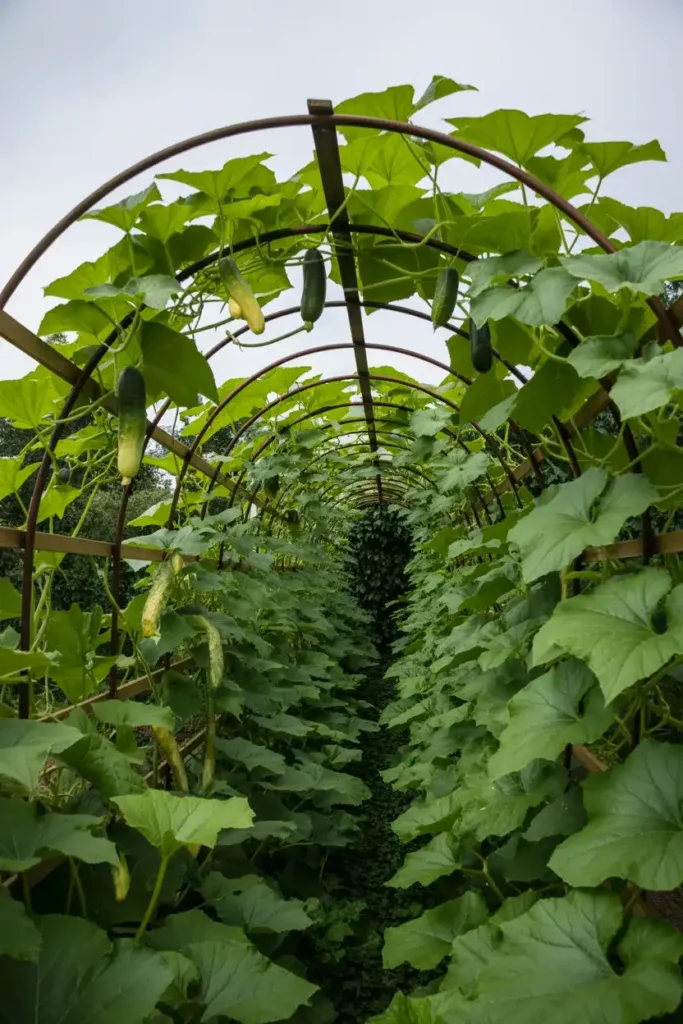
Cattle panels are a genius secret weapon in the world of DIY garden trellis ideas, and once you discover them, you’ll wonder why you ever bought anything else. These heavy-gauge wire grid panels (16 feet long, typically found at farm supply stores) are stiff enough to support massive, heavy plants — we’re talking giant pumpkins, butternut squash, and multi-stem cucumbers — but flexible enough to bend into a stunning garden arch.
Two people can bend a cattle panel into an arch shape and stake both ends into the ground to create a covered tunnel in about 30 minutes. Train your vining vegetables up and over the arch, and by midsummer, you’ll be walking through an actual living green tunnel. It’s functional, dramatic, and the plants love it — air circulation is excellent, sunlight reaches every part of the plant, and harvesting from below is effortless.
✦ Expert TipUse 10–12 inch landscape staples or rebar stakes to anchor each end firmly. In windy areas, add a third stake in the center curve for extra stability. Once heavy squash are hanging from the arch, you’ll be glad you did.
Why It WorksThe arch maximizes cubic growing space instead of just linear square footage. It transforms a utilitarian vegetable garden into a dramatic, sculptural landscape feature that’s genuinely jaw-dropping at peak season.
07
String & Branch Natural Trellis
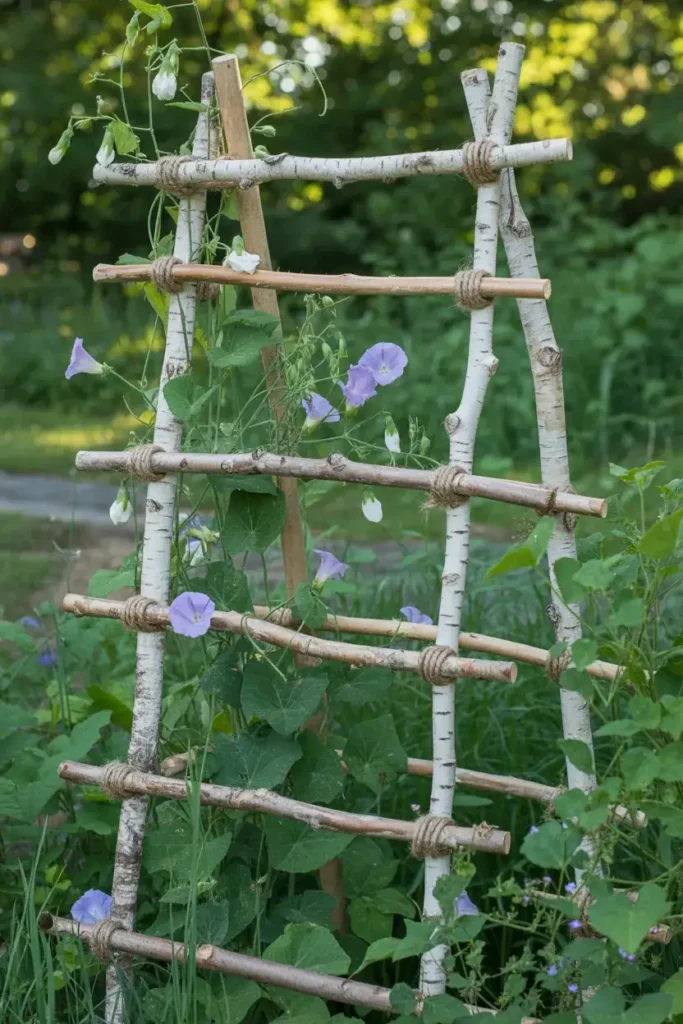
This is the trellis idea for the gardener who loves that wild, collected-from-nature aesthetic. Head into your yard or a nearby wooded area and gather long, straight-ish branches — birch, willow, hazel, and dogwood all work beautifully. Drive two taller branches into the ground as posts, then use natural jute or hemp twine to create a web of horizontal and diagonal lines between them. Add shorter branches as accents or weave them through the twine for extra structure.
No two of these trellises will ever look identical, which is precisely the point. The organic irregularity is the design. This approach is particularly magical for wildflower cottage gardens, where the slightly imperfect structure blends seamlessly into a naturalistic planting style. Sweet peas, morning glories, and climbing nasturtiums love scrambling up twine, and the overall effect — blooms cascading over a hand-crafted branch structure — is genuinely breathtaking.
✦ Expert TipSoak your branches in water for a few hours before installation to reduce cracking and splitting when you drive them into the ground. Freshly cut, green branches are more flexible and far less likely to snap.
Why It WorksNatural materials disappear into the garden as plants grow, creating a seamless ‘the trellis always belonged there’ effect. It’s also completely free if you have access to fallen branches — making it the ultimate zero-cost DIY garden trellis idea.
‘Which of these DIY garden trellis ideas would you actually tackle first — the cattle panel arch, the copper fan, or the string and branch natural style?’
💬 I’d love to know! Leave a comment and tell me which one is going in your garden this season.
08
Cedar Frame with Wire Mesh Trellis
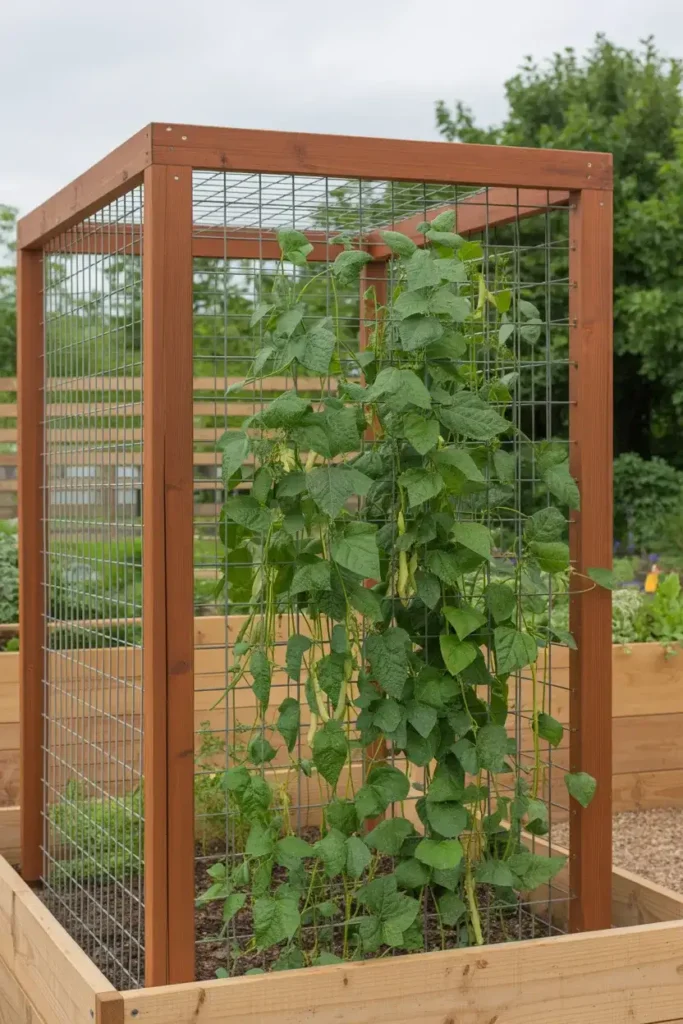
If you want a trellis that looks professionally made, lasts for over a decade, and works beautifully for virtually any climbing plant, the cedar frame with galvanized wire mesh is the gold standard of DIY garden trellis ideas. Cedar is naturally rot-resistant and pest-resistant, so it handles years of moisture and outdoor exposure without warping, cracking, or decomposing. Pair it with heavy-gauge galvanized wire mesh stapled to the back, and you have a structure that’s both elegant and virtually indestructible.
The key to making this look polished is all in the joinery. Use proper corner brackets or lap joints at the frame corners, and invest in a good quality staple gun to secure the mesh without gaps. Paint or stain the cedar in a color that complements your garden — deep charcoal, forest green, or warm barn red all work beautifully. Mount two or three of these in a row along a fence line, and you’ve essentially created a living wall.
✦ Expert TipUse 4×4-inch or 6×6-inch galvanized mesh rather than the smaller 2×2-inch chicken wire. The larger openings make it easier to weave plants through and dramatically easier to harvest fruit and vegetables without disturbing the plant.
Why It WorksCedar’s warm honey tone and natural grain make even an unpainted trellis look intentionally designed. The combination of solid wood framing with airy wire infill creates visual contrast that’s both sturdy-looking and elegant — a rare combination in DIY garden builds.
09
Rebar & Concrete Footing Permanent Trellis
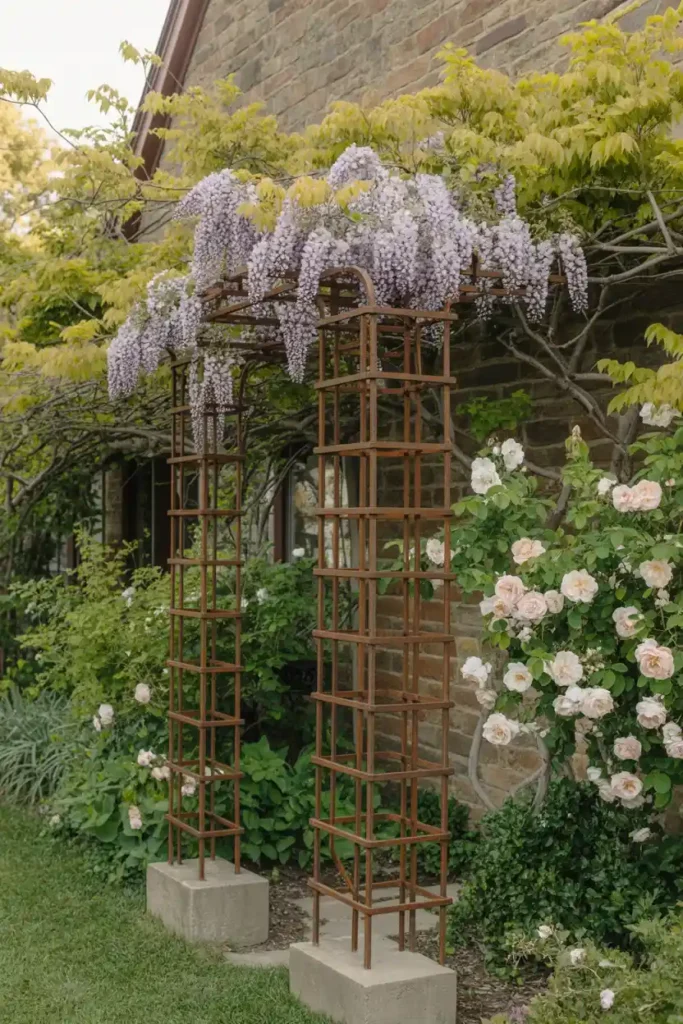
For gardeners who are playing the long game — planting climbing roses, wisteria, trumpet vine, or other permanent perennials that will grow for 20+ years — a rebar trellis set in concrete footings is the only logical choice. These aren’t weekend projects, but they’re not as complicated as they sound. Rebar is inexpensive and available at any hardware or construction supply store. With a basic cutting wheel (or a request to the store to cut it for you), a few bags of quick-set concrete, and a handful of connectors, you can build a trellis that will outlast your garden by decades.
The aesthetic is wonderfully industrial-meets-natural — bare metal rebar against a stone wall, gradually disappearing under a cascade of blooms. Rebar also rusts in an attractive way, developing a warm orange-brown patina that pairs beautifully with terracotta pots and warm-toned garden stone. For a cleaner look, prime and paint the rebar with oil-based metal paint before installation.
✦ Expert TipDig your concrete footing holes at least 18–24 inches deep in zones with frost heaving. A shallow footing will gradually work its way out of the ground after a few freeze-thaw cycles, taking your mature vine with it. Go deep once and never worry about it again.
Why It WorksPermanent structures create the backbone of a mature garden. A beautiful rebar trellis set in solid footings becomes a garden anchor — the kind of feature that frames your entire outdoor space and photographs beautifully in every season, bare in winter and lush in summer.
10
Upcycled Window Frame Trellis
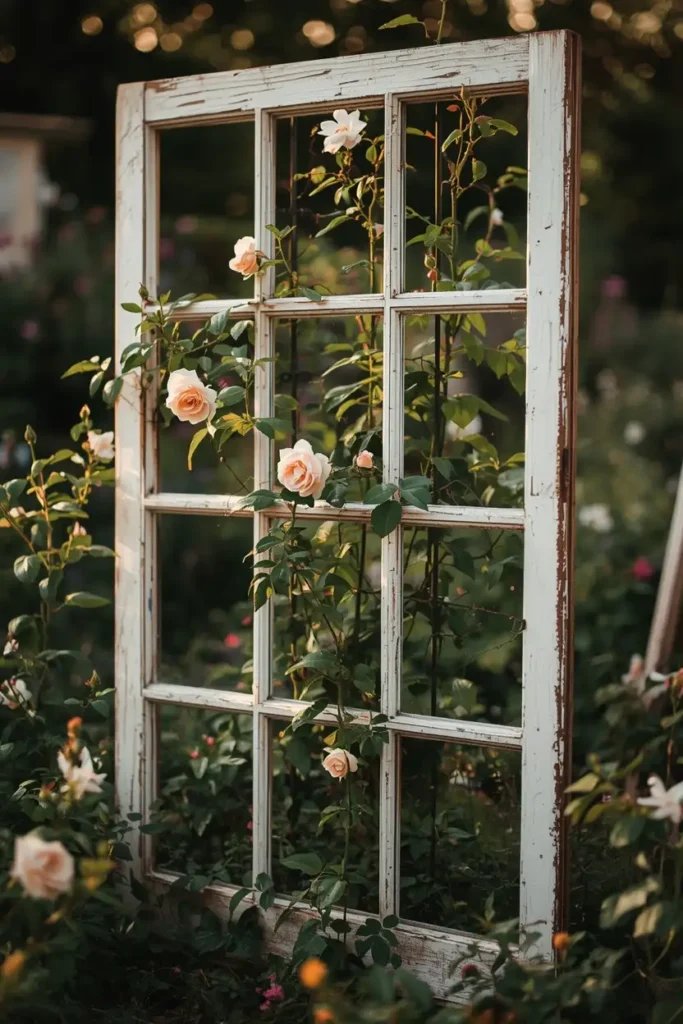
This might be the most charming DIY garden trellis idea on the entire list — and it starts with a trip to your local architectural salvage store, estate sale, or Facebook Marketplace. Old window frames, especially the multi-pane kind with wooden muntins (those dividing bars between the glass panes), are perfect trellis structures straight out of the box. Remove any remaining glass, add a few rows of horizontal twine between the existing dividers, and you have a ready-made trellis with instant vintage character.
Stand the window frame upright in the garden by attaching it to two wooden stakes, lean it against a fence, or hang it from a pergola or garden wall. The divided panes create natural sections for training different plants — imagine a different vine or climbing flower in each ‘window’ section. This idea works especially well in cottage gardens, farmhouse-style backyards, and any space where you want the hardscaping to feel collected and personal rather than store-bought and generic.
✦ Expert TipIf the window frame still has glass in some panes, you can leave it in — it creates a greenhouse-like microclimate for tender plants at the base and adds a beautiful reflective quality to the structure that catches light beautifully in the morning and late afternoon.
Why It WorksThe window frame carries inherent architectural history and character that no new-bought product can replicate. In a garden, this kind of aged, imperfect beauty is gold. It transforms a functional support structure into a genuine art installation that makes every visitor stop and look twice.
‘Be honest — did you already have a window frame or old ladder lying around that you could turn into a trellis this weekend? Sometimes the best DIY ideas are already sitting in your garage!’
💬 Share your ‘I already have this!’ moment in the comments — I love hearing about upcycling wins.
Ready to Build Your Dream Trellis?
From a free bundle of foraged branches to a polished copper pipe fan, these 10 DIY garden trellis ideas prove that creating a beautiful, functional garden structure doesn’t require a big budget or professional skills — just a little creativity and a Saturday afternoon.
My advice? Start with the idea that excites you most, not the one that seems easiest. Your enthusiasm is your best tool. A project you’re genuinely excited about always turns out better than one you just ‘got through.’
And remember: the best trellis is the one that’s actually in your garden, supporting your plants, and making you smile every time you look out the window. So pick one, build it this weekend, and tag us when you share it — we’d absolutely love to see what you create.
🌿 Hungry for more outdoor inspiration?Explore Our Balcony Garden Ideas →
📌 You might also love:
→ 17 Best Chicken Coop and Garden Layout Ideas
→ 15 DIY French Drain Ideas to Fix Yard Drainage for Good