10 Easy DIY 3D Wall Art Ideas That Will Transform Any Boring Wall
This article was created in line with Trends Oraa’s research and content standards.
Your walls are screaming for help. Flat. Lifeless. Forgettable. Sound familiar?
You’ve pinned a hundred gorgeous room ideas. But somehow your walls still look like a sad rental. Here’s the thing — you don’t need a designer budget or a contractor to fix that. You just need the right DIY 3D wall art ideas, a weekend afternoon, and this guide.
Whether you’re working with a blank living room wall, a dull bedroom corner, or a hallway that no one looks twice at, three-dimensional wall art is the single most dramatic change you can make to a room — without touching the floor plan or calling your landlord. It adds depth, shadow, texture, and that “how did they do that?” factor that makes guests stop and stare.
You might also love our viral guide on 20 Brilliant DIY IKEA Dresser Hacks — readers are obsessed with #7!
Ready to turn your blank walls into a showstopper? Let’s dig in.
10 Easy DIY 3D Wall Art Ideas That Actually Work
1. Geometric Paper Panels — The Origami-Inspired Statement Wall
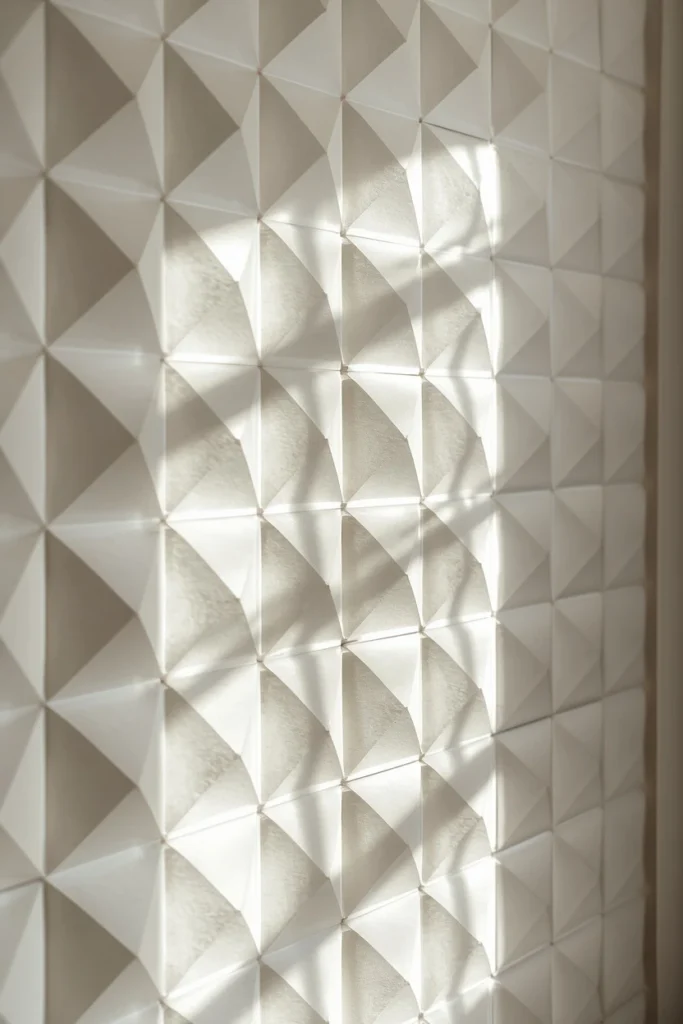
What You’re Looking At: A stunning grid of angular paper folds — think origami meets modern art — arranged in a repeating diamond or chevron pattern. Each folded panel casts a subtle shadow that shifts throughout the day as the light changes, making your wall look alive. The most popular colorways are crisp white on white (for that editorial minimalist look), warm neutrals like cream and sand, and bold monochromes like deep forest green or terracotta.
How to Make It: You’ll need cardstock, a bone folder, a ruler, double-sided tape, and a cutting mat. Score your paper into equal triangles, fold along the lines to create dimensional peaks and valleys, then mount each panel onto a foam-core backing before affixing to the wall with removable adhesive strips. Arrange in a grid pattern — 3×4 works beautifully for a sofa wall.
Expert Tip: Always press each fold firmly with your bone folder before mounting. Soft folds collapse over time and lose that crisp dimensional effect. I suggest doing a test panel first to get your angles consistent before committing to the full grid.
Why It Works: Light and shadow do all the heavy lifting here. Because the texture is physical rather than printed, your wall looks completely different in morning light versus evening lamplight. It’s genuinely mesmerizing — and the materials cost under $20 total.
Which texture style speaks to you most — clean geometric folds, organic shapes, or mixed media? Drop your pick in the comments below — I’d love to know!
2. Wood Slice Mosaic — Rustic Meets Gallery-Worthy
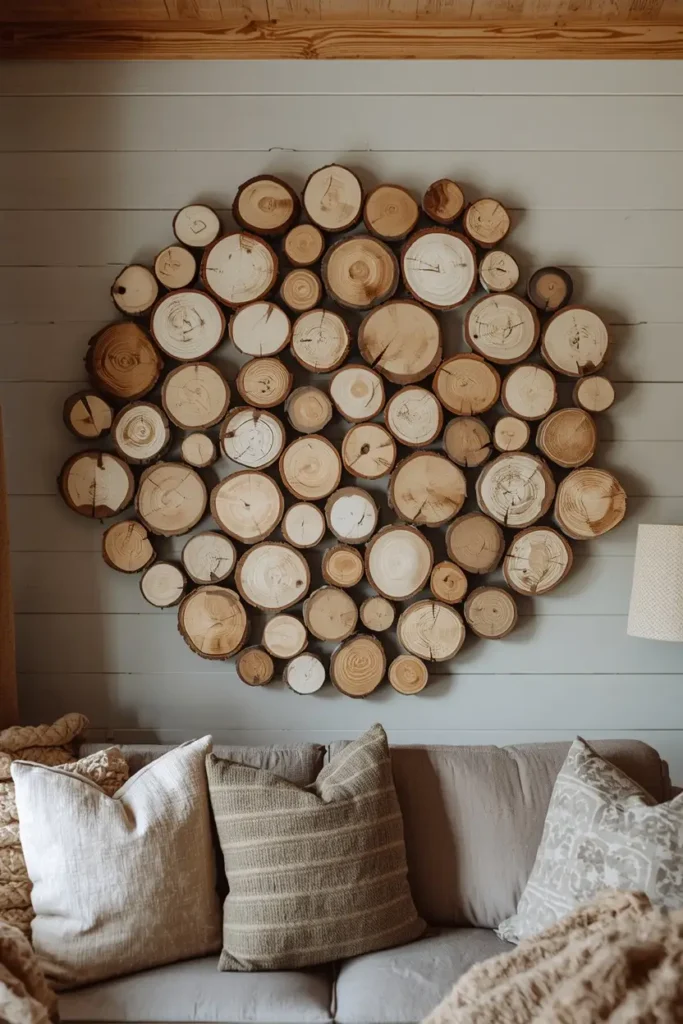
What You’re Looking At: Dozens of thin birch or pine wood slices, each about 3–5 inches in diameter, arranged in a flowing circular or asymmetrical cluster on the wall. Some are left natural with their beautiful grain and bark edges intact; others are lightly stained, whitewashed, or even dipped in gold paint for contrast. Together they create a mosaic effect that’s incredibly organic and warm — perfect for farmhouse, boho, or earthy cottage aesthetics.
How to Make It: Pick up a bag of pre-cut wood slices from a craft store or Amazon (they’re cheap — usually $12–18 for a big bag). Lightly sand any rough edges. Decide on your arrangement by laying them out on the floor first. Then use a hot glue gun on a piece of foam board cut to size, or mount them directly to the wall one by one with small nails or Command Strips depending on weight.
Expert Tip: Vary the sizes intentionally. Use larger slices as the visual anchors in the center of your composition and taper down to smaller pieces at the edges. This creates a natural, organic feel — unlike a perfectly uniform grid which can look a bit stiff with round shapes.
Why It Works: Wood has natural warmth that no printed art can replicate. The variation in grain patterns means no two slices look alike, giving your wall art genuine visual richness without any additional effort. This is also one of the most budget-friendly ideas on this list.
3. Plaster or Joint Compound Texture Art — The “Looks Expensive” Secret
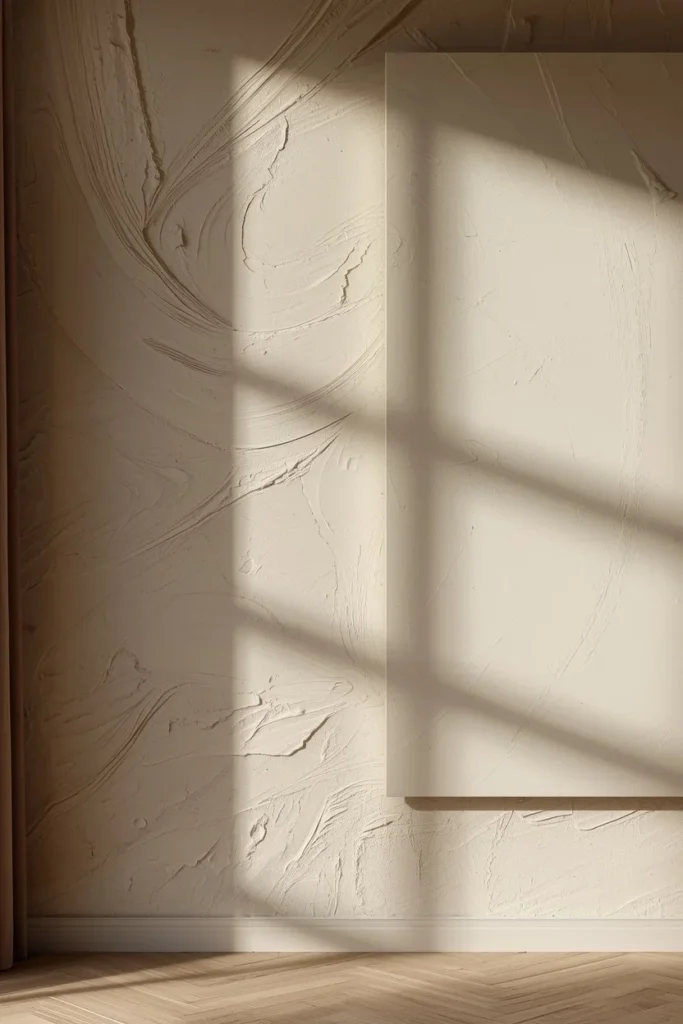
What You’re Looking At: A large canvas (or section of wall) covered in thick, swirled, raked, or layered joint compound — the kind of surface that looks like it belongs in a Parisian apartment or a high-end boutique hotel. When painted a single matte color (dusty white, warm greige, or even deep charcoal), the texture creates thousands of tiny highlights and shadows that read as genuinely luxurious from across the room.
How to Make It: Buy a pre-stretched canvas in your desired size, or work directly on a primed wall panel. Apply joint compound with a wide putty knife, a notched trowel, or even your hands. Work in sweeping strokes, combing patterns, or deliberate swirls. Let it dry completely (24 hours), sand very lightly if needed, then seal and paint.
Expert Tip: Don’t overthink the pattern. The pieces that look best are the ones made with loose, confident strokes. If you tighten up and over-work it, the result looks nervous. Put on some music, breathe out, and go for it in one fluid session.
Why It Works: Texture is what separates a $50 room from a $5,000 room. This technique replicates the effect of expensive plaster finishes at a fraction of the cost, and because it’s dimensional, photographs beautifully — great for your own Pinterest and Instagram feed too.
4. Woven Rope or Macramé 3D Wall Hanging — Boho with Structure
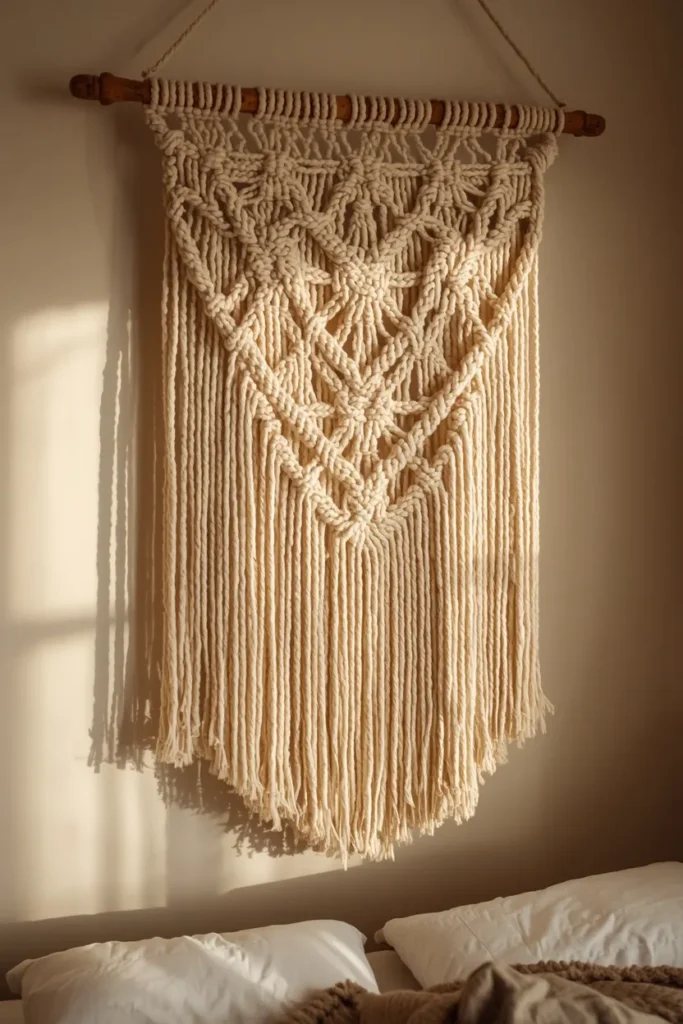
What You’re Looking At: A wall hanging that goes beyond flat macramé — one that incorporates looped, knotted, and braided sections that actually project off the wall in layers. Imagine chunky natural cotton rope in varying thicknesses, some sections twisted tightly, others left loose and frayed into soft fringe. The overall shape might be a large sunburst, an irregular organic form, or a simple rectangular panel with serious dimensional depth.
How to Make It: You’ll need a wooden dowel, macramé cord in at least two thicknesses, scissors, and a comb for fringing. The key to making this feel 3D rather than flat is varying your knot tightness, adding looped sections that stand away from the main piece, and incorporating wrapped sections that create dense, sculptural ridges.
Expert Tip: Work from the top down and keep stepping back to assess as you go. It’s easy to get absorbed in the knotting and lose sight of the overall shape. I hang my dowel on a hook at eye level while I work — seeing it at actual display height changes everything about how you balance the composition.
Why It Works: Macramé has made a massive design comeback, and for good reason — natural fibers bring warmth and tactile interest that nothing else does. A layered, dimensional macramé piece reads as a true art object rather than a craft project.
Budget Breakdown: What Will Your DIY 3D Wall Art Actually Cost?
Before we go further, let’s talk money — because one of the biggest reasons people love DIY 3D wall art is that it delivers huge visual impact at a tiny fraction of what you’d pay for gallery art or designer wall treatments. Here’s a realistic breakdown:
| Project | Materials Cost | Time Required | Skill Level |
|---|---|---|---|
| Geometric Paper Panels | $15–$25 | 3–5 hours | Beginner |
| Wood Slice Mosaic | $18–$35 | 2–4 hours | Beginner |
| Plaster Texture Canvas | $20–$40 | 2–3 hours + drying | Beginner–Intermediate |
| Macramé 3D Hanging | $25–$45 | 4–8 hours | Intermediate |
| Fabric Ribbon Installation | $15–$30 | 2–4 hours | Beginner |
| Shadow Box Gallery Wall | $40–$80 | 3–5 hours | Beginner |
| Paper Flower Wall Backdrop | $20–$35 | 4–6 hours | Beginner |
| Geometric Wood Shelf Art | $30–$60 | 3–5 hours | Intermediate |
| Mirror Fragment Mosaic | $25–$50 | 3–4 hours | Beginner–Intermediate |
| Air Plant Vertical Garden | $35–$70 | 2–3 hours | Beginner |
Total range for all 10 projects: $243–$470. Compare that to a single piece of gallery art that might run $200–$800+ for something equally striking.
Where to save money:
- Dollar Tree, Walmart craft section, and Amazon basics are your best friends for materials.
- Buy in bulk when a project uses a lot of one material (like rope or paper) — the per-unit cost drops dramatically.
- Check Facebook Marketplace and thrift stores for frames, dowels, and canvases.
Where NOT to skimp:
- Don’t use cheap low-temp hot glue for heavy materials like wood slices — it will fail over time. Use construction adhesive instead.
- Don’t skip sanding and priming plaster or wood before painting — raw materials absorb paint unevenly and the finished result looks amateurish.
- Don’t use regular printer paper for geometric folded panels — cardstock holds its shape; copy paper goes limp within weeks.
If you’re on a tight budget, our guide to 15 Genius IKEA Kids Playroom Ideas shows how to get a designer look for almost nothing — same principle applies everywhere in your home.
5. Fabric Ribbon Waterfall — Color, Movement, and Zero Nails
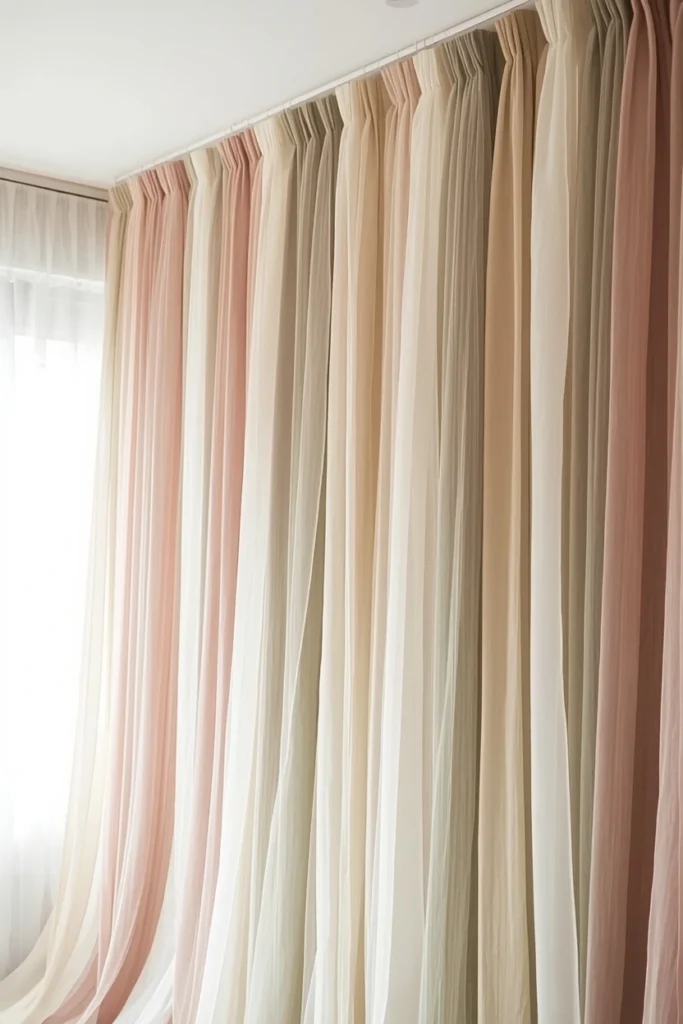
What You’re Looking At: Long strips of sheer or satin fabric, in a carefully curated color palette, hung vertically from a slim curtain rod or tension rod mounted near the ceiling. The ribbons hang in overlapping layers at varying lengths, creating a dimensional waterfall effect that catches light and moves gently with any air circulation. Think of it as a living textile installation.
How to Make It: Choose 5–8 complementary fabric colors and cut strips about 4–6 inches wide and floor-length (or longer if you want pooling at the bottom). Fold each strip over the rod and secure with a small stitch or fabric tape. Vary the lengths slightly for a more organic look. Mount the rod with brackets or use a tension rod in a doorway or alcove.
Expert Tip: Sheer fabrics like organza, chiffon, or voile create the most beautiful layered effect because light passes through them and mixes the colors. For a bolder, more opaque look, go with cotton or velvet ribbon. Either way, press everything with a cool iron before hanging — wrinkles ruin the effect completely.
Why It Works: This idea works in any room but is particularly magical in bedrooms, nurseries, and behind dining tables. It adds color and softness simultaneously, and because it moves, it brings a dynamic, living quality to the wall that static art never can. It’s also completely rental-friendly.
6. Shadow Box Gallery Wall — Miniature Worlds on Your Wall
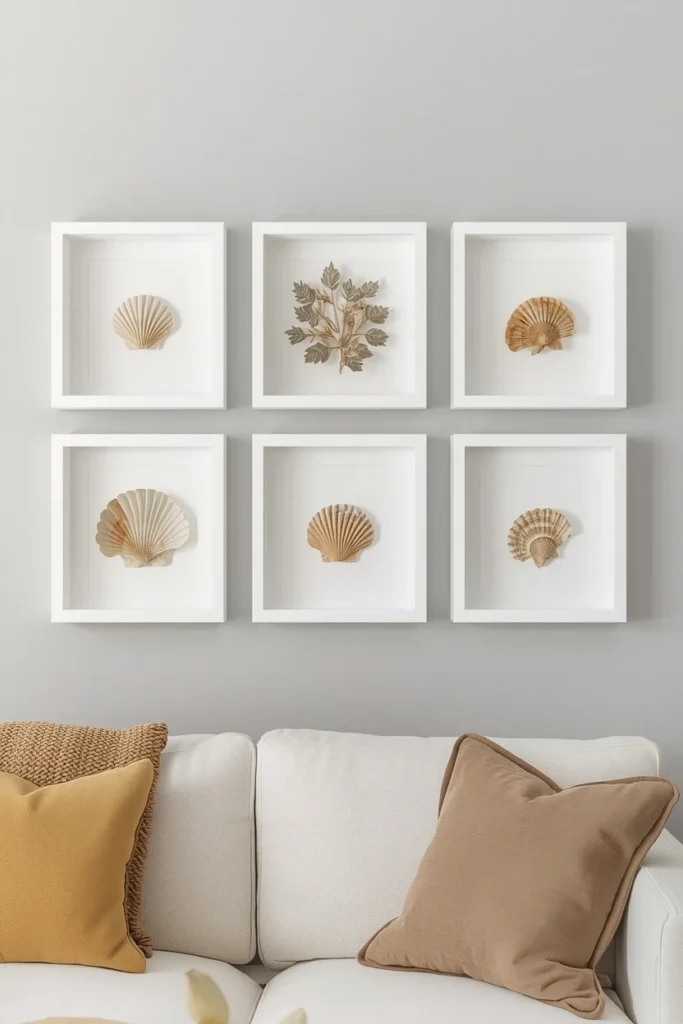
What You’re Looking At: A curated collection of shadow box frames, each containing a small three-dimensional arrangement — pressed botanicals layered over fabric backgrounds, seashells arranged in shallow sand, miniature dioramas, or meaningful objects from your travels displayed at depth. Arranged gallery-wall style, they create an entire wall feature that rewards close inspection.
How to Make It: Purchase shadow boxes in a consistent size (IKEA’s SANNAHED frames work brilliantly for this). Decide on a theme — botanicals, coastal, travel, abstract — and create a cohesive collection. Each box should tell a small story. Use foam spacers, small shelves inside the box, or layers of matting to create genuine depth before placing your objects.
Expert Tip: Stick to a limited color palette across all boxes — 2 or 3 colors max — even if the objects vary. This is what makes a gallery wall look intentional rather than chaotic. I always lay mine out on the floor before hanging to get the spacing exactly right.
Why It Works: Shadow boxes have an heirloom, collected quality that makes any room feel more personal and layered. They’re also incredibly versatile — you can update the contents seasonally or as your taste evolves, which makes this a truly long-term investment.
What room are you tackling first with your DIY 3D wall art project — living room, bedroom, or somewhere unexpected like a bathroom or hallway? Tell me in the comments!
7. Giant Paper Flower Wall Backdrop — Drama on a Budget
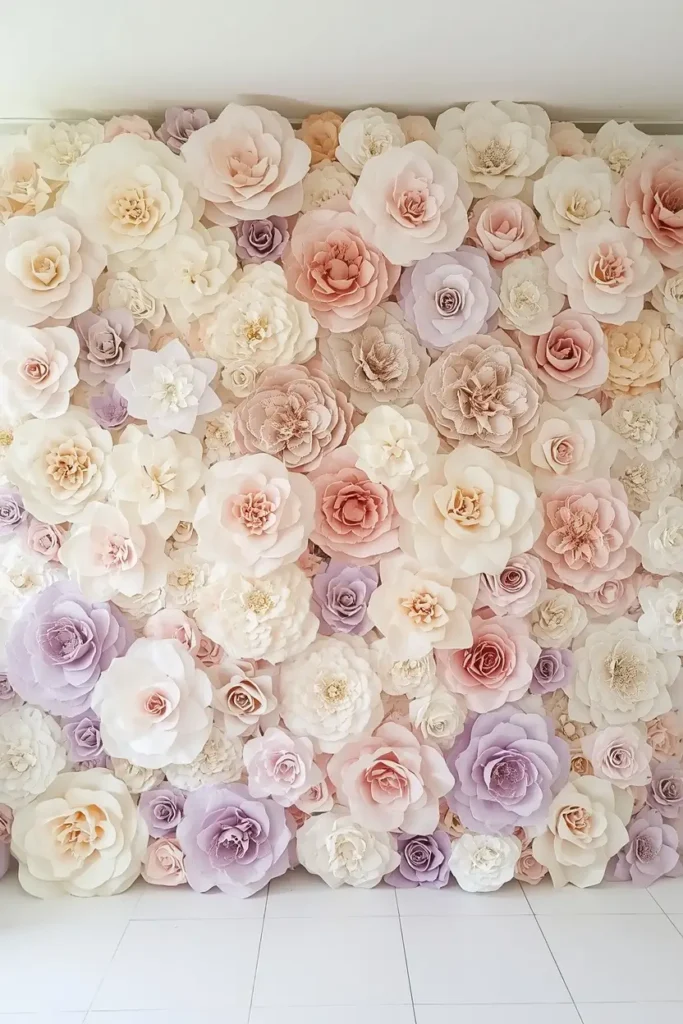
What You’re Looking At: Oversized paper flowers — think peonies, dahlias, or abstract blooms — clustered together on a wall in a lush, abundant arrangement. Each flower is 12–24 inches across and built from layers of crepe paper or cardstock petals, giving them genuine sculptural depth. The arrangement might be all-white for a wedding backdrop aesthetic, or a riot of color for a maximalist statement wall.
How to Make It: Crepe paper is the gold standard for these — it stretches and shapes more naturally than cardstock. Cut petal shapes in graduated sizes, curl the edges with a pencil, and layer from the outside in, gluing each layer to a circular backing. The centers can be filled with tightly rolled paper or tissue paper pom-poms. Mount finished flowers to the wall with Command strips or small nails through a loop of wire on the back.
Expert Tip: Vary the scale dramatically for the most impressive result. A backdrop with all same-sized flowers reads as repetitive; one that mixes enormous hero blooms with medium-sized secondary flowers and small accent pieces looks like a professional floral installation. Aim for roughly 30% large, 50% medium, 20% small.
Why It Works: Paper flowers are one of those projects that photograph outrageously well — they’re a Pinterest favorite for a reason. Made well, they’re genuinely indistinguishable from fabric flowers in photos, and they last for years if kept away from moisture. The time investment pays off enormously.
8. Geometric Wood Shelf Sculpture — Function Meets Art
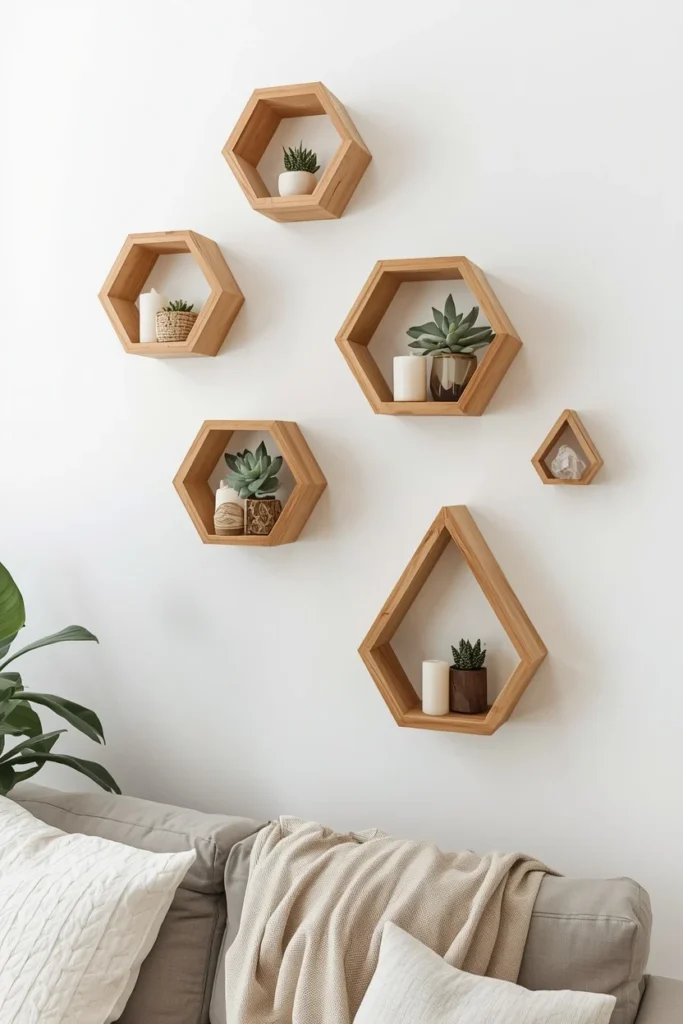
What You’re Looking At: A series of small geometric wooden shapes — hexagons, triangles, irregular polygons — mounted to the wall at varying depths and angles to create a sculptural shelf installation. Each shape is shallow enough to hold small decorative items (a tiny succulent, a candle, a crystal), but primarily exists as art. The result is something between a gallery wall and a shelving unit — dimensional, functional, and striking.
How to Make It: Cut your shapes from 1×4 or 1×6 pine using a miter saw or jigsaw (or buy pre-cut shapes from craft stores). Sand, stain or paint in a cohesive palette (all white, all walnut, or a mix of natural and painted), then mount to the wall with L-brackets or directly with wood screws into studs. Stagger them at different projection distances from the wall using different bracket depths.
Expert Tip: Before mounting anything permanently, tape paper templates of each shape to the wall and live with the arrangement for a day. What looks perfect from 3 feet away often needs tweaking from across the room, and you’ll save yourself a lot of wall patching.
Why It Works: This idea bridges the gap between art and storage, which makes it particularly appealing for small spaces. Every inch of wall space does double duty. It also photographs beautifully because the different depths create layers of shadow that read as real depth even in 2D photos.
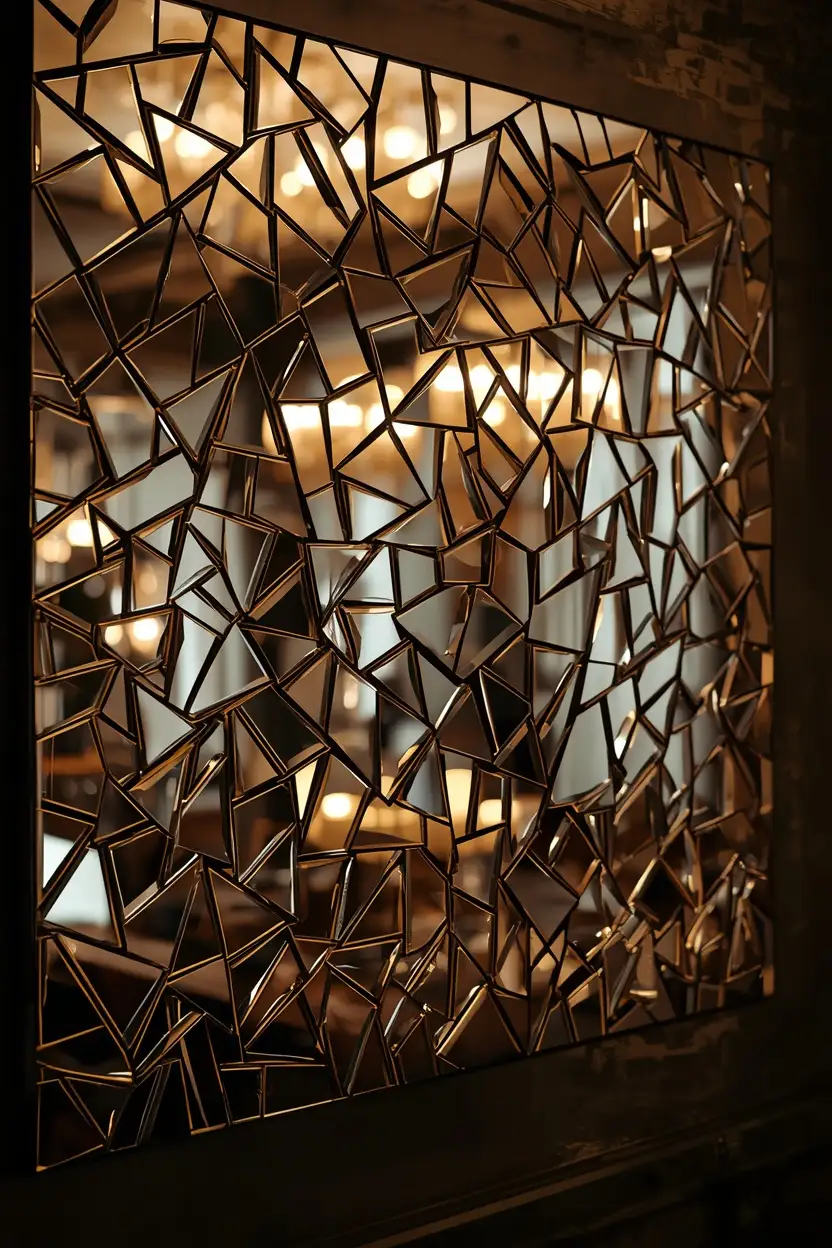
9. Broken Mirror Mosaic Panel — Light-Catching Wall Magic
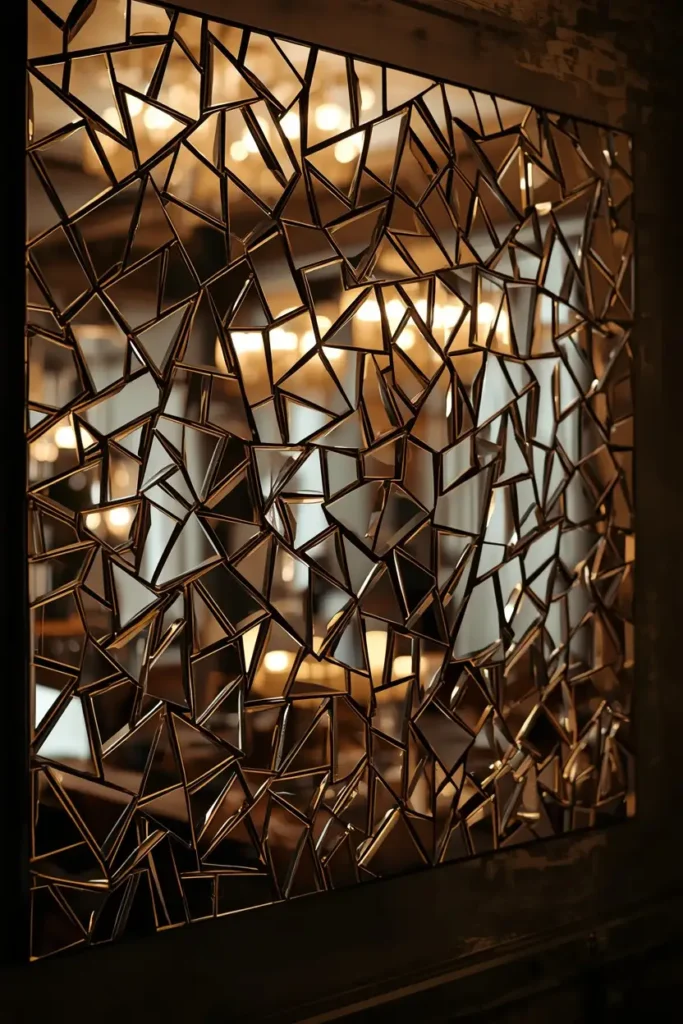
What You’re Looking At: A large canvas or wood panel completely covered in small irregular pieces of mirror, each reflecting the room from a slightly different angle. The effect is simultaneously glamorous and organic — like a disco ball that grew up. Depending on how the pieces are spaced and arranged, you can achieve anything from a tight, jewel-like texture to a looser, more artistic arrangement with visible grout lines.
How to Make It: Start with safety — use a proper mirror-cutting tool and always wear eye protection and gloves when handling broken mirror. Lay pieces face-down on a rubber mat before breaking with a hammer (or use mirror mosaic tiles from the craft store for a safer option). Apply to a pre-primed board with mirror adhesive, press firmly, and let cure fully before grouting. Use white or metallic grout for the most polished result.
Expert Tip: Consider going without grout entirely for a more contemporary look — tightly packed mirror shards with no fill lines between them create a seamless, faceted surface that’s absolutely mesmerizing. This only works if your pieces are fairly consistent in size and you’re meticulous about placement.
Why It Works: Mirrors make rooms feel larger and brighter, so a wall-mounted mirror mosaic does everything a regular mirror does — plus it functions as art. In a dark room or hallway, the light-bouncing effect is genuinely transformative.
10. Living Vertical Air Plant Wall Garden — Texture You Can Touch
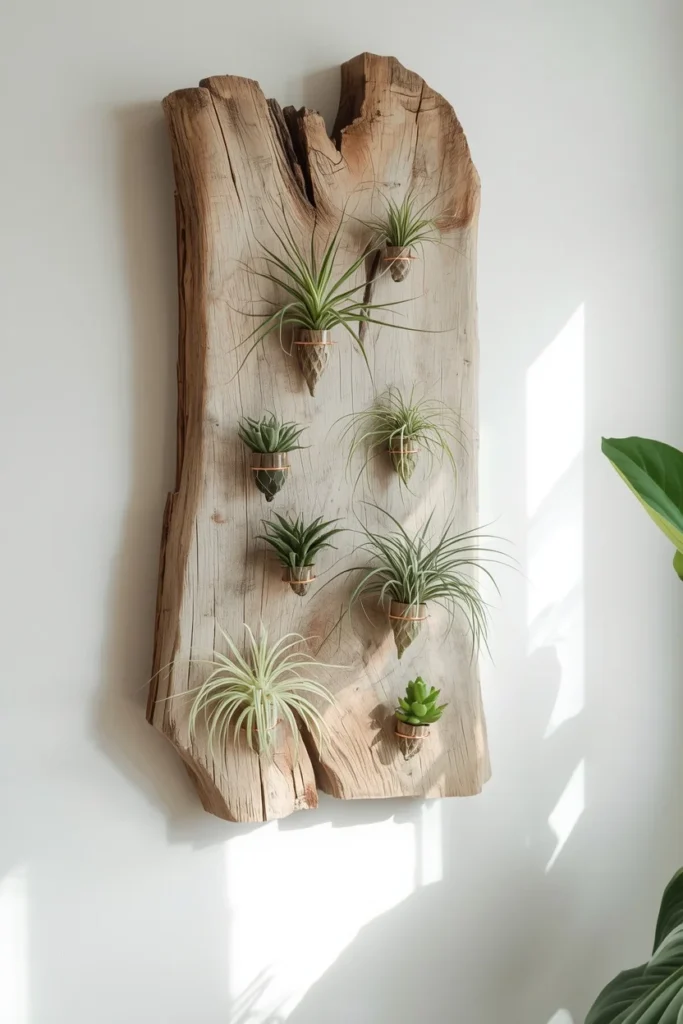
What You’re Looking At: A mounted wooden frame or driftwood panel covered in a collection of air plants (tillandsia) in a variety of shapes and sizes — spiky silver ones, soft rosetted ones, dramatic curling varieties — attached with copper wire or nestled in small holders. The living wall brings incredible organic texture to any room and changes slowly over time as the plants grow and occasionally bloom.
How to Make It: Source a weathered wood panel, driftwood slab, or purchase a purpose-built grid frame. Attach small copper wire loops or purchase wire air plant holders. Mount your tillandsia by gently securing them at their base — never tightly, as these plants need air circulation. Hang the panel on the wall and mist the entire installation 2–3 times per week.
Expert Tip: Position this away from direct sunlight and heating/AC vents. Tillandsia thrive in bright indirect light and moderate humidity — exactly the conditions most living rooms and bedrooms have naturally. The biggest killer of air plants is overwatering combined with poor airflow, so less is more when misting.
Why It Works: A living wall installation brings nature indoors in the most tactile, immersive way possible. Air plants are genuinely low-maintenance (no soil, no pots, no regular feeding), which means this isn’t a project that requires ongoing serious effort. It just lives there, looking incredible, growing slowly, occasionally surprising you with tiny colorful blooms.
Which of these 10 DIY 3D wall art ideas are you most excited to try? I’ve personally done the paper panels, the macramé hanging, and the wood slice mosaic — and I can honestly say all three got more compliments than anything I’ve bought. Tag me if you make one!
Quick Recap: 10 Easy DIY 3D Wall Art Ideas at a Glance
Here’s your fast-reference list when you’re ready to shop for materials:
- Geometric Paper Panels — Origami-style folded cardstock grid
- Wood Slice Mosaic — Natural birch rounds in organic arrangement
- Plaster Texture Canvas — Joint compound art with luxe finish
- Macramé 3D Wall Hanging — Layered knotted rope with sculptural depth
- Fabric Ribbon Waterfall — Sheer fabric strips for color and movement
- Shadow Box Gallery Wall — Miniature 3D scenes in a curated grid
- Giant Paper Flower Backdrop — Oversized crepe paper blooms
- Geometric Wood Shelf Sculpture — Functional art with real depth
- Broken Mirror Mosaic Panel — Light-catching shards on board or canvas
- Living Vertical Air Plant Garden — Real tillandsia on driftwood or frame
Final Thoughts: Your Walls Deserve Better
Here’s what I love most about DIY 3D wall art: it’s not just cheaper than buying art — it’s often better. Because you made it, it’s genuinely one-of-a-kind. Because it’s dimensional, it responds to real light in your real room in ways that printed art never can. And because you chose it, it tells your story.
You don’t need to tackle all 10 ideas. Pick one that fits your style, your budget, and your Saturday afternoon. Start there. I promise the first one will make you want to do three more.
And when you’re done with your walls? Your floors and furniture deserve some love too. Check out our guide to Small Room Makeover Ideas for the full room transformation treatment — it pairs perfectly with everything you just read.
Pin this post to save it for your next project. Your future self — standing in front of a gorgeous dimensional wall — will thank you.