10 DIY Watercolour Bookmarks That’ll Make You Actually Want to Finish Your Book Pile
This article was created in line with Trends Oraa’s research and content standards.
Your bookmark situation is a mess. A receipt. A folded napkin. The corner of the page, bent into oblivion.
I get it. I was there too.
That’s exactly why I fell down the DIY watercolour bookmark rabbit hole — and once you see how easy these are, you won’t go back to random paper scraps either.
These DIY watercolour bookmarks are cheap, fast, and genuinely beautiful. You don’t need to be “good at art.” You just need a brush, some paint, and ten minutes of quiet time that honestly feels more like therapy than crafting.
You might also love our guide on book nook ideas if you’re building out a whole cozy reading corner to go with your new handmade bookmarks — the two projects pair perfectly.
Stick with me here. I’m walking you through 10 different styles, from beginner-friendly washes to designer-level florals, plus a full buying guide so you don’t waste money on the wrong supplies.
Let’s get into it.
Why DIY Watercolour Bookmarks Are Having a Moment
Pinterest boards are flooded with these right now, and it’s not hard to see why.
- They cost pennies once you own basic supplies
- They make thoughtful, personal gifts
- They’re a low-pressure way to practice watercolour technique
- They give your reading nook a custom, curated feel
But here’s the important part: most tutorials online only show you one style. I wanted to give you a full range — from five-minute beginner projects to ones that look like they came from an Etsy shop.
Would you rather have something simple you can whip up tonight, or a slower, more detailed project for a rainy weekend? Keep that in mind as you scroll, because both are coming up.
What You’ll Need Before You Start
Let’s cover the basics quickly so you’re not scrambling mid-project.
- Watercolour paper — cardstock weight or heavier (this matters more than people think)
- Watercolour paints — pans or tubes both work
- Round and flat brushes — a size 6 round covers most of these projects
- A hole punch and ribbon, twine, or tassel thread
- Washi tape to mask off clean edges
- A water jar and paper towel — non-negotiable
Most people don’t know this, but the paper you choose matters far more than the paint brand. Cheap printer paper will buckle, pill, and ruin your design. Don’t skip that detail.
Now let’s get into the ten ideas.
1. The Classic Watercolour Wash Bookmark
What You’re Seeing
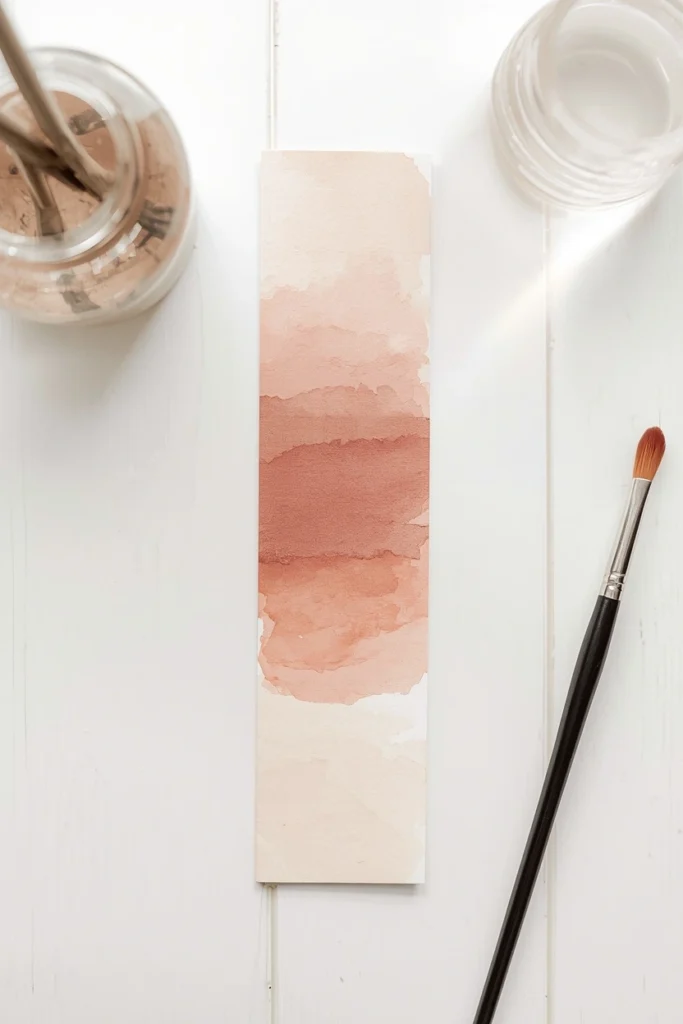
Picture a soft rectangle of paper in a single dreamy gradient — think dusty rose fading into cream, or ocean blue melting into white. Simple, elegant, and endlessly reusable as a gift idea.
Design Breakdown
This is the “starter” project, and honestly, it’s the one I still make the most. You wet the paper slightly, drop in one or two colors, and let gravity and water do the rest of the work.
Expert Tip
Tilt your paper gently while the paint is still wet. It creates a natural blend without a single brushstroke showing.
Why It Works
There’s something calming about a gradient. It mimics sunset skies and ocean horizons, which is part of why these feel so soothing to look at — even subconsciously.
Best For
- Small spaces
- Budget makeovers
- Renters
- Families
Common Mistake To Avoid
Using too much water. It causes the color to pool unevenly and dry with harsh water spots called “blooms” — unless that’s the effect you want.
Quick Wins
- Takes under 10 minutes start to finish
- Works with literally any two colors you own
- Great for using up paint you already have
- Perfect first project for kids or beginners
2. Ombre Watercolour Bookmarks With Metallic Edges
What You’re Seeing
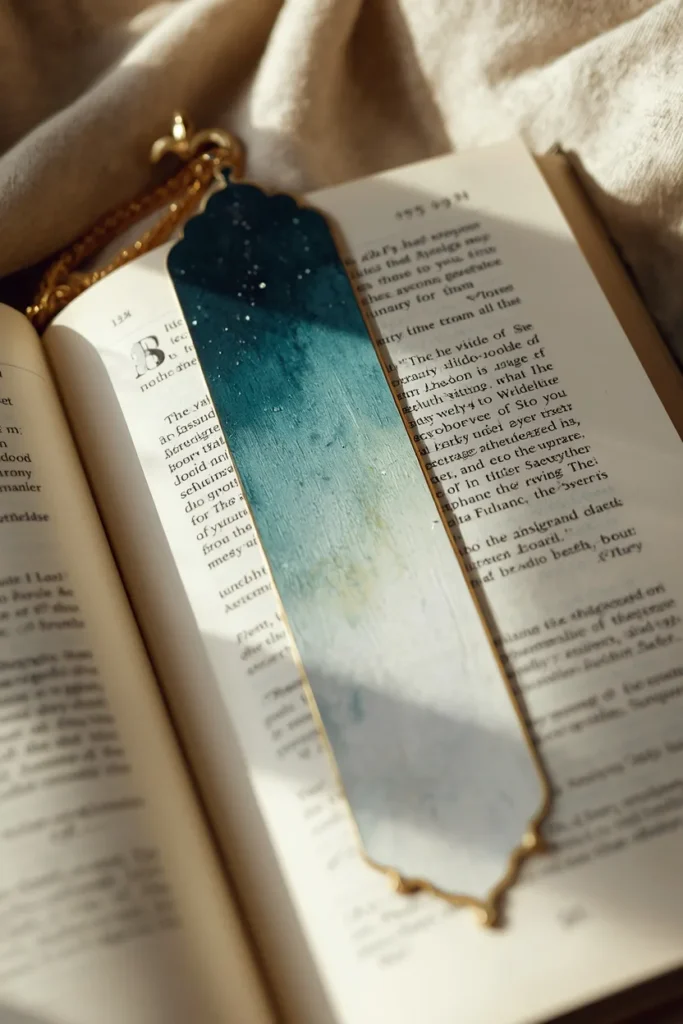
Imagine walking into a stationery boutique and picking up a bookmark with a smooth color gradient and a delicate gold-painted edge catching the light.
Design Breakdown
This one builds on the wash technique but adds a luxury touch. Once your gradient dries completely, you trace the border with a metallic paint pen or liquid gold acrylic.
Expert Tip
Let the base watercolour dry for a full hour before adding metallic detail — rushing this step causes smearing.
Why It Works
Metallic accents instantly elevate a simple craft into something that feels expensive. It’s the same psychological trick luxury packaging uses.
Best For
- Luxury homes
- Budget makeovers
- Renters
Common Mistake To Avoid
Skipping a light pencil guideline before adding the metallic border. Freehand gold lines wobble more than you’d expect.
Quick Wins
- Doubles as an elegant gift topper
- Pairs beautifully with wax-sealed stationery
- Great for wedding favors or bridal shower gifts
One thing I’ve learned: gold paint pens dry out faster than you’d think if you leave the cap off for even a minute. Keep a damp cloth nearby to wipe the tip between uses, and always test the flow on scrap paper first. This one habit alone saved me from ruining at least a dozen bookmarks.
Would you choose the simple wash or the metallic upgrade first? Both take roughly the same amount of time.
Most people waste more space than they realize — and the same goes for their crafting supplies. The next idea makes use of scraps you’d normally throw away.
3. Pressed Flower + Watercolour Bookmarks
What You’re Seeing
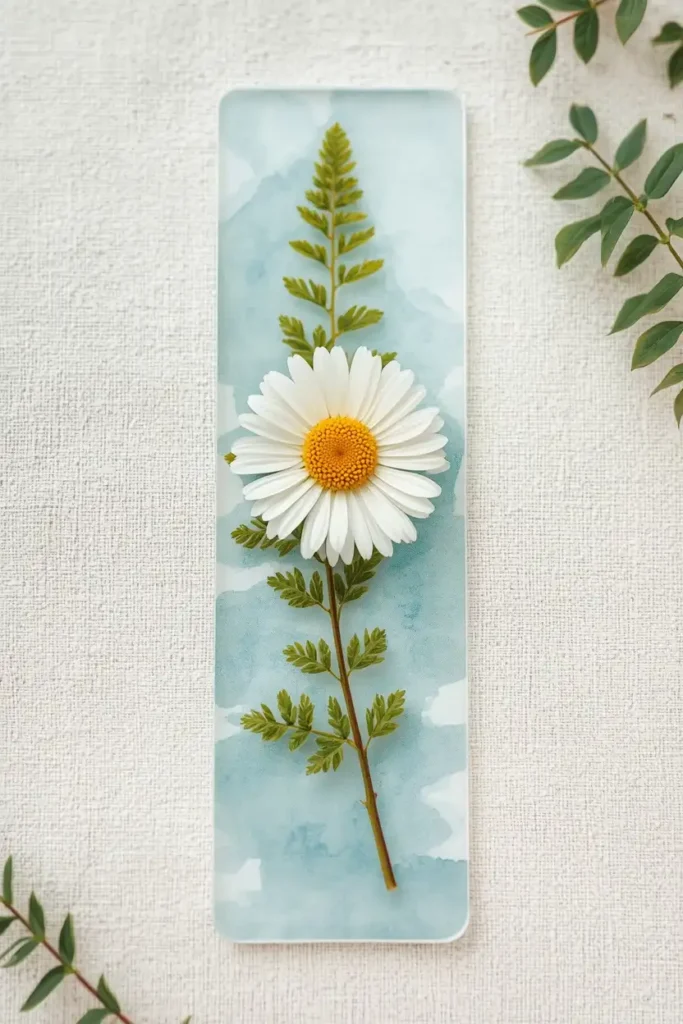
Picture a translucent painted background with a real pressed flower or fern layered on top, sealed under clear laminate or contact paper.
Design Breakdown
This is where nature meets paint. You create a light watercolour wash first, let it dry, then arrange pressed botanicals before sealing the whole thing.
Expert Tip
Press your flowers for at least a week between heavy books before using them — rushed pressing leads to moldy, discolored petals.
Why It Works
Combining a real, textured element with a painted background creates depth that flat paint alone can’t achieve. It also feels more personal, since the flower likely came from your own yard or a meaningful trip.
Best For
- Small spaces
- Families
- Budget makeovers
Common Mistake To Avoid
Using flowers that are too thick or moisture-heavy — they won’t press flat and will tear your laminate seal.
Quick Wins
- Great way to preserve flowers from a bouquet or wedding
- No painting skill required for the botanical layer
- Sentimental gift for grandparents or teachers
You May Also Like:
- Reading Corner Ideas
- Book Nook Ideas
- Bedroom Bookshelf Ideas
- Library Room Ideas
- Bookshelf Styling With Lots of Books
Here’s where it gets interesting — the next few ideas move away from soft washes and into bolder, more graphic styles.
4. Galaxy and Night Sky Watercolour Bookmarks
What You’re Seeing
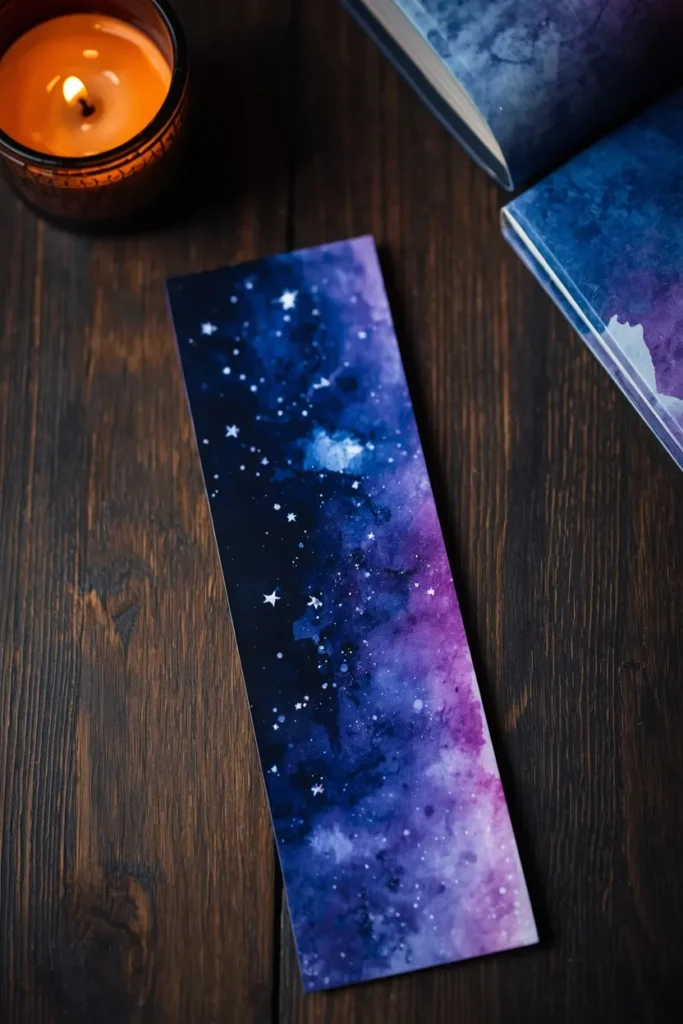
Think deep indigo and violet blending into black, speckled with tiny white dots that look exactly like stars scattered across a night sky.
Design Breakdown
You layer navy, purple, and a touch of black wet-on-wet, then flick white paint (or a toothbrush splatter technique) once the base is dry to mimic stars.
Expert Tip
Use a toothbrush dipped lightly in white paint and run your thumb across the bristles for a controlled, even star-splatter effect.
Why It Works
Dark, moody colors read as dramatic and sophisticated, which makes this a favorite for teen bedrooms and fantasy-book lovers alike.
Best For
- Families
- Small spaces
- Budget makeovers
Common Mistake To Avoid
Overloading the toothbrush with paint — it creates big blobs instead of fine star-like dots.
Quick Wins
- A hit with fantasy and sci-fi readers
- Works great as a set of matching gifts
- Easy to customize with constellation shapes
5. Geometric Watercolour Bookmarks
What You’re Seeing
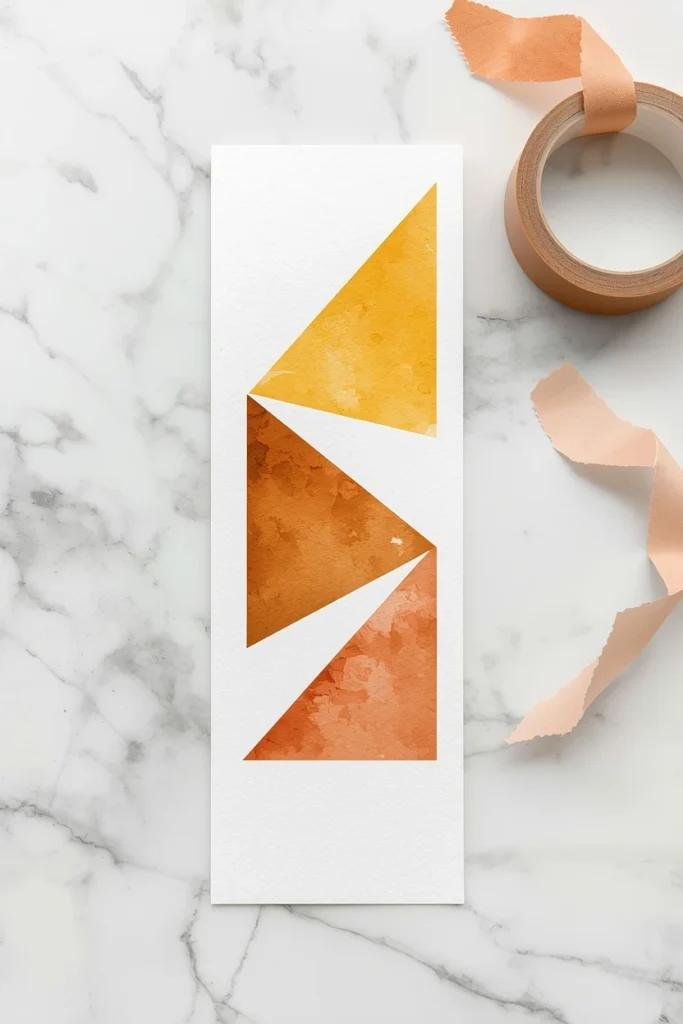
Picture crisp triangles or diamond shapes in bold, contrasting colors, separated by clean white lines where the paper shows through.
Design Breakdown
This style relies entirely on masking tape. You tape off your shapes first, paint inside the lines, then peel the tape away once dry to reveal sharp, graphic edges.
Expert Tip
Press the tape down firmly with your fingernail along every edge — any gaps let paint bleed underneath and ruin the crisp line.
Why It Works
Clean geometric shapes appeal to people who love modern, minimalist design. It’s structured, which makes it feel more “finished” even with beginner-level painting skill.
Best For
- Luxury homes
- Small spaces
- Renters
Common Mistake To Avoid
Peeling the tape while the paint is still wet — always wait until it’s fully dry, or you’ll smear the edges.
Quick Wins
- No advanced brush skills required
- Looks intentional and professional every time
- Great for matching a modern home office
Here’s where it gets interesting: washi tape and painter’s tape behave very differently on watercolour paper. Washi tape is gentler but lets more paint seep underneath, while painter’s tape holds a sharper line but can tear the paper surface if your paper is too thin. If you’re going for crisp geometric edges, spring for a slightly heavier cardstock — it makes a noticeable difference.
The next idea is one designers secretly love — it’s deceptively simple, but it photographs beautifully for gifting or shop displays.
6. Minimalist Single-Stroke Botanical Bookmarks
What You’re Seeing
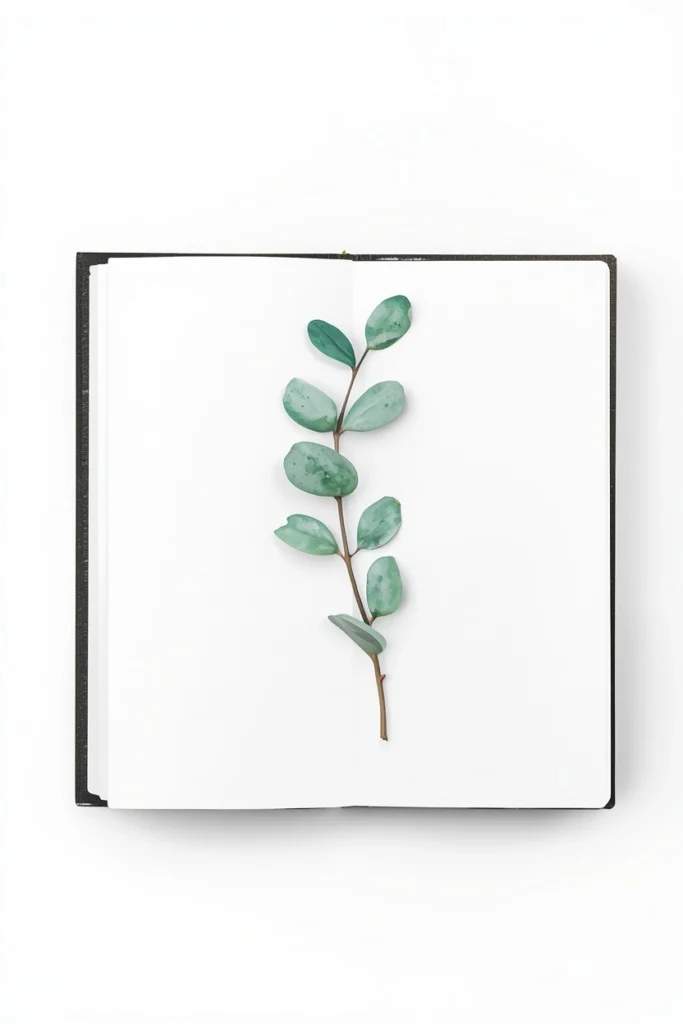
Imagine one delicate stem or leaf painted in a single confident brushstroke, floating on plenty of white space.
Design Breakdown
Less is more here. Instead of a full floral scene, you’re painting one small, loose botanical element — a eucalyptus sprig, a single leaf, a tiny wildflower.
Expert Tip
Load your brush generously, then paint in one continuous motion without going back over your stroke. Overworking it is what makes it look stiff.
Why It Works
Negative space draws the eye directly to the design, which makes even a shaky brushstroke look intentional and artistic.
Best For
- Small spaces
- Renters
- Budget makeovers
- Luxury homes
Common Mistake To Avoid
Trying to add too much detail. This style depends on restraint — one stem, one color, done.
Quick Wins
- Fastest project on this entire list
- Uses barely any paint
- Ideal for practicing brush control
Which of these ideas would work best in your home — the bold geometric style, or this quieter minimalist one?
7. Watercolour Monogram Bookmarks
What You’re Seeing
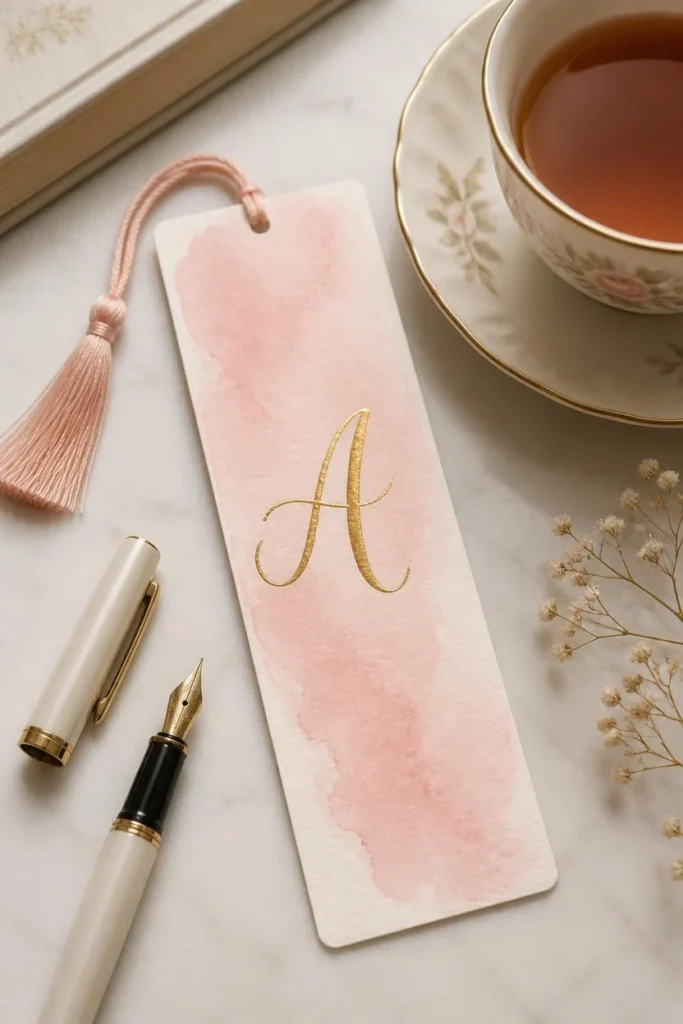
Picture a soft painted background with a single hand-lettered initial layered on top in ink or a fine-tip brush pen.
Design Breakdown
Paint your wash or gradient background first, let it dry completely, then hand-letter an initial once the surface is stable enough to write on.
Expert Tip
Practice your letter on scrap paper first — watercolour paper has more texture than regular paper, and pens can skip if you’re not used to it.
Why It Works
Personalization makes any handmade item feel significantly more valuable. A monogrammed bookmark reads as a thoughtful, custom gift rather than a generic craft.
Best For
- Families
- Budget makeovers
- Renters
Common Mistake To Avoid
Writing on paper that isn’t fully dry — even slightly damp watercolour paper will make ink bleed and feather.
Quick Wins
- Perfect for teacher gifts and book clubs
- Easy to batch-make for a whole family
- Doubles as a place card at dinner parties
You May Also Like:
- 17 Amazing DIY Birthday Gifts for Friends
- 10 Easy Handmade Birthday Card Ideas
- DIY Organization Hacks
- Documents Organization Ideas
- Fabric Wall Decor Ideas
This is where many homeowners make a mistake — they assume beautiful crafts need expensive materials. That’s exactly what the next section is about to bust wide open.
The Real Buying Guide for Watercolour Bookmark Supplies
Let’s slow down for a second, because this is the part most tutorials skip entirely, and it’s honestly the difference between bookmarks that look store-bought and ones that fall apart in a week.
Paper matters more than paint.
- 140lb cold-press watercolour paper ($8–15 for a pad) is the sweet spot — it handles water without buckling
- Cardstock (110lb+) works fine for light washes, but struggles with wet-on-wet techniques
- Avoid anything under 90lb — it warps almost immediately
Paint: pans vs. tubes
- Pan sets ($10–25) are beginner-friendly, portable, and mess-free
- Tube paints ($15–40) give richer pigment and are better for larger batches
- Student-grade paint is completely fine for bookmarks — you don’t need artist-grade pigment for a project this small
Brushes worth owning
- A size 6 round brush covers 80% of these projects
- A fine liner brush (size 0 or 1) handles detail work and lettering
- A cheap flat brush is useful for washes and backgrounds
Finishing supplies
- Laminating sheets or clear contact paper ($5–10) — protects your bookmark for years
- A hole punch and ribbon or tassel cord ($3–8)
- Optional: a paper trimmer for perfectly straight edges
Common mistakes to avoid when buying supplies:
- Buying a huge paint set when you only need 6–8 core colors
- Skipping lamination, then wondering why the bookmark curls or stains
- Choosing brushes that are too large for detail work
- Overspending on “kits” that include tools you’ll never use
Realistic budget breakdown:
- Ultra-budget starter kit: $15–20 (basic pan paints, cardstock, one brush)
- Mid-range setup: $35–50 (quality paper, tube paints, a few brush sizes)
- Full hobby kit with lamination and finishing tools: $60–80
Here’s the honest truth: you can make a beautiful bookmark with a $15 starter kit. The upgrades matter more once you’re making these regularly or selling them.
What’s your biggest challenge right now — picking supplies, or actually finding time to sit down and paint?
8. Abstract Splatter Watercolour Bookmarks
What You’re Seeing
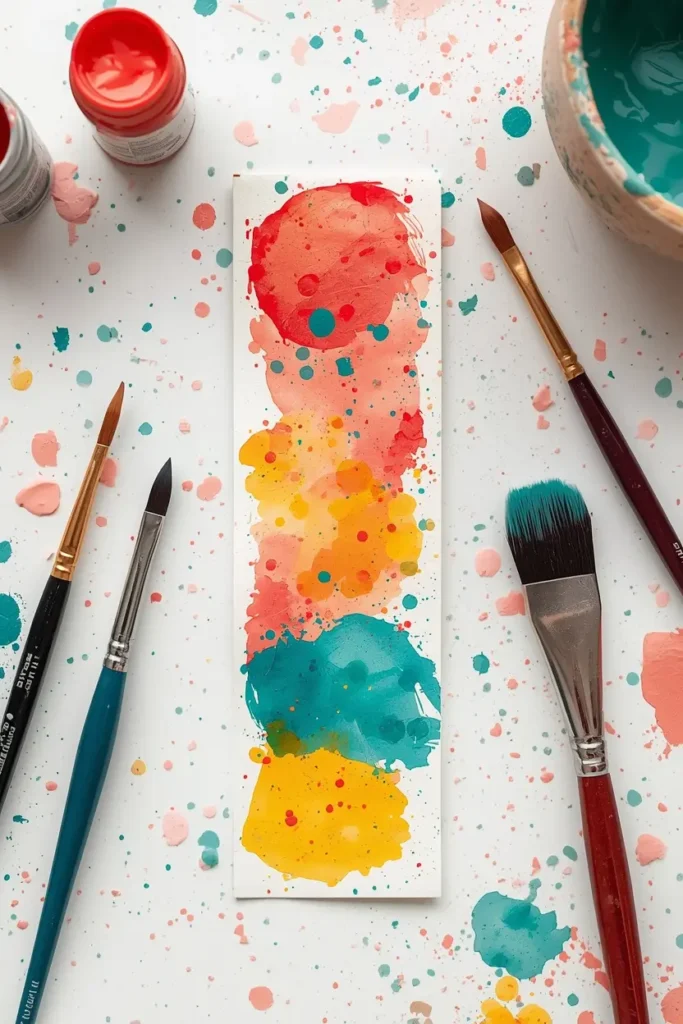
Think loose, energetic paint splatters in two or three coordinating colors, scattered across a plain background with no defined shape at all.
Design Breakdown
This is the loosest, most forgiving technique on the list. Load a brush with diluted paint and flick it toward your paper from a few inches away.
Expert Tip
Protect your work surface first — this technique gets messy fast, and that’s actually part of the appeal.
Why It Works
Abstract, imperfect designs feel modern and artistic precisely because they can’t be replicated exactly. Every single one is a genuine original.
Best For
- Families
- Small spaces
- Budget makeovers
Common Mistake To Avoid
Using paint that’s too thick — it creates heavy blobs instead of a delicate splatter effect. Dilute it more than feels natural.
Quick Wins
- Ideal for kids’ craft afternoons
- Zero precision required
- Great way to use up leftover paint mixtures
Most people don’t know this: splatter technique actually works better with slightly older, more diluted paint than fresh pigment. Fresh paint tends to clump and splatter unevenly, while paint that’s been sitting mixed for a bit flicks more smoothly off the brush. Save your “tired” paint mixes for this exact project instead of tossing them.
Don’t skip the next tip — this next style is the one that surprised me the most out of everything on this list.
9. Seasonal and Holiday Watercolour Bookmarks
What You’re Seeing
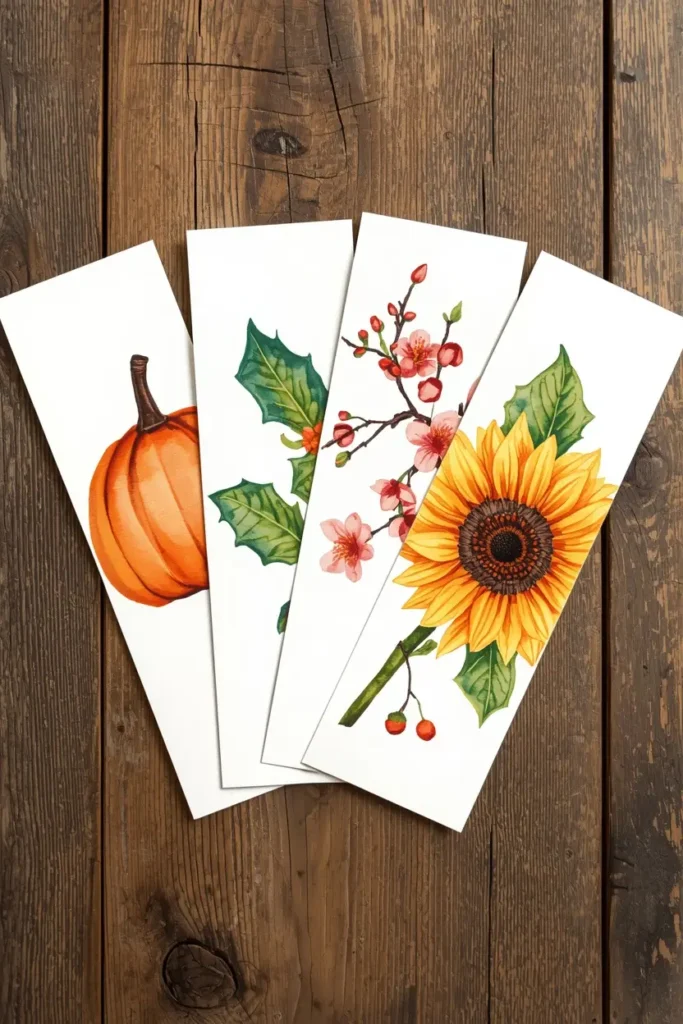
Picture tiny painted pumpkins in autumn tones, delicate holly sprigs for winter, or soft cherry blossoms for spring — each one tucked into a slim bookmark shape.
Design Breakdown
This simple change can completely transform the room — or in this case, your whole gifting strategy. Instead of one static design, you rotate colors and motifs with the seasons.
Expert Tip
Batch these in sets of 10–12 during a single sitting, using the same background wash technique with different seasonal accents painted on top.
Why It Works
Seasonal items tap into anticipation and nostalgia, which is part of why holiday markets and craft fairs sell out of them so quickly.
Best For
- Families
- Budget makeovers
- Renters
Common Mistake To Avoid
Making them too intricate for a quick seasonal gift — simplicity sells better and takes a fraction of the time.
Quick Wins
- Great for craft fair or Etsy shop inventory
- Doubles as festive gift tags
- Easy to theme around any holiday
10. Tassel-Accented Statement Bookmarks
What You’re Seeing
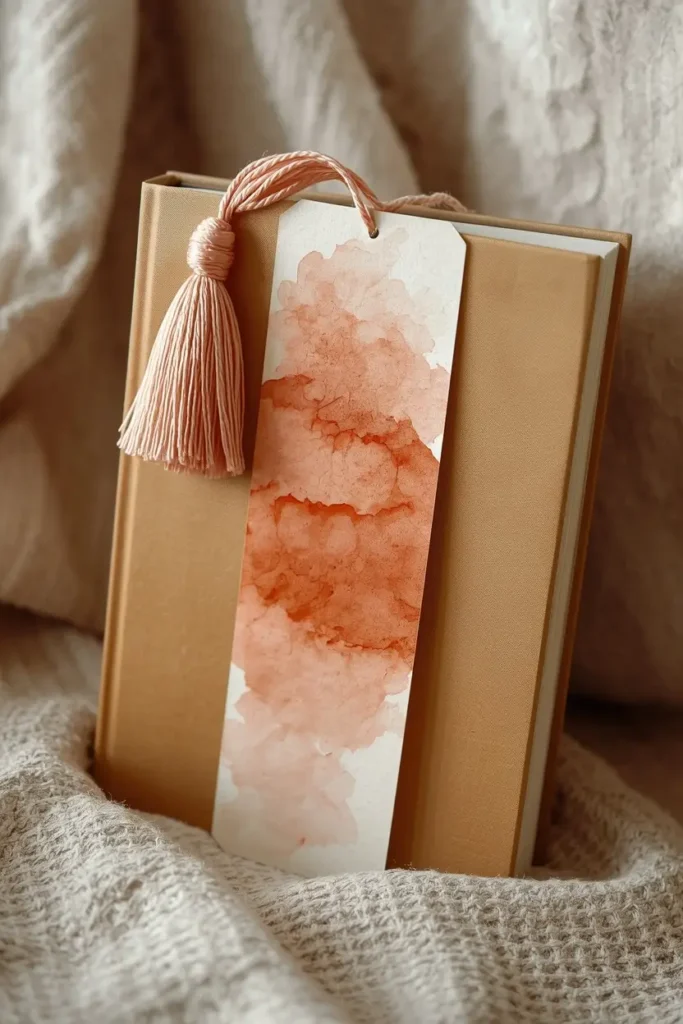
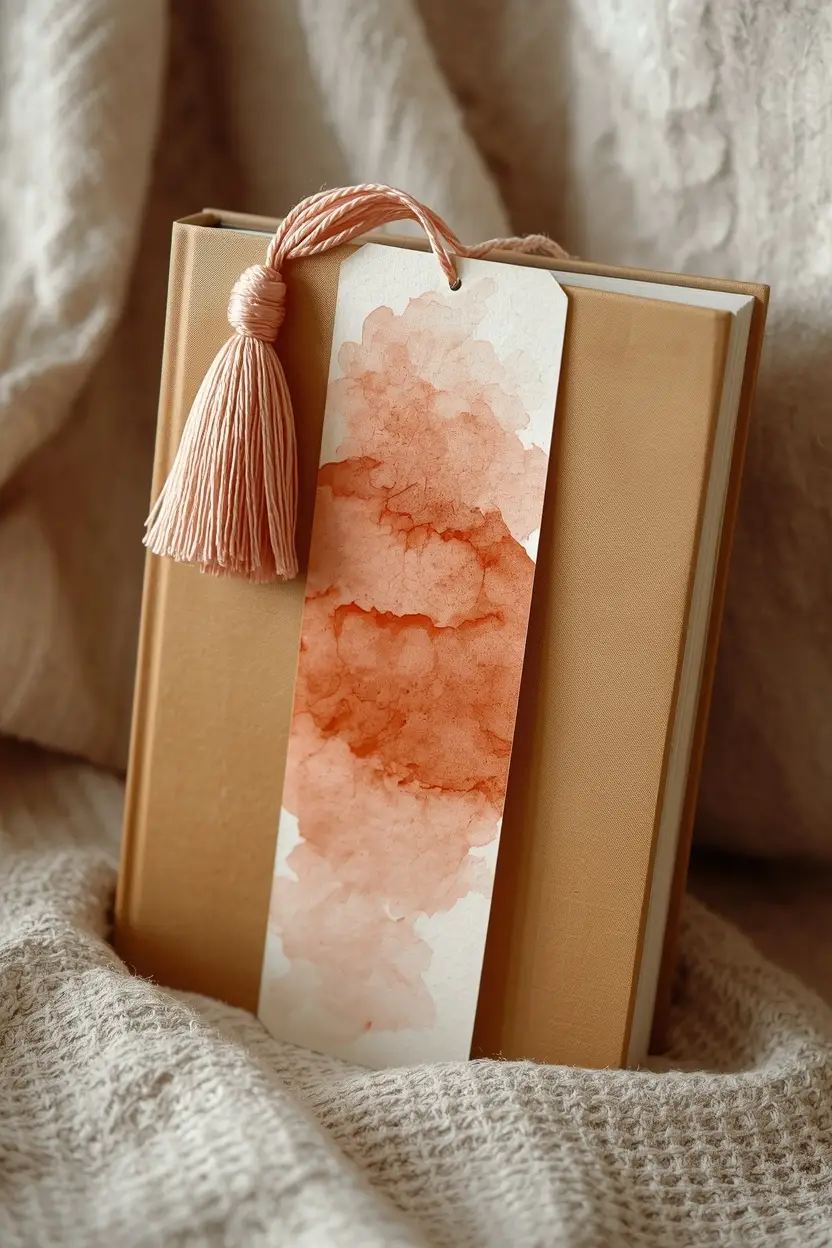
Visualize the difference a simple tassel makes — a beautifully painted bookmark suddenly looks finished, boutique-quality, and ready to gift the moment you attach a colorful cord or tassel to the top.
Design Breakdown
This is less about the paint technique and more about presentation. Any of the nine designs above can be transformed with this final step.
Expert Tip
Match your tassel color to the lightest shade in your painted design, not the darkest — it keeps the bookmark feeling balanced instead of top-heavy.
Why It Works
Small tactile details like tassels increase perceived value dramatically. It’s the same reason a ribbon-tied gift feels more special than one in a plastic bag.
Best For
- Luxury homes
- Budget makeovers
- Renters
- Small spaces
Common Mistake To Avoid
Punching the hole too close to the edge — the paper tears easily near the border, especially after lamination.
Quick Wins
- Turns any basic design into a finished gift
- Costs under $1 per bookmark in tassel materials
- Works with embroidery floss if you don’t own tassel cord
Let me know which one is your favorite — I genuinely go back and forth between the ombre and the pressed flower style depending on my mood.
Related Reading & Reading Nook Ideas
If painting these bookmarks has you newly inspired to build out your whole reading setup, you’re going to want to keep exploring. Here’s where to go next:
- Book Nook Ideas
- Reading Corner Ideas
- Bedroom Bookshelf Ideas
- Library Room Ideas
- 15 Brilliant Bookshelf Styling Ideas
- Small Desk Ideas
- Window Seat Ideas
- Cosy Bedroom Ideas
Final Thoughts: Pick One and Just Start
Here’s the recap: you’ve got ten totally different directions to take these DIY watercolour bookmarks, from a five-minute ombre wash to a full seasonal batch you could sell at a craft fair.
Don’t overthink which one to try first. Pick whichever design made you pause while scrolling, gather your supplies tonight, and give yourself twenty quiet minutes this week to actually make it.
That’s really the whole secret. Momentum beats perfection every time with a project this forgiving.
So — which idea are you trying first, the classic wash or the galaxy design?
And once you’ve got your bookmarks sorted, it only makes sense to give them a proper home. Our book nook ideas guide is the natural next stop if you want your whole reading corner to feel just as intentional as the bookmark tucked inside your current read.
There’s a reason this pairing keeps showing up together on Pinterest boards everywhere — once you start one project, the other tends to follow.
Frequently Asked Questions
1. What kind of paper is best for DIY watercolour bookmarks? 140lb cold-press watercolour paper holds up best. It resists warping and handles both wet washes and detailed brushwork.
2. Do I need expensive watercolour paints for this project? No. Student-grade pan or tube paints work perfectly well for a small project like this — you don’t need artist-grade pigment.
3. How do I keep my watercolour bookmarks from curling? Laminate them or seal them with clear contact paper once fully dry. This also makes them far more durable for everyday use.
4. Can kids make these DIY watercolour bookmarks too? Absolutely. The wash technique and splatter technique are especially beginner-friendly and low-pressure for younger crafters.
5. How long does it take for watercolour paint to fully dry before laminating? Give it at least an hour, though overnight drying is safest, especially for heavier washes or layered designs.
6. What’s the cheapest way to start this hobby? A basic $15–20 starter kit with pan paints, one brush, and cardstock is enough to make beautiful first attempts.
7. Can I sell handmade watercolour bookmarks? Yes, many crafters sell these at markets and on Etsy. Seasonal designs and monogrammed styles tend to sell especially well.
8. What’s the best way to attach a tassel or ribbon? Punch a hole at least a quarter inch from the top edge, then thread and knot embroidery floss or a pre-made tassel cord through it.
9. How do I stop watercolour paint from bleeding under my tape lines? Press tape edges down firmly with your fingernail, and only paint over areas where the tape is fully sealed against the paper.
10. Are DIY watercolour bookmarks a good gift idea? Definitely — they’re personal, inexpensive to make in batches, and feel far more thoughtful than a store-bought option.