10 Kitchen Countertop Storage Ideas That Will Finally Fix Your Clutter Problem
This article was created in line with Trends Oraa’s research and content standards.
Your counters are drowning. Again. You wipe them clean on Sunday, and by Wednesday they’re buried under mail, mugs, and mystery cords.
Sound familiar? You’re not alone, and it’s not because you’re messy.
It’s because most kitchens are designed for looks, not for real life — and today that changes. I’m walking you through 10 kitchen countertop storage ideas that actually work, not just Pinterest fantasies that fall apart the moment real groceries show up.
You might also love our guide on Kitchen Countertop Ideas if you want to go even deeper into countertop design before diving into storage — it pairs perfectly with everything below.
Keep scrolling, because idea #4 alone changed how I use my kitchen every single morning.
Why Kitchen Countertop Storage Matters More Than You Think
Storage isn’t just about hiding clutter. It’s about how your kitchen feels every time you walk into it.
A cluttered counter raises your stress before you’ve even made coffee. A well-organized one does the opposite — it makes cooking feel easy, even joyful.
That’s the real goal behind good kitchen countertop storage: less friction, more flow.
Imagine walking into your kitchen and every single surface has a purpose. No random piles. No “I’ll deal with that later” corner.
That’s what we’re building toward here.
1. Vertical Riser Shelves for Small Appliances
What You’re Seeing
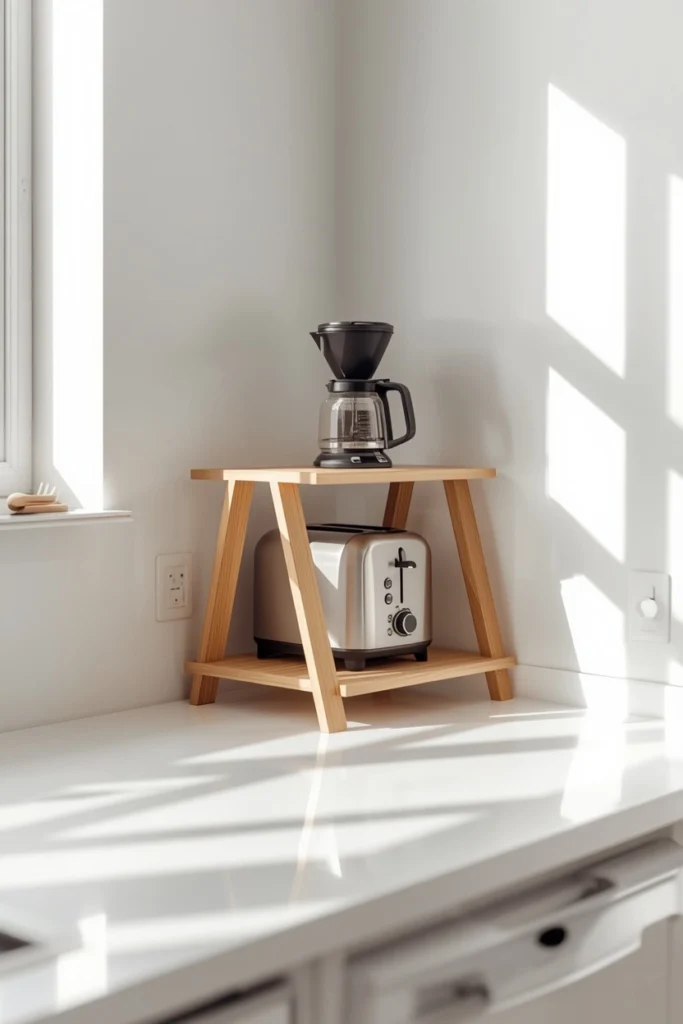
Picture a slim wooden riser shelf sitting on the counter, lifting your coffee maker and toaster up onto a second level. Underneath, there’s a clean strip of open counter space you didn’t have before — perfect for a cutting board or fruit bowl.
Design Breakdown
Riser shelves work by using vertical space instead of spreading appliances across the counter horizontally. Most kitchens waste the airspace above small appliances completely.
A simple two-tier riser can hold your coffee maker on top and mugs or pods underneath, effectively doubling your usable counter footprint without adding a single inch of cabinetry.
Expert Tip
Choose a riser with a weight rating slightly higher than what you think you need — heavier stand mixers and espresso machines are notorious for sagging cheap shelves over time.
Why It Works
This idea works because it solves a spatial problem, not a clutter problem. You’re not removing items, you’re reorganizing dimension — and that subtle shift instantly makes a counter feel 30% bigger.
Best For
- Small spaces
- Renters
- Budget makeovers
Common Mistake To Avoid
Don’t stack risers so high that reaching your coffee maker becomes a daily workout. Keep frequently used appliances within easy arm’s reach.
Quick Wins
- Instantly frees up horizontal counter space
- Works in rentals with zero installation
- Costs under $30 in most cases
- Pairs well with almost any kitchen style
Would you choose function or style here? Honestly, this is one of the rare ideas that gives you both.
2. Magnetic Knife Strips Instead of Countertop Blocks
What You’re Seeing
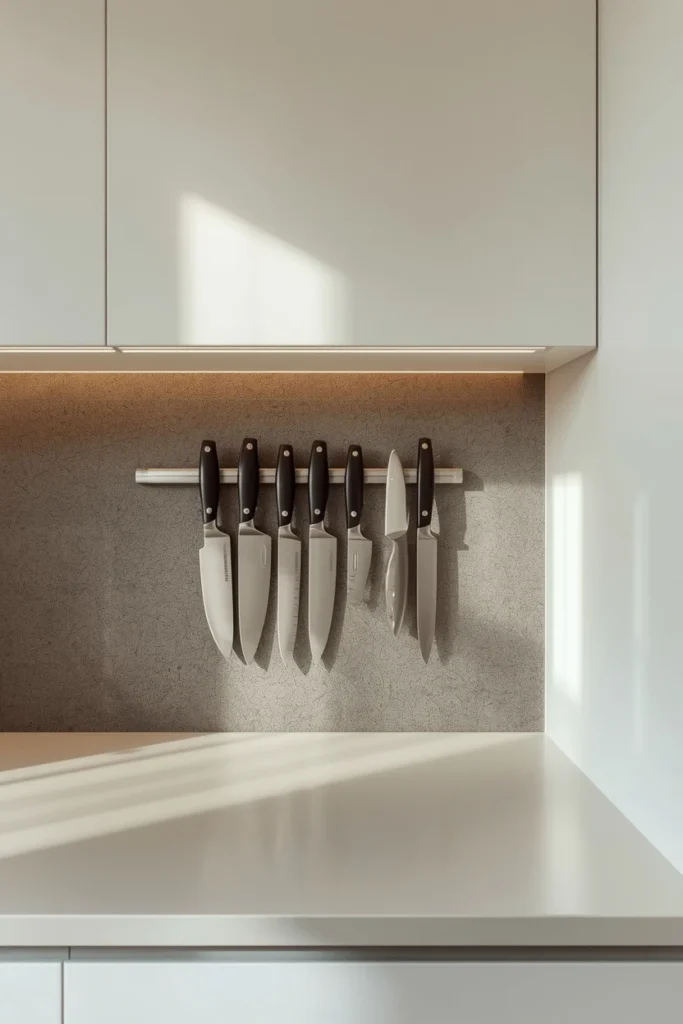
A sleek magnetic strip mounted just below the upper cabinets, holding a full set of knives in a neat, floating row. No block. No drawer digging. Just clean, exposed counter underneath.
Design Breakdown
Traditional knife blocks eat up more counter real estate than people realize — often 6 to 8 inches of depth that could otherwise hold a cutting board or utensil crock.
Mounting knives on a magnetic strip pulls that entire footprint off your countertop and onto the wall, where it becomes almost decorative.
Expert Tip
Install the strip at a height where the tallest knife handle still clears the counter below, so nothing bumps into your workspace while you’re prepping food.
Why It Works
Removing bulky objects from eye level and countertop space reduces visual clutter almost instantly, which is why designers use this trick constantly in small kitchen renovations.
Best For
- Small spaces
- Families
- Luxury homes
Common Mistake To Avoid
Skipping stud placement. Mounting directly into drywall without anchors is the number one reason magnetic strips eventually fall — along with your favorite chef’s knife.
Quick Wins
- Frees a full 6-8 inches of counter depth
- Keeps knives visible and easy to grab
- Looks intentional and modern
- Improves kitchen safety by keeping blades off the counter
Most people don’t know this: magnetic strips actually keep knives sharper longer than blocks do, since blades aren’t sliding against slots every time you grab one.
MINI EXPERT INSIGHT
Here’s where it gets interesting. I used to think knife blocks were non-negotiable until I measured how much counter space mine was hogging — nearly a foot of depth along my busiest prep zone. Swapping to a magnetic strip gave me back an entire cutting station. If you’re tight on space, this is one of the highest-impact, lowest-cost changes you can make this weekend.
But here’s the important part: this same “get it off the counter and onto the wall” logic applies to almost everything in your kitchen, and it’s the secret thread running through the rest of this list.
Most people waste more space than they realize.
3. Tiered Lazy Susans for Corner Counters
What You’re Seeing
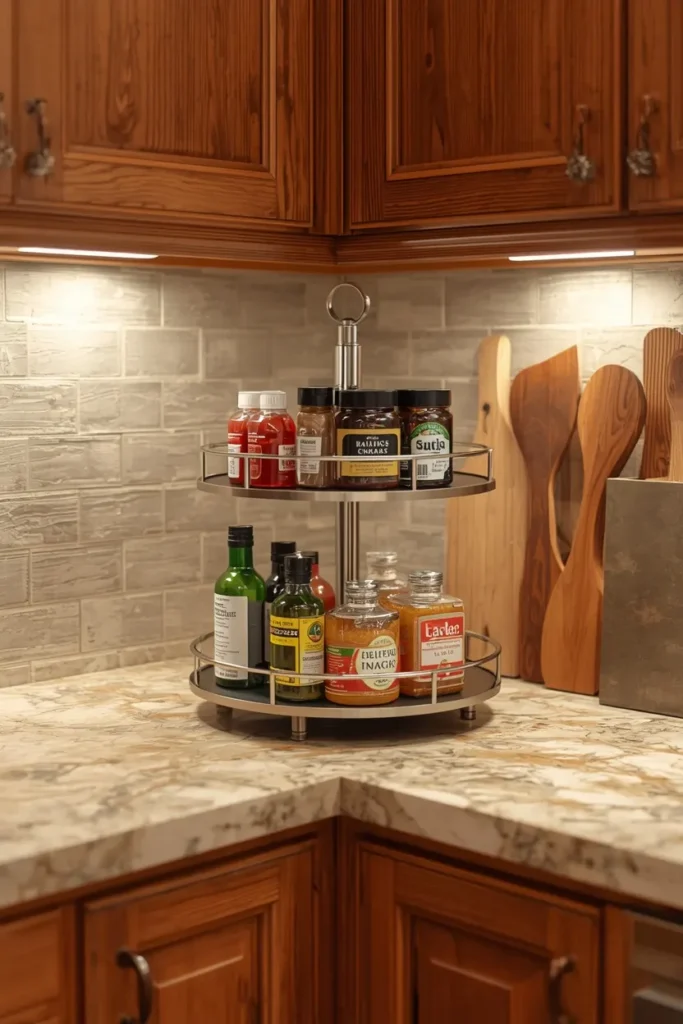
A round, two-tiered rotating tray tucked into the awkward corner where two countertops meet, holding oils, spices, and everyday condiments in an organized spin.
Design Breakdown
Corner counters are notoriously the most wasted zone in any kitchen. Items get pushed back, forgotten, and eventually replaced because nobody remembers they exist.
A tiered lazy Susan solves this by making the entire corner reachable with one spin, instead of requiring you to lean and dig.
Expert Tip
Group items by use — cooking oils on one tier, everyday condiments on another — so you’re not spinning past ketchup to find olive oil mid-recipe.
Why It Works
This idea works because it turns a dead zone into active storage, and it reduces the number of decisions your brain makes while cooking, which genuinely lowers kitchen stress.
Best For
- Small spaces
- Families
- Budget makeovers
Common Mistake To Avoid
Overloading the top tier and underusing the bottom tier is the most common issue. Balance the weight and the visibility across both levels.
Quick Wins
- Reclaims dead corner space instantly
- No installation required
- Keeps everyday items visible
- Works in almost any kitchen layout
Which of these ideas would work best in your home so far? I’d genuinely love to know.
You May Also Like:
- Kitchen Pantry Ideas
- Organized Kitchen Shelving Ideas
- Small Kitchen Ideas
- Kitchen Island Ideas
- Modern Kitchen Island Ideas
The next idea changes everything about how you think of your coffee station.
4. A Dedicated Coffee and Beverage Station
What You’re Seeing
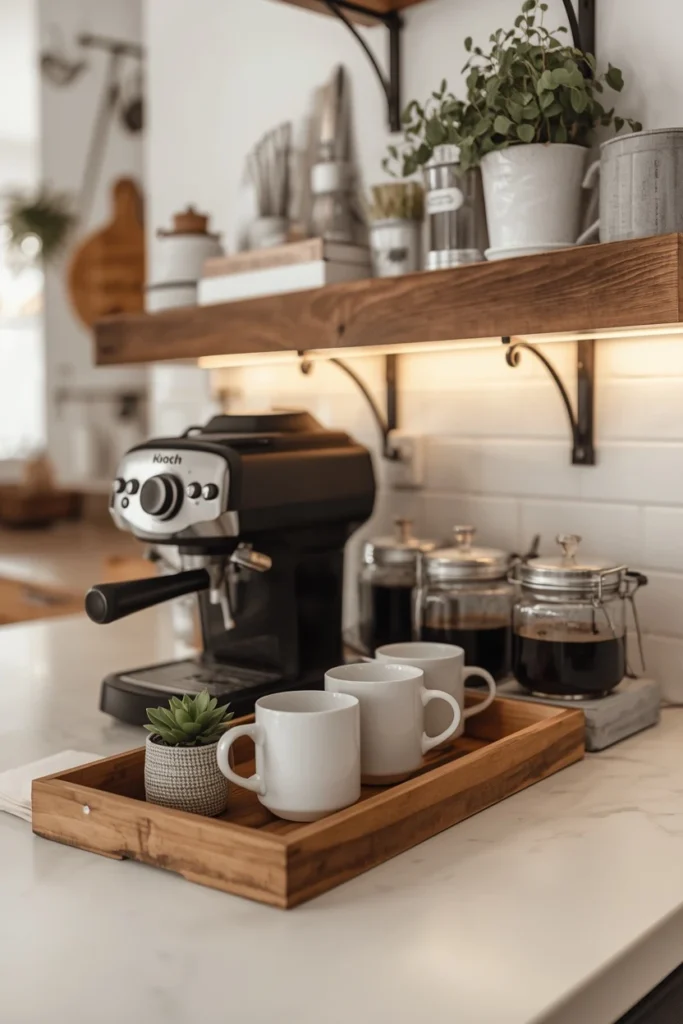
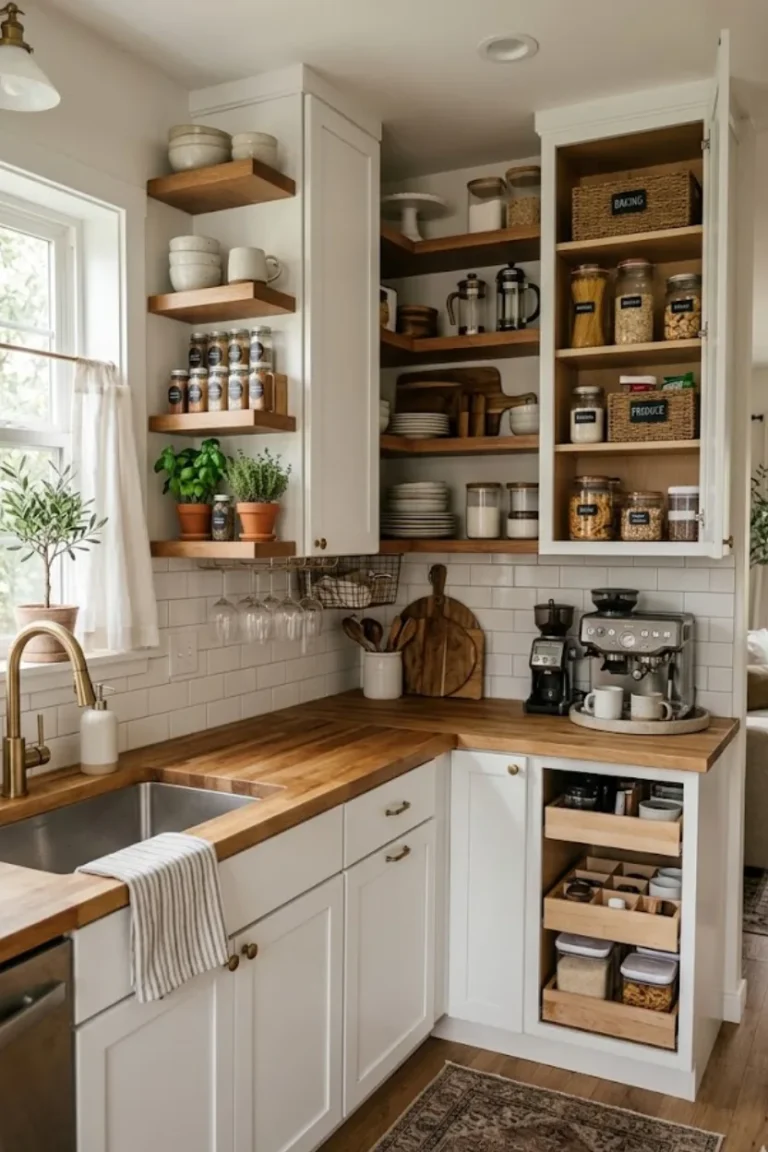
A styled corner of the counter with an espresso machine, a small tray of mugs, a canister of grounds, and a tiny plant — all contained within one visually defined zone, rather than scattered.
Design Breakdown
The idea behind a beverage station isn’t just aesthetics — it’s containment. When every coffee-related item lives inside one boundary (a tray, a shelf, a designated stretch of counter), your brain stops treating the rest of the kitchen as fair game for clutter.
Expert Tip
Use a tray with a raised edge underneath your machine. It catches spills and instantly signals “this stays here,” which keeps the zone from creeping across your whole counter.
Why It Works
Visualize the difference between a coffee maker sitting alone versus one anchored inside a styled tray with mugs and a small plant. The second version reads as intentional, not messy — same items, completely different feeling.
Best For
- Small spaces
- Large spaces
- Families
- Renters
Common Mistake To Avoid
Letting the station expand endlessly. If it starts absorbing snacks, mail, and random items, it’s no longer a coffee station — it’s just clutter with a nicer name.
Quick Wins
- Creates a defined, intentional zone
- Makes mornings faster and calmer
- Contains mess to one tray, not the whole counter
- Doubles as a decorative feature
This is where many homeowners make a mistake: they build a beautiful coffee station, then forget to maintain the boundary. A tray only works if you actually respect its edges.
What’s your biggest challenge right now — space, or just keeping things put away once they’re organized?
5. Under-Cabinet Storage Racks
What You’re Seeing
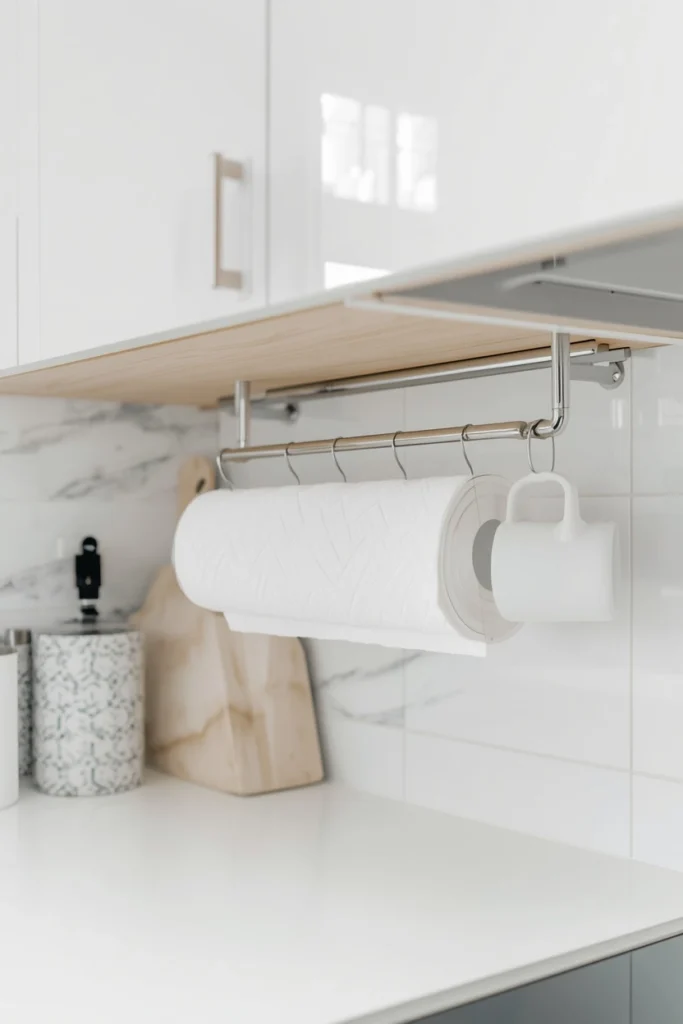
A slim wire or wood rack mounted to the underside of your upper cabinets, holding paper towels, mugs, or a small spice rack — suspended in space that used to sit completely empty.
Design Breakdown
The gap between your countertop and the bottom of your upper cabinets is one of the most overlooked storage zones in the entire kitchen. Most homeowners never even consider using it.
Under-cabinet racks hang directly from that space, giving you functional storage that takes up zero counter footprint.
Expert Tip
Measure the clearance before buying — you need at least 3-4 inches between the rack and your counter to comfortably slide items in and out.
Why It Works
This solution works because it adds storage capacity without adding visual bulk. Your eye reads the counter as clear, even though you’ve technically added more organized space to the room.
Best For
- Small spaces
- Renters
- Budget makeovers
Common Mistake To Avoid
Choosing a rack that’s too deep and blocks your view or reach to the counter below. Slim profiles work far better than bulky ones here.
Quick Wins
- Zero counter footprint used
- Great for renters with removable options
- Keeps paper towels and mugs off the counter
- Inexpensive and easy to install
MINI EXPERT INSIGHT
One thing I’ve learned after years of small-kitchen living: the space people forget to use is almost always above the counter, not below it. Under-cabinet racks are the single most underrated storage upgrade I recommend to friends, because they solve clutter without touching your counter at all. If you rent and can’t drill into walls, look for tension-mounted or adhesive versions — they hold surprisingly well for lightweight items.
The next idea is one designers secretly love.
6. Built-In Charging and Cord Stations
What You’re Seeing
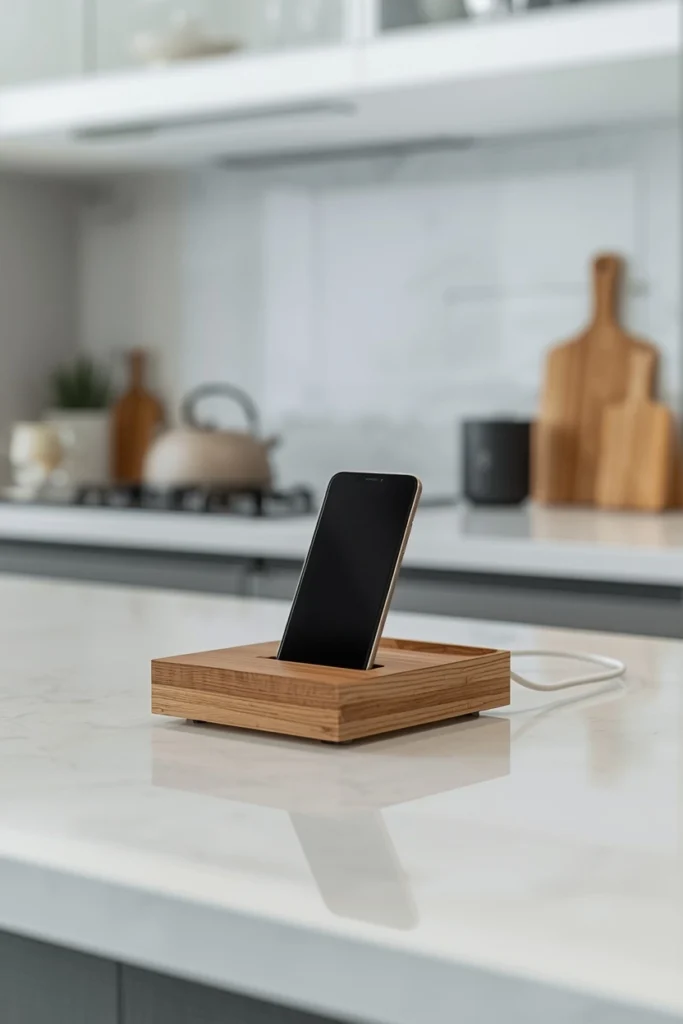
A small wooden or fabric-lined box tucked at the end of the counter, with a single visible charging cord and a phone resting neatly inside — no tangle of wires anywhere in sight.
Design Breakdown
Kitchens have quietly become command centers — phones, tablets, and even laptops end up charging on the counter constantly. Without a designated spot, cords sprawl everywhere.
A dedicated charging station contains the mess to one small box instead of letting it spread across your entire workspace.
Expert Tip
Drill a small hole in the back of the box for the cord to pass through cleanly, so the station stays closed and tidy even mid-charge.
Why It Works
Think about how much easier your counter feels the moment cords disappear into one contained spot instead of snaking across your prep space.
Best For
- Small spaces
- Families
- Renters
- Budget makeovers
Common Mistake To Avoid
Placing the station too close to the sink or stove. Cords and water (or heat) are never a good combination.
Quick Wins
- Contains cord clutter instantly
- Cheap DIY option available
- Keeps phones off the main prep area
- Doubles as a landing spot for keys and mail
Would you try this one first, or does another idea on this list feel more urgent for your space?
7. Wall-Mounted Utensil Rails
What You’re Seeing
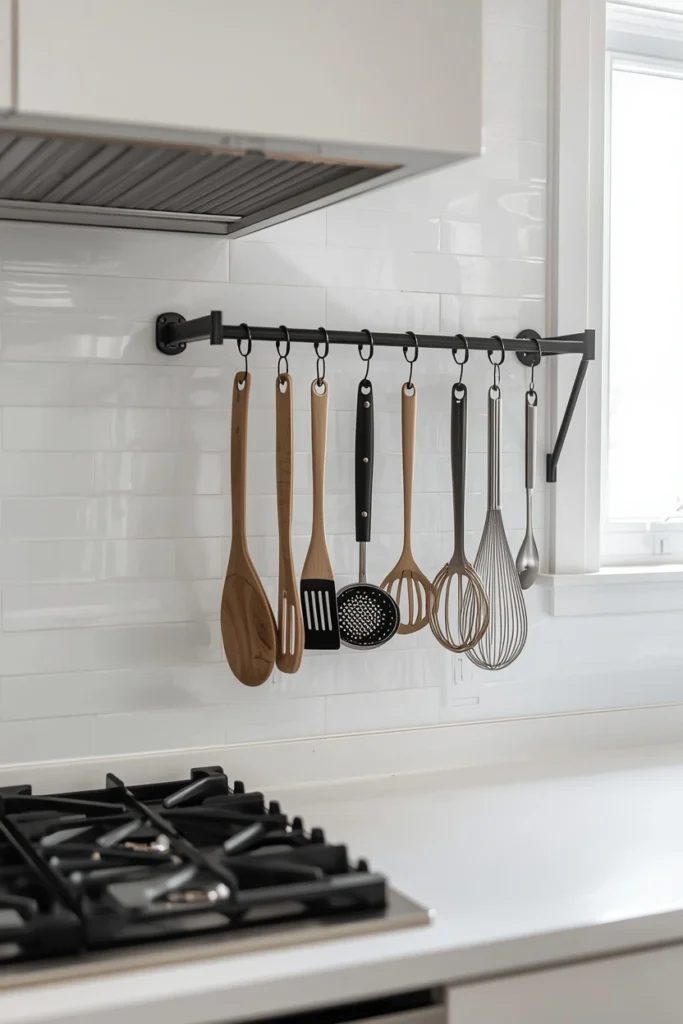
A slim metal rail mounted along the backsplash, holding S-hooks with your most-used spatulas, whisks, and tongs hanging in a neat row, completely off the counter.
Design Breakdown
Utensil crocks are one of the biggest silent counter hogs in most kitchens. They’re wide, they’re often overstuffed, and they take up prime real estate right next to your stove.
A wall rail relocates all of that to vertical space, which is almost always underused in a kitchen.
Expert Tip
Mount the rail slightly to the side of the stove rather than directly above it, so rising heat doesn’t warm plastic or wooden handles over time.
Why It Works
This works because it applies the same principle as the magnetic knife strip — moving bulky, frequently used items off the counter and onto the wall, where they’re just as accessible but far less visually heavy.
Best For
- Small spaces
- Budget makeovers
- Renters
Common Mistake To Avoid
Overcrowding the rail with utensils you rarely use. Keep it to your top 8-10 daily tools; store the rest in a drawer.
Quick Wins
- Frees up an entire utensil crock’s footprint
- Keeps daily tools within arm’s reach
- Inexpensive rail-and-hook systems available everywhere
- Adds a professional, styled look near the stove
Don’t skip the next tip, because idea #8 is the one that surprised me the most when I first tried it.
You May Also Like:
- Coffee Bar Ideas
- Kitchen Trash Can Ideas
- Apartment Organization Ideas
- DIY Organization Hacks
- Space Saving Furniture Ideas
What Countertop Storage Actually Costs
Before we get to the final ideas, let’s talk numbers — because knowing what to expect helps you plan without overspending.
Here’s where it gets interesting: most countertop storage upgrades cost far less than people assume, and a few surprisingly small purchases make the biggest visible difference.
Low-Cost Fixes ($10-$40)
- Riser shelves: $15-$35
- Magnetic knife strips: $12-$25
- Wall-mounted utensil rails: $10-$20
- Small charging station boxes: $15-$30
These are the easiest entry points if you’re testing the waters before committing to bigger changes.
Mid-Range Upgrades ($40-$120)
- Tiered lazy Susans: $25-$60
- Under-cabinet racks: $20-$50
- Styled coffee station trays and accessories: $40-$100
- Small rolling carts (covered in idea #8): $60-$120
This range tends to deliver the biggest visible transformation for the money, especially in kitchens with awkward corners or dead zones.
Higher Investment Pieces ($120+)
- Custom pull-out counter extensions
- Built-in appliance garages
- Professionally installed floating shelves
- Custom-cut risers matched to your countertop material
Decision-Making Advice
Start with whichever zone frustrates you the most daily — not the one that looks worst in photos. If your coffee corner stresses you out every morning, fix that first, regardless of what’s trending.
Common Mistakes in Budget Planning
- Buying storage before decluttering, which just organizes clutter instead of removing it
- Choosing trendy pieces that don’t match your kitchen’s actual traffic flow
- Overspending on one showpiece while ignoring three smaller daily frustrations
- Forgetting to measure clearance before buying anything wall-mounted
A Realistic Full Kitchen Refresh
If you tackled all 10 ideas in this article using mostly budget and mid-range options, you’re realistically looking at $250-$500 total — a fraction of what a full countertop or cabinet renovation would cost, with a transformation that often feels just as dramatic.
This simple change can completely transform the room.
8. Appliance Garages With Tambour Doors
What You’re Seeing
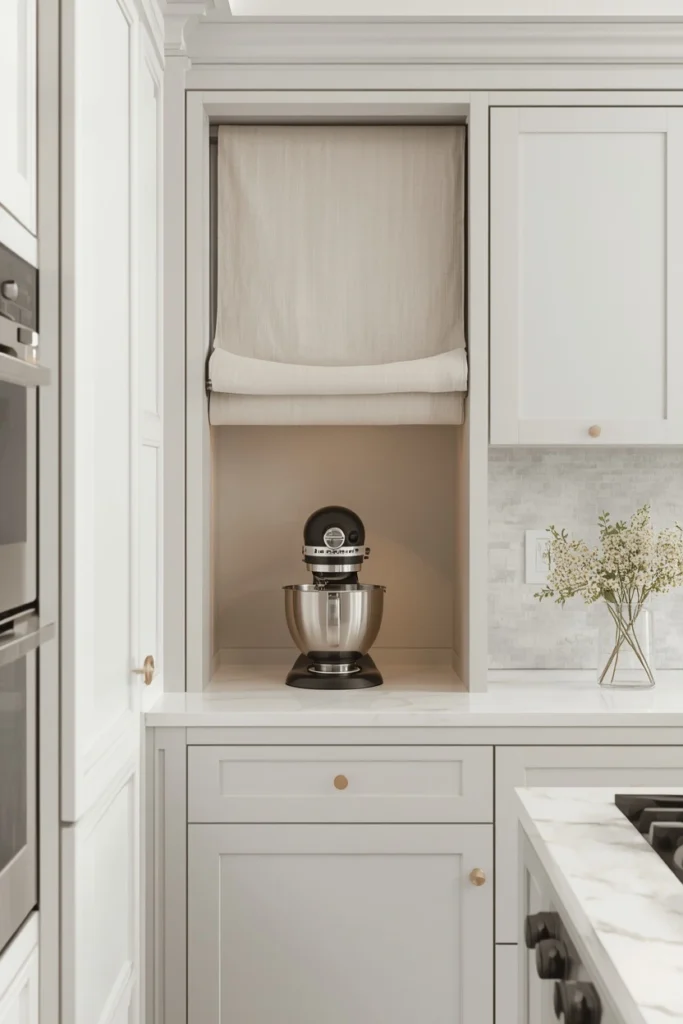
A built-in cabinet-style box in the corner of the counter, with a rolling tambour door pulled down to hide a stand mixer and blender completely from view.
Design Breakdown
Appliance garages solve the “counter full of bulky machines” problem without forcing you to store them in a hard-to-reach cabinet below. The appliance stays plugged in and ready, just hidden behind a door.
Expert Tip
Add a small power strip inside the garage so multiple appliances can stay charged and ready without a tangle of cords crossing your counter.
Why It Works
Picture yourself enjoying a completely clear stretch of counter that, moments later, opens to reveal your stand mixer ready to go. That combination of hidden-but-accessible is what makes appliance garages so effective for busy kitchens.
Best For
- Large spaces
- Luxury homes
- Families
Common Mistake To Avoid
Building a garage too small for your appliances to actually fit with their cords attached. Always measure with the appliance plugged in, not just the appliance alone.
Quick Wins
- Hides bulky appliances without full storage
- Keeps machines plugged in and ready
- Adds a custom, high-end look
- Reduces visual clutter dramatically
MINI EXPERT INSIGHT
Here’s where it gets interesting: appliance garages used to be considered a luxury-only feature, but smaller tambour-style kits have made this accessible for almost any kitchen now, even rentals with removable versions. If your stand mixer has been living on your counter out of guilt because it’s “too heavy to put away,” this is the fix that finally solves that specific frustration.
9. Slim Rolling Carts as Mobile Counter Extensions
What You’re Seeing
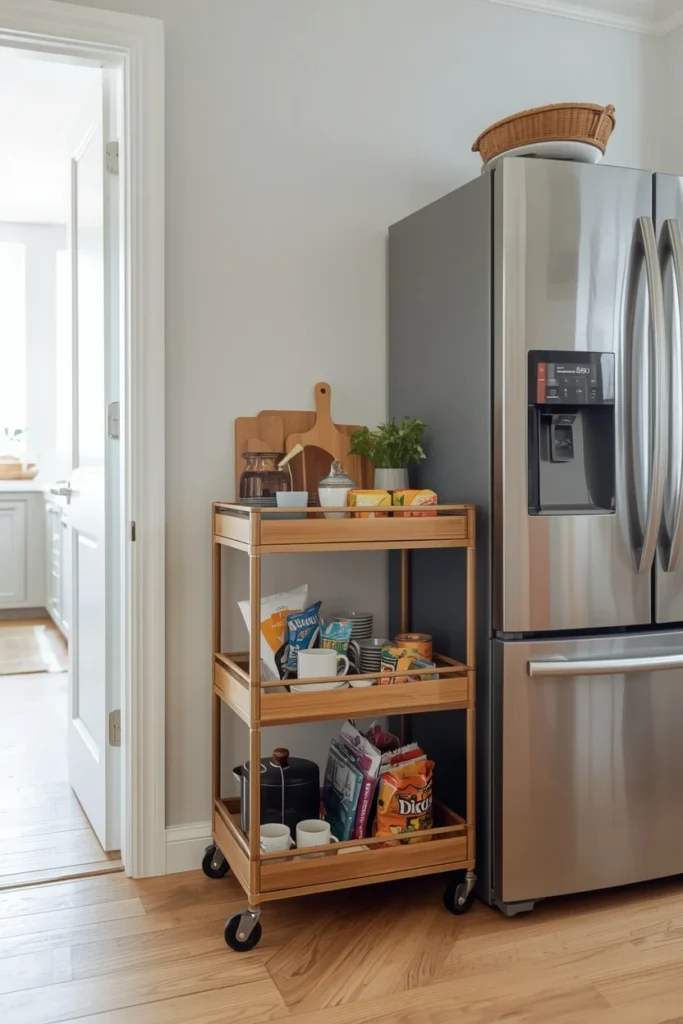
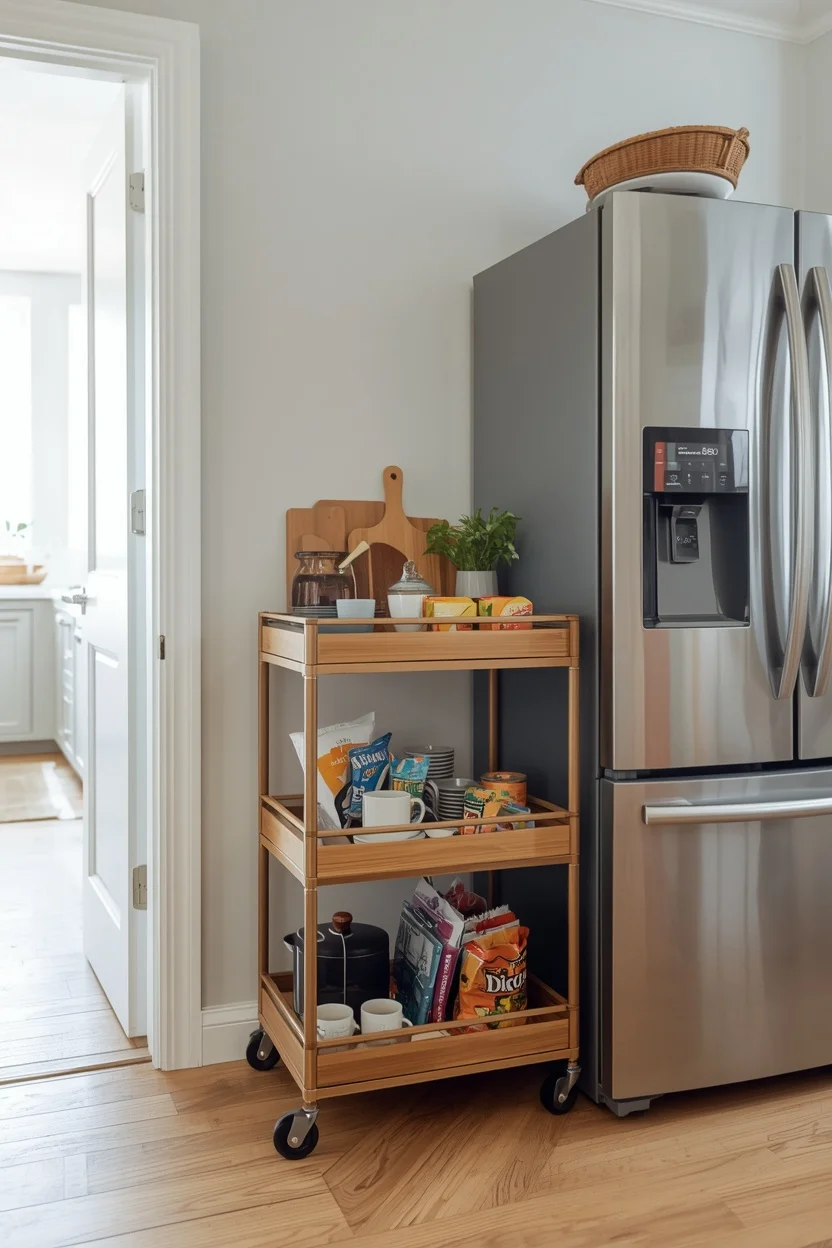
A narrow rolling cart with two or three shelves, tucked beside the fridge, holding cutting boards, extra mugs, and snacks — essentially functioning as a second counter on wheels.
Design Breakdown
Rolling carts solve a problem fixed counters simply can’t: flexibility. When you need extra prep space, you roll it out. When you don’t, it tucks away into a narrow gap.
Expert Tip
Choose a cart with locking wheels so it doesn’t shift while you’re using it as an actual work surface during meal prep.
Why It Works
This idea works because it gives you temporary square footage exactly when you need it, without permanently committing counter space to something you only use occasionally.
Best For
- Small spaces
- Renters
- Budget makeovers
- Families
Common Mistake To Avoid
Buying a cart too wide for your kitchen’s walking paths. Measure your narrowest gap before purchasing, especially in galley-style layouts.
Quick Wins
- Adds instant extra counter space
- Tucks away when not needed
- Great for renters who can’t install anything
- Doubles as extra storage for rarely-used items
Let me know which one is your favorite so far — I have a feeling this one resonates with more people than they expect.
10. Floating Shelves With Curated Everyday Items
What You’re Seeing
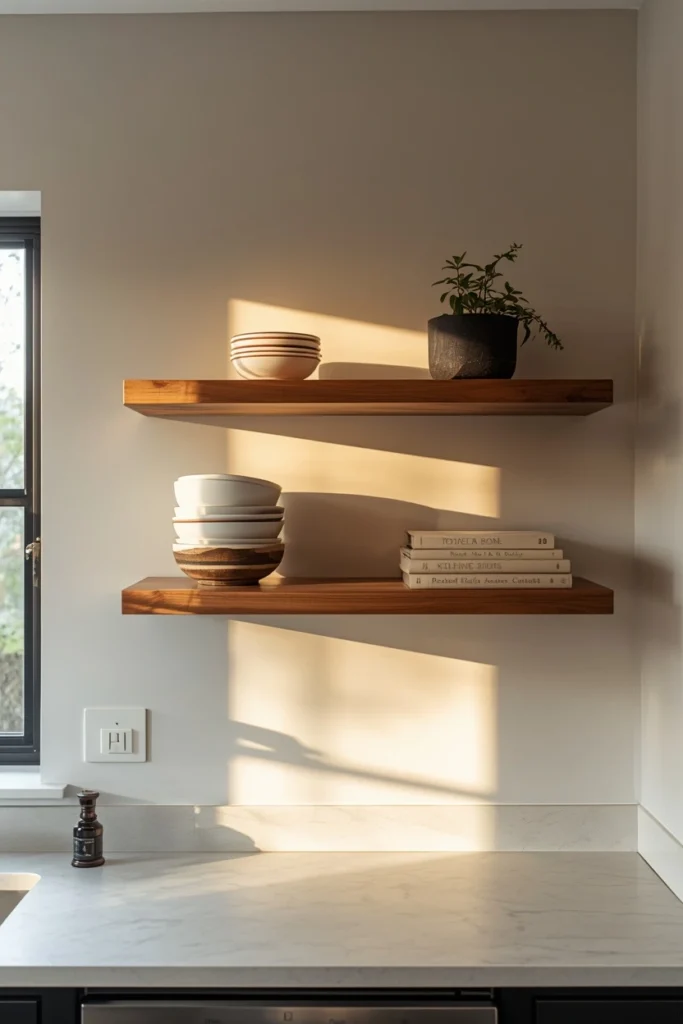
Two or three floating wood shelves above the counter, styled with a small stack of bowls, a few cookbooks, and a plant, creating an intentional display instead of hidden clutter.
Design Breakdown
Floating shelves work best when treated like a curated display rather than extra storage to dump items onto. The goal is fewer items, better arranged, so the shelf reads as styled rather than crowded.
Expert Tip
Follow a simple rule: no more than 5-7 items per shelf, mixing function (bowls, mugs) with a decorative touch (plant, small art piece) to keep it balanced.
Why It Works
Visualize the difference between an open shelf crammed with mismatched dishes versus one holding a small styled collection. The second version doesn’t feel like storage at all — it feels like design.
Best For
- Large spaces
- Luxury homes
- Budget makeovers
Common Mistake To Avoid
Turning floating shelves into a dumping ground for everything that didn’t fit in cabinets. That instantly undoes the clean, curated look they’re meant to create.
Quick Wins
- Adds storage without closed cabinetry
- Creates a styled, personal look
- Works in almost any kitchen style
- Keeps everyday items within reach
Related Kitchen Storage Ideas
If this list sparked some ideas, you’re going to want to keep exploring — because kitchen storage rarely stops at the counter.
- Kitchen Sink Ideas
- Kitchen Lighting Ideas
- Modern Farmhouse Kitchen Ideas
- Galley Kitchen Ideas
- Mini Kitchen Ideas
- Kitchen Wall Tile Ideas
- Documents Organization Ideas
- Walk-In Closet Ideas
Final Thoughts on Kitchen Countertop Storage
Let’s recap the ideas that made the biggest difference in this list: riser shelves, magnetic knife strips, and a dedicated coffee station are the fastest wins if you’re short on time or budget. Appliance garages and rolling carts are worth the extra investment if you’re ready for a bigger shift.
Here’s my honest advice: don’t try to do all 10 at once. Pick one idea — the one that solves your biggest daily frustration — and implement it this week. Small, finished changes beat big, half-done projects every time.
So tell me: which idea would you try first?
If you enjoyed this, your next stop should be our guide on Small Kitchen Ideas, especially if square footage is your biggest challenge right now.
And if you thought countertop clutter was frustrating, wait until you see what’s hiding in most people’s pantries — that’s a whole different kind of chaos, and I’m covering it next.
Frequently Asked Questions About Kitchen Countertop Storage
1. What is the best kitchen countertop storage idea for small kitchens? Riser shelves and under-cabinet racks tend to work best for small kitchens because they add storage without using extra floor or counter footprint.
2. How do I stop my kitchen counters from getting cluttered again? Create defined zones (like a coffee station) with clear boundaries, and commit to returning items to their designated spot daily rather than letting them drift.
3. Are magnetic knife strips actually safe? Yes, when properly mounted into wall studs or with heavy-duty anchors, magnetic strips are considered a safe and even sanitary alternative to knife blocks.
4. What’s the cheapest way to improve kitchen countertop storage? Wall-mounted utensil rails and riser shelves are typically the most budget-friendly options, often costing under $30.
5. Do appliance garages work in small kitchens? Compact tambour-style appliance garages exist specifically for smaller kitchens, though they work best when you have at least one corner of extra depth to dedicate to them.
6. What should I do with corner counter space? Tiered lazy Susans are one of the most effective solutions for awkward corner counters, since they make the entire space reachable with a simple spin.
7. Is countertop storage a good option for renters? Absolutely. Many ideas on this list, like risers, rolling carts, and tension-mounted racks, require zero permanent installation.
8. How much does a full kitchen countertop storage refresh cost? A realistic budget-to-mid-range refresh covering most of these ideas typically falls between $250 and $500.
9. What’s the biggest mistake people make with countertop storage? Buying new storage solutions before decluttering first, which just organizes existing mess instead of actually reducing it.
10. How do I keep floating shelves from looking cluttered? Limit each shelf to 5-7 curated items, balancing functional pieces like bowls with a decorative touch like a small plant.