10 Paver Patio Ideas That Make Even Small Backyards Look Much More Spacious
This article was created in line with Trends Oraa’s research and content standards.
Simple layout tricks and design secrets that visually double your outdoor space
Your backyard feels like a postage stamp. You know it. I know it. And every summer, you watch your neighbors enjoy their gorgeous outdoor spaces while yours just… sits there.
But here’s the thing — it doesn’t have to stay that way. The right paver patio ideas can completely transform a tight, cramped backyard into a space that feels open, intentional, and honestly? Impressive. And you don’t need to knock down fences or buy more land to do it.
In this post, I’m sharing 10 specific paver patio designs that use layout, pattern, color, and clever tricks to make small backyards feel dramatically bigger. Stick around — idea #7 is the one that surprises people most.
✨ Before you start planning your patio — you might also love our guide on Patio Ideas for Florida Homes, packed with climate-smart design choices that work beautifully in warm climates. And if you’re dreaming about a full outdoor entertaining setup, don’t miss our Ultimate Outdoor Patio Ideas guide either.
Whether you’re working with a 10×12 slab or a weird L-shaped corner, these ideas will give you a clear vision — and the confidence to actually build it.
Let’s get into it.
But here’s the important part first… The biggest mistake small backyard owners make is treating their space like it’s a limitation. The designers behind these gorgeous patios started with the exact same square footage you have. The difference is strategy.
Why Paver Patios Are the #1 Way to Expand a Small Backyard (Visually)
Unlike a deck or a concrete slab, pavers give you almost total creative freedom. You can control:
- The direction the pattern runs (this alone changes how big a space feels)
- The size of each paver (larger pavers = more spacious look)
- The color — lighter tones reflect light and open up a space
- The shape — curves vs. straight lines tell completely different spatial stories
- The grout/joint color — matching joints to pavers makes the whole surface feel seamless
That’s a lot of control. And when you use it intentionally, the results are genuinely stunning.
Now let’s get into the 10 ideas. Some are bold. Some are subtle. All of them work.
The Diagonal Running Bond — The Oldest Trick in the Book
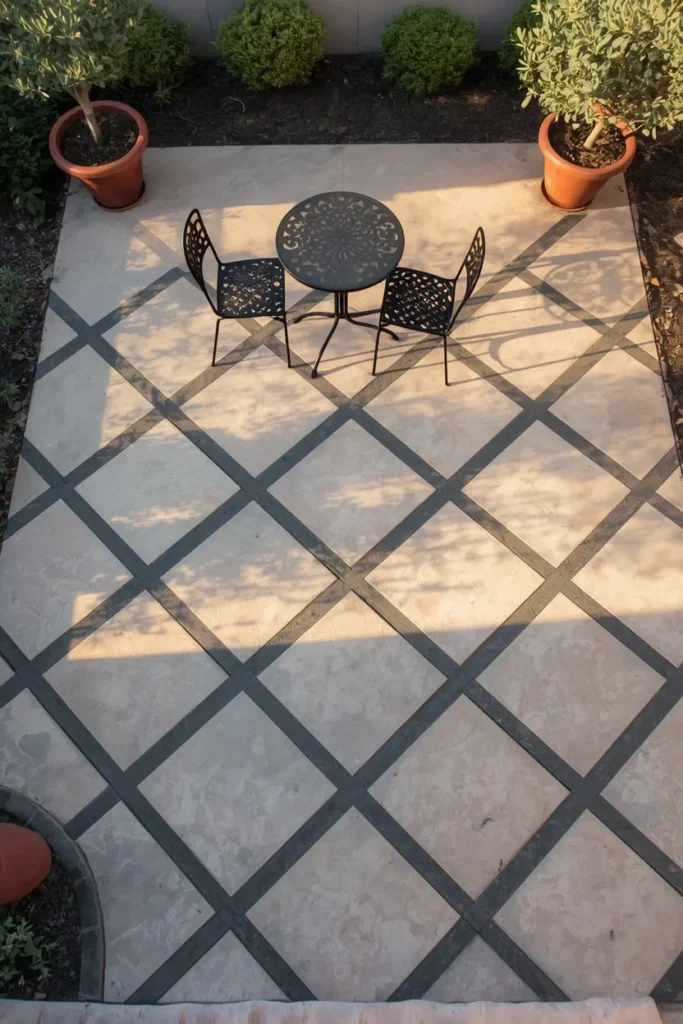
In this image, you’re looking at a modest rectangular backyard — maybe 12×14 feet — that feels significantly larger than it actually is. The secret is those pavers are laid at a 45-degree angle to the house, running diagonally rather than straight across.
This is one of the oldest visual tricks in interior design, borrowed from flooring and applied beautifully outdoors. Your eye follows the diagonal lines outward, which makes the boundaries of the space feel further away than they really are.
The homeowners here paired light sandstone-colored pavers with dark charcoal grout joints. That contrast helps each individual paver pop, making the pattern more visible — and the visual “stretching” effect stronger. A simple bistro set sits in the center, and two potted olive trees frame the edge without adding visual clutter.
🌿 Expert TipWhen laying diagonal pavers in a small space, go with a larger paver size (at least 16×16 inches). Smaller pavers create a busier pattern that can actually make a space feel more cramped. Bigger tiles = cleaner lines = more breathing room.
✦ Why It WorksDiagonal lines engage the longest visual distance across a rectangular space. Instead of leading your eye to the shortest wall, the pattern pulls your gaze to the farthest corners — making every dimension feel generously sized.
Large-Format Concrete Pavers With Minimal Joints
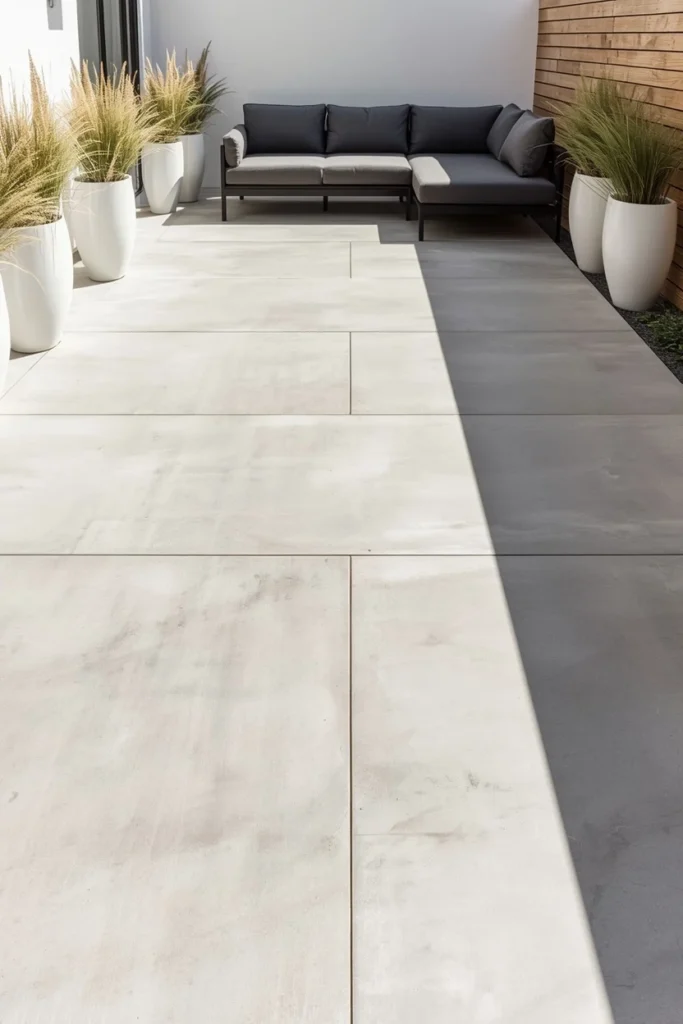
This is the sleekest option on the list, and it photographs beautifully — which is probably why you’ve been seeing it everywhere on Pinterest lately. The image shows 24×24 inch light gray concrete pavers installed in a simple grid, with sand-colored joints that almost disappear into the surface.
When the grout joints match the paver tone, the entire floor reads as one continuous plane. Your eye doesn’t get interrupted by dark lines breaking up the space. The result? The patio looks like it stretches on forever — even when it’s only 10 feet wide.
This homeowner paired the pavers with a low-profile sectional sofa and kept planters to the perimeter. That choice is key: when furniture stays off the floor visually (no tall legs blocking the pavers), you see more of the surface, which enhances the spacious effect.
🌿 Expert TipUse porcelain or concrete pavers in light gray, warm white, or blush beige tones. Avoid very dark colors in small spaces — they absorb light and make edges feel like walls closing in. Light surfaces bounce light around and visually “lift” the whole patio.
✦ Why It WorksFewer and wider grout lines mean less visual “chop” across the surface. The eye reads the space as larger because it doesn’t have to process dozens of small divisions. It’s the same reason large bathroom tiles make small bathrooms feel like spas.
“Are you going for a modern, minimal look — or something warmer and more natural with stone or brick? Drop your style in the comments — I’d love to help you narrow it down!”
👇 Tell us in the comments below!
A Curved Paver Border That Blurs the Edges
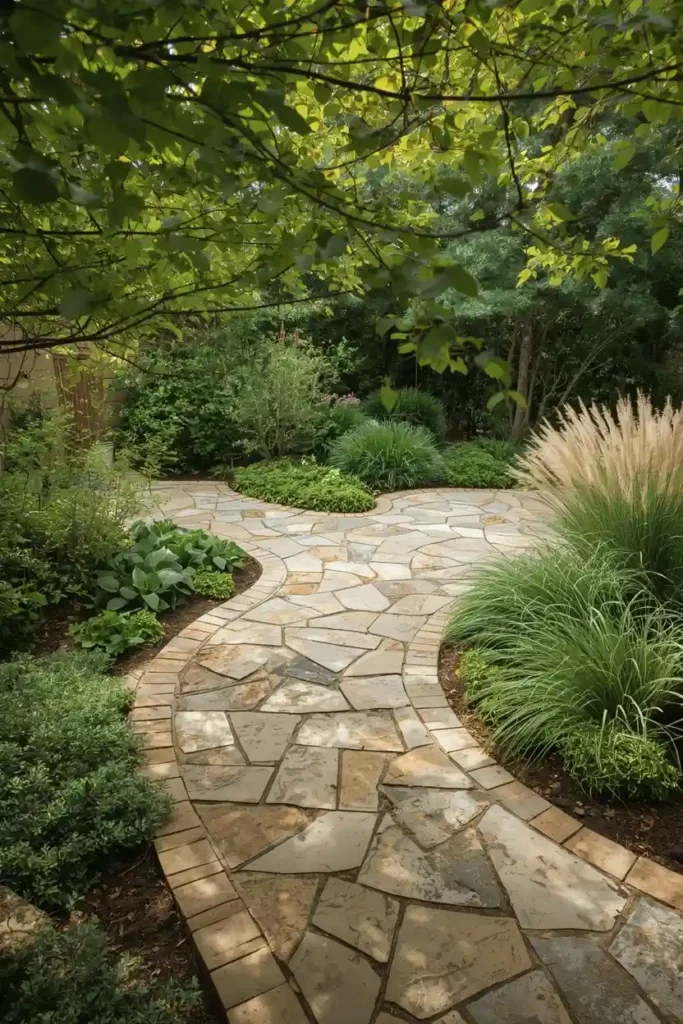
This design takes a completely different approach — instead of creating crisp, straight edges that define (and therefore limit) the patio’s footprint, it uses gentle curves that melt into the surrounding garden beds. The visual effect is magic.
When there’s no hard line where the patio “stops,” your brain doesn’t register the edge as a boundary. The space feels like it continues past itself, which is exactly what you want in a small backyard. The image here uses a mix of irregular flagstone and smooth pavers, with low-growing ground cover planted in the gaps at the curved edge.
This is a great option if you love a slightly more natural, cottage-style aesthetic. It’s also forgiving for DIYers because irregular-edge designs hide imperfections beautifully — no one expects a curved stone border to be ruler-straight.
🌿 Expert TipPlant something soft and spreading at your curved edge — creeping thyme, sedum, or ornamental grasses work wonderfully. They soften the transition further and make the whole design look intentional and professionally landscaped, even if you did it yourself on a Saturday.
✦ Why It WorksHard rectangular lines force the eye to measure the space. Curves invite exploration instead. The brain naturally follows a curve rather than stopping at it — creating a feeling of depth and movement even in a very tight area.
Herringbone Brick Pavers Running Lengthwise

Herringbone is timeless, and for good reason. The interlocking zigzag pattern is incredibly stable structurally, but what makes it brilliant for small spaces is the directional pull it creates when oriented lengthwise down the yard.
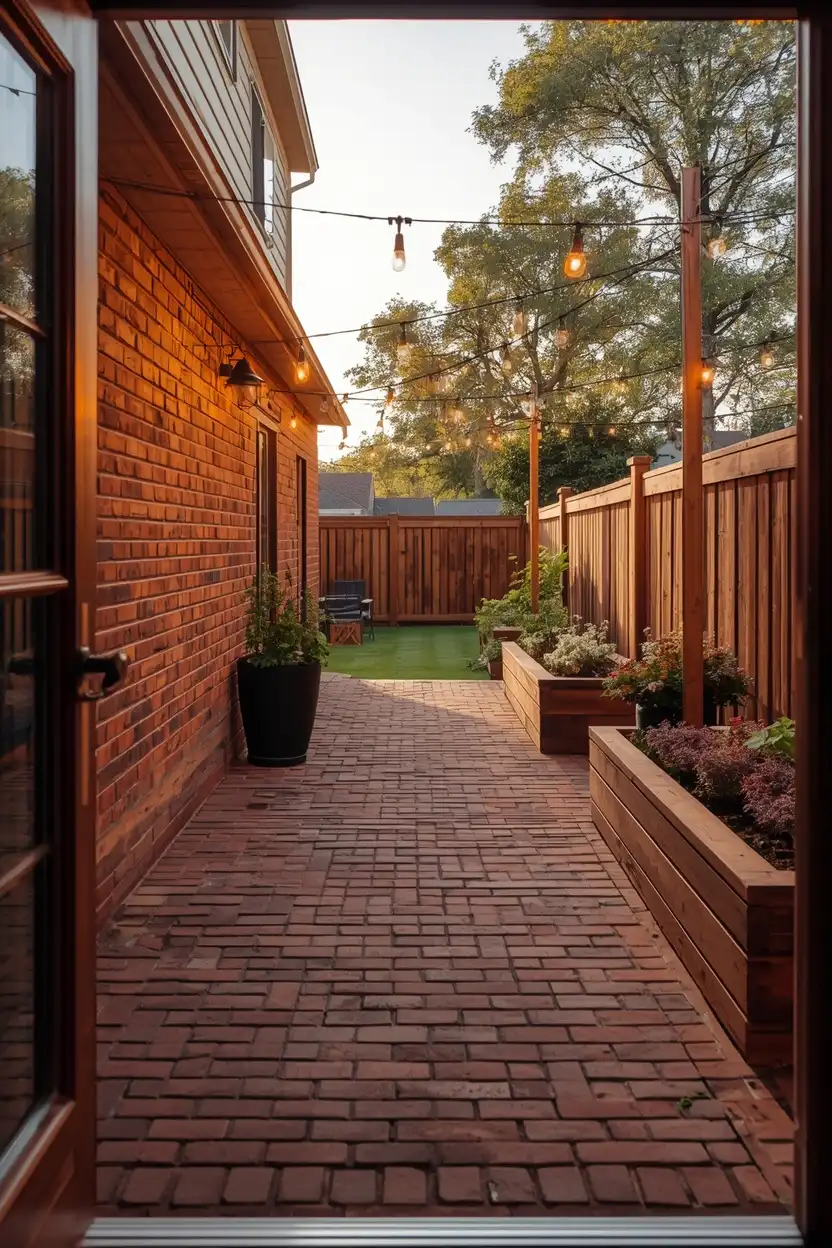
In this photo, warm terracotta brick pavers are laid in a herringbone pattern running away from the house. That direction matters — it pulls your gaze deep into the yard, not across it. The result makes even a narrow backyard feel like it has real depth.
The homeowners added a string light canopy overhead, which does double duty: it creates a cozy overhead “ceiling” while also drawing the eye up and outward rather than letting it focus on the fences. Simple wooden planters line the border, keeping the sightlines clear while adding warmth and texture.
🌿 Expert TipChoose the herringbone direction carefully. If your yard is wider than it is deep, run the pattern toward the back fence to create depth. If it’s deep and narrow, run it perpendicular to make it feel wider. The pattern direction is the whole game here.
✦ Why It WorksThe herringbone’s V-shapes naturally lead the eye in one direction — like an arrow pointing forward. This creates an illusion of extended perspective, making the yard appear to go on longer than it actually does.
Most people don’t know this… The color of your pavers affects perceived temperature AND space. Warm-toned pavers (terracotta, sandstone, buff) make a space feel cozy and intimate. Cool-toned pavers (gray, slate, silver) make the same space feel larger and more open. Neither is “wrong” — it just depends on what feeling you want to create.
Paver Patio Buying Guide: Budget Breakdown + Pros & Cons
Before you fall completely in love with one of these designs (and I know you will), let’s talk money and materials — because choosing the wrong paver type is the most expensive mistake you can make.
There are four main types of pavers you’ll encounter, and they vary wildly in cost, durability, and aesthetic. Here’s an honest breakdown:
| Paver Type | Cost per sq ft (installed) | Durability | Best For |
|---|---|---|---|
| Concrete Pavers | $8–$20 | ★★★★☆ | Modern, clean designs; budget-friendly |
| Brick Pavers | $10–$25 | ★★★★★ | Traditional, herringbone, or cottage styles |
| Natural Stone (Travertine, Bluestone) | $15–$45 | ★★★☆☆ | Luxury, organic, or Mediterranean looks |
| Porcelain Pavers | $18–$50 | ★★★★★ | Minimal, high-end, low-maintenance designs |
For a typical small backyard patio (roughly 12×16 = 192 sq ft), here’s what you’d realistically spend:
- DIY concrete pavers: $600–$900 in materials alone
- Professional install, concrete pavers: $1,500–$3,800
- Professional install, natural stone: $3,000–$8,600
- DIY with rented compactor + polymeric sand: Can save 40–60% on labor
Here’s what most budget guides don’t mention: the base prep (gravel, sand, compaction) is often more expensive than the pavers themselves — and it’s the part you absolutely cannot skip. A poorly prepared base means cracked, sunken, or shifting pavers within 2–3 winters.
✔ Pros of Paver Patios
- Individual pavers can be replaced if cracked — unlike concrete slabs
- Huge variety of colors, patterns, and sizes
- Increases home resale value (avg. 5–12%)
- Can be DIY’d with patience and the right tools
- Permeable options allow drainage — great for wet climates
✖ Things to Consider
- Weeds can grow in joints (use polymeric sand to minimize this)
- Base prep is labor-intensive and essential
- Some natural stones need annual sealing
- Larger pavers are harder to cut for curved edges
- Freeze-thaw cycles can shift pavers if base is inadequate
My honest recommendation for small budgets: start with concrete or brick pavers, use a light color, and invest in quality polymeric sand for the joints. You’ll get 90% of the visual impact at 40% of the cost of natural stone.
Now that you’ve got the budget picture, let’s keep going — because ideas 5 through 10 are where it starts getting really creative.
Mixed-Size Pavers in a Random Ashlar Pattern
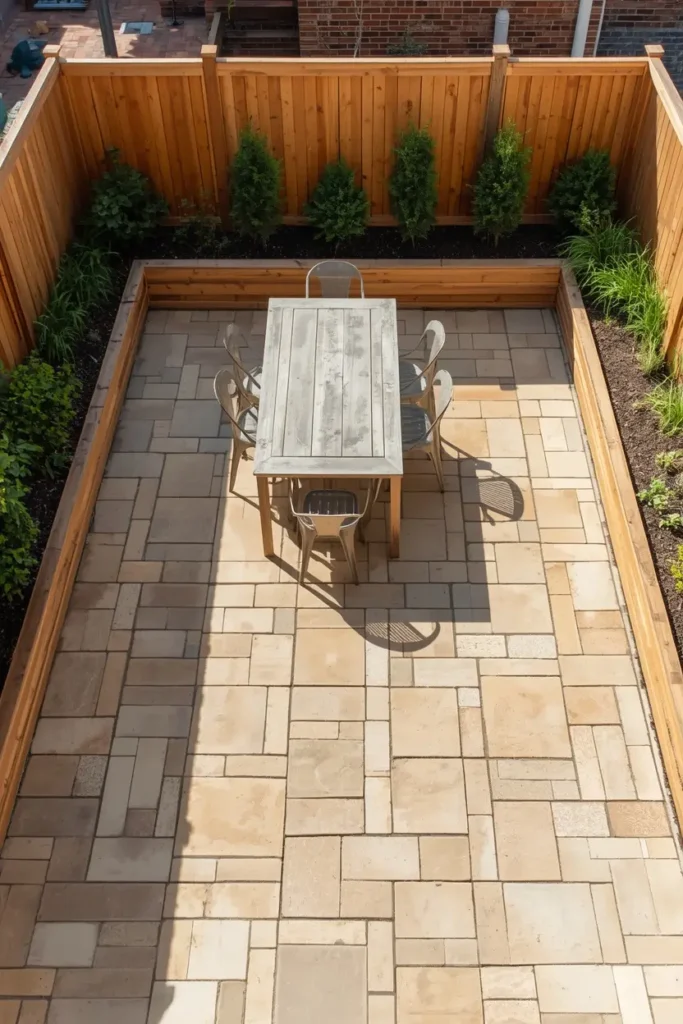
The random ashlar pattern uses three or four different sizes of pavers arranged in an intentionally varied layout — no two sections look identical, yet the overall grid stays organized and structured. The effect feels artisanal, like a European courtyard you’d find in Tuscany or Provence.
What makes this brilliant for small spaces is the visual complexity it adds without adding clutter. Your eye is constantly moving across the surface — decoding the pattern, noticing the variation — which takes longer than looking at a simple grid. More time looking at the floor means less time noticing how small the backyard actually is.
In this image, three sizes of warm buff pavers are arranged in an ashlar layout across a compact urban backyard. Raised cedar beds line two walls, and a slim dining table fills the center without crowding the space. The light paver tone keeps everything feeling airy even though there are walls on three sides.
🌿 Expert TipWhen ordering pavers for an ashlar layout, you’ll typically want a ratio of roughly 50% large, 30% medium, and 20% small. Buy about 10% extra to account for cuts at edges — especially important at curves or awkward corners.
✦ Why It WorksVisual variety slows the eye down in the best way. An intricate, intentional pattern communicates “this space was carefully designed” — and well-designed spaces always feel larger than disorganized ones of the same size.
Stepping Stone Pavers Set Into Gravel — The Anti-Patio Patio
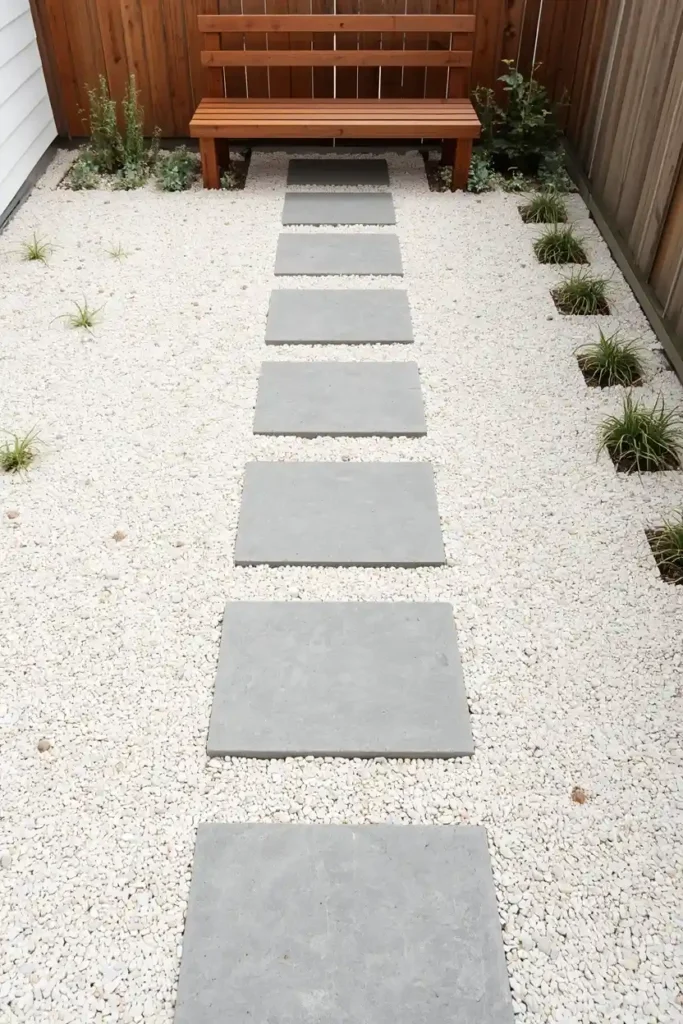
This is the concept that surprises people the most — and it’s genuinely one of the most underused ideas in the list. Instead of a solid paver surface, you lay individual pavers in a loose material like pea gravel, decomposed granite, or even fine river rock. The pavers become stepping paths and designated “zones” within the gravel field.
The image shows large square concrete pavers set into crisp white pea gravel. The gravel fills the entire remaining space, including around the raised planting beds at the perimeter. Because the gravel and the pavers are both relatively light in tone, the whole floor reads as one continuous, expansive surface — and the yard feels huge.
This approach is also dramatically cheaper than full paver coverage, significantly easier to DIY, and naturally permeable for drainage. It’s a favorite for renters who want to do something impactful without a massive concrete commitment.
🌿 Expert TipLay landscape fabric under your gravel before you begin — this is non-negotiable. Without it, gravel sinks into soil, weeds push through constantly, and you’ll redo the whole thing in two seasons. A $30 roll of weed fabric saves you hundreds of hours.
✦ Why It WorksA gravel field has no hard stopping point. It flows right up to the fences, walls, and beds without declaring “here is where the patio ends.” That seamlessness is exactly what makes the space feel borderless — and borderless spaces feel big.
“If you could sit in any of these backyard spaces right now, which one would it be? The cozy herringbone with string lights, or the minimal stepping stone patio? Tell me in the comments!”
👇 I’m genuinely curious!
Two-Tone Paver Design With a Defined Zone
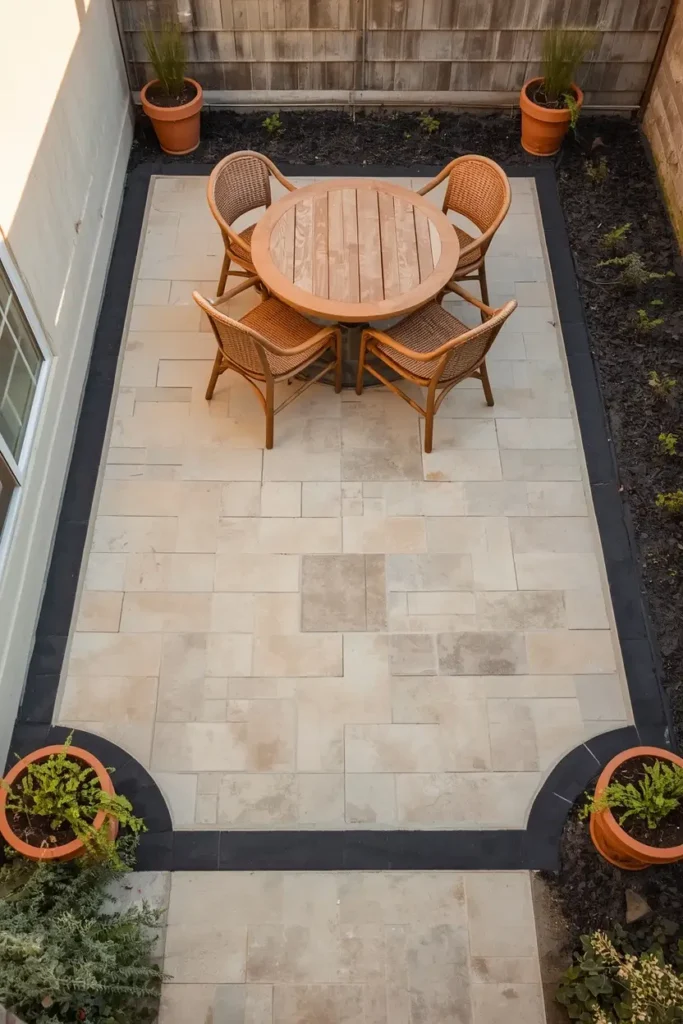
This is the idea that surprises people most — and now you’ll see why. Instead of treating the entire patio as one uniform space, this design uses two tones of paver to create distinct visual “zones.” A lighter paver fills the main field, and a contrasting darker tone forms a border or inset strip that defines the seating area.
Why does this make the space feel bigger? Because it creates the illusion of two separate spaces within one footprint. Your brain processes it as “a dining area AND a lounge area” rather than “a small patio.” Two functional zones always feel more spacious than one undifferentiated slab — it’s the same psychology that makes open-plan living rooms feel luxurious.
The image shows warm cream pavers bordered by charcoal accent strips running parallel to the house. A round table and four chairs sit within the defined center zone. The contrast is strong enough to read clearly but not so dramatic that it feels busy or loud.
🌿 Expert TipKeep your accent color to no more than 20–25% of the total paver surface. More than that and it starts to feel like a checkerboard rather than a curated design. Restraint is everything with two-tone patios — let one color dominate and one color define.
✦ Why It WorksDefined zones within a small space create perceived spatial complexity. The mind interprets zoning as “multiple rooms” — and multiple rooms always feel larger than a single undivided space. It’s one of the most powerful tricks in interior and exterior design.
Here’s where it gets interesting… Most homeowners think they need to maximize coverage — fill every inch with pavers. But the most visually stunning small patios often leave strategic gaps. Negative space (gravel, ground cover, even open dirt) makes the paved areas feel more deliberate. Less really is more here.
Extending the Patio Into a Pathway — The Visual Trick Pro Landscapers Use
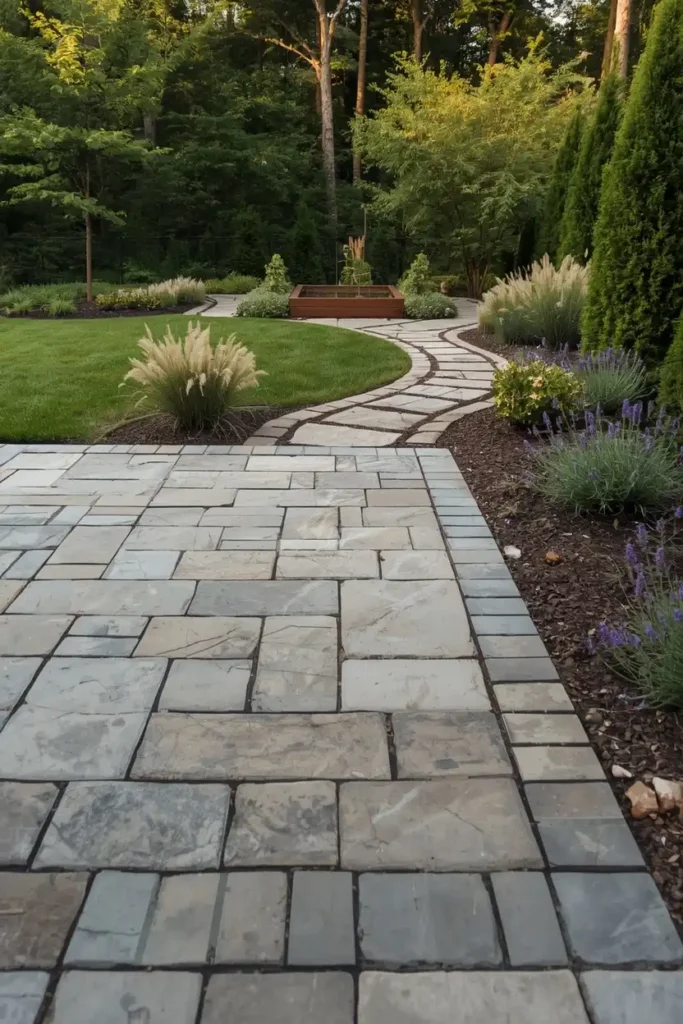
Here’s one that most DIY guides completely overlook: instead of ending your patio at a clean, defined edge, let it extend outward into a pathway that winds into the garden. The patio doesn’t “stop” — it transitions. And the moment a space doesn’t have a visible stopping point, it feels much larger than it really is.
In this image, a rectangular paver patio transitions seamlessly into a winding flagstone path that curves toward a small raised garden at the far end of the yard. The pavers aren’t the same — the path uses a slightly smaller, more irregular stone — but the tones are complementary, so the eye reads them as part of the same connected landscape.
This technique also solves a common problem in small backyards: awkward dead space beyond the patio. Connecting the patio to the rest of the yard with a path gives that space a purpose — and purposeful spaces always feel well-used and generous rather than cramped and forgotten.
🌿 Expert TipMake your path curve — never run it straight to the back fence. A straight path reveals the full length of a small yard all at once. A curved path hides the endpoint, creating mystery and making the yard feel longer because the eye wants to follow the curve to see where it leads.
✦ Why It WorksVisual continuity eliminates perceived boundaries. When the patio flows into a path, which flows into a garden bed, the whole yard becomes one unified outdoor room rather than a small slab surrounded by dead space. Unified spaces always feel larger.
Raised Paver Platform With Built-In Seating Wall

Raising your patio even six to twelve inches above the surrounding yard level does something remarkable to how the space feels. Suddenly it has presence. It commands the space rather than sitting shyly at ground level. And because you need a retaining wall to hold that elevation — that wall becomes a built-in seating ledge that eliminates the need for bulky outdoor furniture.
The image shows a paver platform raised about ten inches, bordered by a low capped wall in matching stone. Two throw cushions sit on the wall itself — that’s the seating. The center of the platform is completely open and uncluttered, which makes the small footprint feel intentional and airy rather than cramped.
This approach works best if you’re considering professional installation since the retaining wall requires some structural planning. But the investment pays off dramatically: you gain seating without buying furniture, you define the space architecturally, and the elevation creates a “destination” feeling that makes even a modest backyard feel like an outdoor room worth spending time in.
🌿 Expert TipCap your retaining wall at 17–19 inches for comfortable seating height. Add a 12-inch-wide flat cap stone in a complementary material (bluestone caps on brick walls look stunning) and consider having the cap overhang the wall face slightly — it creates shadow lines that look incredibly refined.
✦ Why It WorksElevation creates perceived importance. A raised space naturally feels like a stage — a focal point with status. Your eye is drawn to it, and drawn-to spaces always feel larger and more significant than forgotten ground-level corners.
Now, avoid this mistake… Don’t match your paver color exactly to your house exterior. When everything blends into one tone, the space loses depth. A subtle contrast between your house color and your paver tone is what creates the layered, designed look that photographs so beautifully — and feels so much more spacious in person.
Pale Travertine Pavers With Flush Lighting — The “Magazine-Worthy” Look

This is the one that gets pinned the most. And honestly? It earns it. Pale travertine or ivory-toned porcelain pavers combined with low-voltage LED lighting recessed into the paver joints transforms even the most underwhelming backyard into something that looks pulled from an architectural digest spread.
The magic here is dual: during the day, the light-colored pavers reflect sunlight and make the space feel expansive and open. At night, the flush LED strips running through the joints illuminate the pattern from within — the yard glows, the pattern becomes art, and the whole space feels dramatically larger because your eye follows the lit lines into the distance.
In this image, a 12×16 enclosed backyard is almost entirely paved in ivory travertine. At night, warm white LED strips follow the main joint lines radiating from the center outward. There are no other light sources except for a simple wall sconce by the door. The restraint is intentional — and it’s what makes the lighting pop so dramatically. There’s no furniture cluttering the shot. Just light, stone, and incredible atmosphere.
🌿 Expert TipLow-voltage paver lights are simpler to install than most people think — many systems are plug-and-play with a 12V transformer. Plan your lighting layout before you lay the pavers, not after. Running wiring under a finished patio is painful. A few inches of conduit buried during the base prep phase will save you endless grief later.
✦ Why It WorksLight lines lead the eye outward and create a sense of perspective — the same effect that makes movie theaters feel bigger than they are. Flush floor lighting also eliminates the heavy shadows that make small spaces feel dark and confined. The entire yard becomes the light source, not just one corner of it.
“Which of these 10 paver patio ideas is going straight to your Pinterest board? I’m calling it — it’s either #7 or #10. Tell me I’m wrong in the comments!”
👇 Let’s settle this below!
A Few More Things to Keep in Mind Before You Start
You’ve got 10 incredible paver patio ideas now — but before you head to the hardware store or start calling contractors, here are a few things that will make or break your project.
Scale Your Furniture to Match the Space
The most common mistake after finishing a beautiful paver patio? Filling it with furniture that’s too large. Oversized sectionals on a small patio make the patio look smaller — not bigger. Opt for slim-leg furniture, round tables (they fit more naturally into corners), and multifunctional pieces like storage ottomans.
If you need outdoor furniture inspiration, our Patio Dining Set Ideas guide is full of scale-appropriate picks that look gorgeous on every budget.
Don’t Forget Overhead Interest
The paver surface gets your backyard looking amazing at ground level. But the best outdoor spaces also have visual interest overhead — a pergola, a string light canopy, a shade sail, or even a well-placed umbrella. If you want to explore overhead structures, check out our Luxury Pergola Ideas post for some seriously gorgeous inspiration.
Consider the Surrounding Landscape
Your patio doesn’t exist in isolation. The landscaping around it — the plantings, the borders, the raised beds — either reinforces the spacious feeling or undermines it. Keep border plantings low and flowing rather than tall and bushy. Tall hedges right at the patio edge create a “walls closing in” effect that even the most gorgeous pavers can’t overcome.
And if you’re working with a particularly small front or side yard, our guide on Small Front Yard Landscaping Ideas has some seriously clever approaches that translate beautifully to back yard situations too.
You’ve Got This — Your Dream Backyard Is Closer Than You Think
Small backyards don’t have to feel small. With the right paver patio ideas — the right pattern direction, the right scale, the right color — you can genuinely double the perceived size of your outdoor space without knocking down a single fence.
Start with one idea from this list that resonates with your style and your budget. Test it. Tweak it. Build from there. The homeowners behind every photo in this post started exactly where you are right now: standing in a small backyard wondering if it was even worth bothering.
It always is.
And when you’re ready to take the next step on your outdoor transformation, don’t miss our full Outdoor Patio Ideas guide — it covers everything from furniture to lighting to privacy screens in stunning detail. You might also love browsing our Patio Awning Ideas post if you’re thinking about overhead cover next.
Happy building. 🌿