10 Colorful String Friendship Bracelets Patterns
This article was created in line with Trends Oraa’s research and content standards.
Most people don’t realize this.
The bracelet that took someone twenty minutes to make is usually the one that gets worn every single day for years.
That’s why the simplest string patterns often outlast the fanciest store-bought jewelry in a kid’s memory box.
The good news? These string friendship bracelets patterns are genuinely beginner-friendly, and you don’t need fancy tools or years of experience to make something that looks incredible.
You might also love our guide on 17 Amazing DIY Birthday Gifts for Friends Ideas if you’re already in gift-making mode, since a handmade bracelet is one of the easiest add-ons to any of those ideas.
I’ve made more friendship bracelets than I can count, at sleepovers, summer camp, and now with my own kids, and the patterns on this list are the ones that consistently turn out beautifully even on someone’s very first try.
Here’s what makes this list different: every pattern below uses the same basic knot, just arranged differently, so once you learn one, you’re basically halfway to all ten.
Keep scrolling — the third pattern on this list is the one that looks the most complicated but is actually one of the easiest to knot.
Why String Friendship Bracelets Patterns Are Having a Major Comeback
Before we jump into the patterns, let’s talk about why this craft refuses to go away.
Friendship bracelets are cheap, portable, and require almost no setup, which makes them perfect for car rides, camp, or lazy summer afternoons.
String friendship bracelets patterns have also exploded on Pinterest lately, partly thanks to nostalgia and partly because they photograph beautifully in bright, saturated color combinations.
But here’s the important part: almost every pattern on this list is built from just two knots, the forward knot and the backward knot. Once your fingers learn the motion, every pattern becomes achievable.
Picture yourself with a stack of finished bracelets lined up on your wrist by the end of one afternoon. That’s genuinely how fast these come together once you get the rhythm down.
1. Classic Chevron Pattern
What You’re Seeing
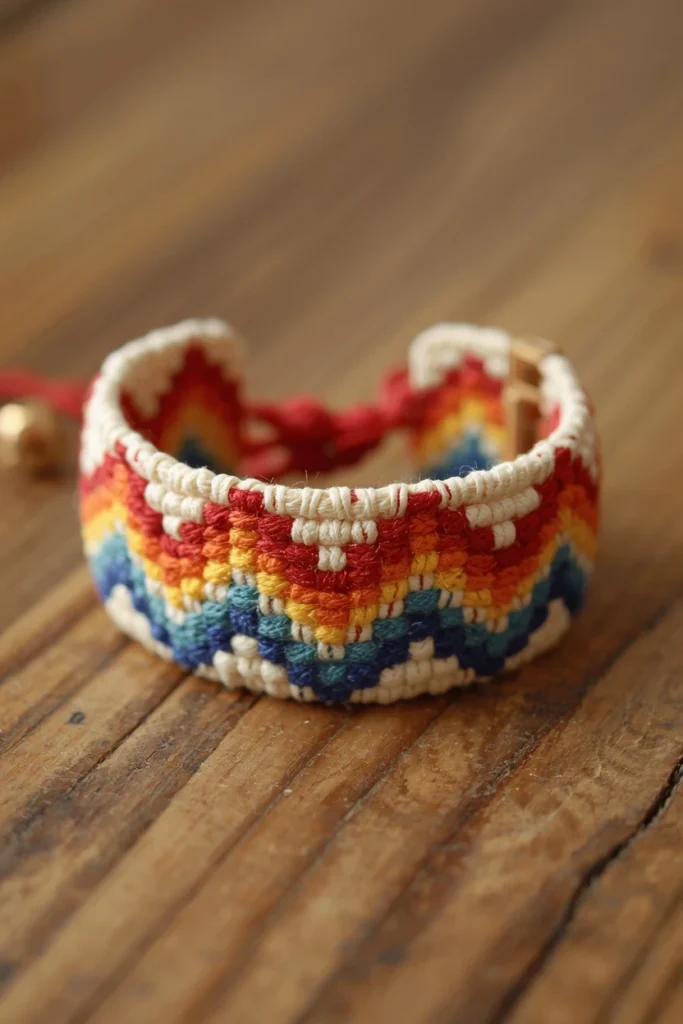
Imagine a bracelet made of six or eight strings in bold, contrasting colors, forming a series of clean V-shaped chevrons stacked down the length of the band, each point crisp and evenly spaced.
Design Breakdown
Chevron is the pattern most people picture when they think “friendship bracelet,” and it’s the perfect starting point because it teaches the fundamental forward and backward knot in a simple, repeating sequence. Once you’ve made one chevron bracelet, every other pattern on this list makes a lot more sense.
Expert Tip
Tape all your strings down firmly to a clipboard or table edge before starting. Loose strings are the number one reason beginner chevron bracelets come out uneven.
Why It Works
The symmetrical V-shape is visually satisfying because our brains are naturally drawn to repeating, mirrored patterns, which is part of why chevron remains one of the most photographed bracelet styles on Pinterest.
Best For
- Small spaces
- Budget makeovers
- Families
- Renters
Common Mistake To Avoid
Pulling knots too tight. Snug is good, but overly tight knots make the bracelet stiff and can distort the clean V-shape you’re going for.
Quick Wins
- Uses only two basic knot types
- Works with any even number of strings
- Endlessly customizable with color combinations
- Great first pattern for teaching kids
2. Candy Stripe Pattern
What You’re Seeing
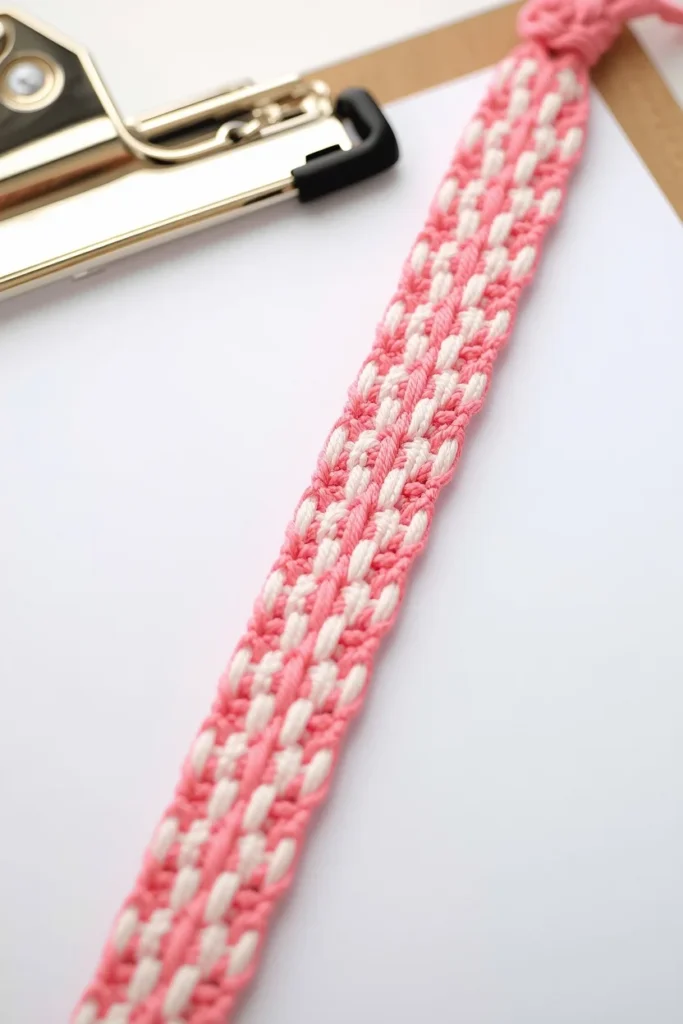
Picture thin, evenly spaced diagonal stripes running across the bracelet in alternating bright colors, almost like a piece of ribbon candy twisted flat, cheerful and simple at the same time.
Design Breakdown
Candy Stripe is one of the fastest patterns to knot because it only uses forward knots in one consistent direction, no switching back and forth required. It’s a fantastic confidence-builder for anyone who found chevron a little tricky at first.
Expert Tip
Choose colors with high contrast, like bright pink next to white, or turquoise next to yellow, so the diagonal stripe effect really pops once the bracelet is finished.
Why It Works
The single-direction knotting keeps the pattern visually clean and orderly, and the diagonal stripe effect creates movement across the bracelet that a straight stripe simply wouldn’t achieve.
Best For
- Small spaces
- Budget makeovers
- Families
Common Mistake To Avoid
Forgetting to keep the working string consistent. Since every knot moves in the same direction, losing track of which string is active is the most common beginner slip-up.
Quick Wins
- Fastest pattern on this entire list to complete
- Great for teaching young kids their first bracelet
- Only requires learning one knot type
- Looks great in just two or three colors
Most people don’t know this: the biggest reason handmade bracelets fray or unravel isn’t the knotting, it’s the finishing. One thing I’ve learned after years of making these is that a small dab of clear nail polish or fabric glue on the final knot, plus trimming the ends at a slight angle rather than straight across, dramatically extends how long a bracelet holds up through daily wear, showers included.
Most people waste more space than they realize when they leave their embroidery floss tangled in one big bag. Here’s where it gets interesting.
3. Diagonal Stripe Pattern
What You’re Seeing
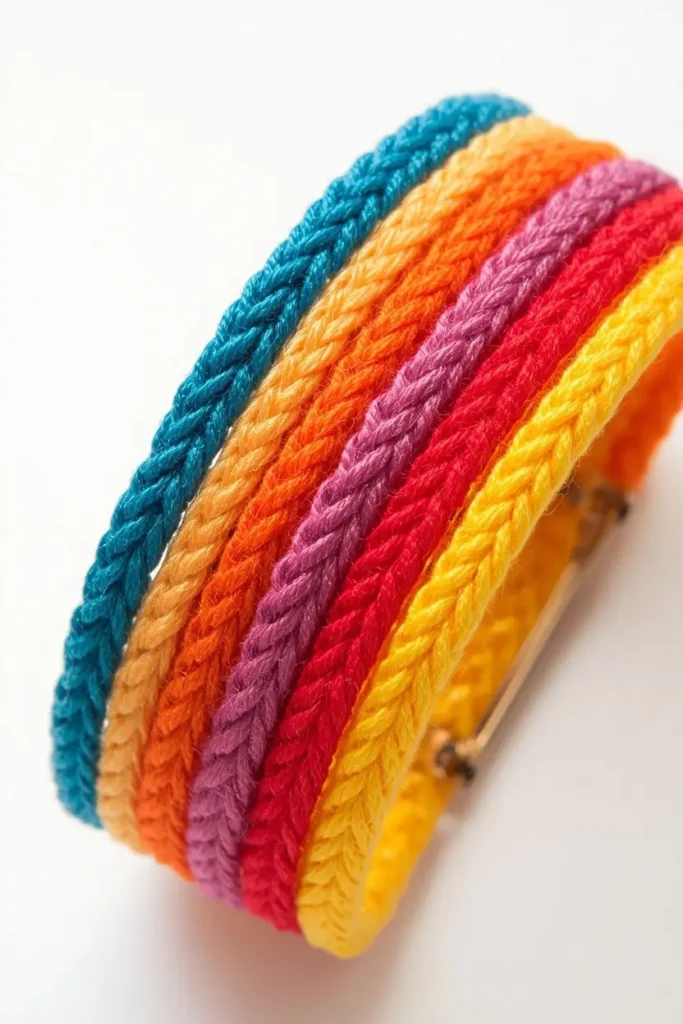
Visualize bold, clean diagonal bands of color running the full width of the bracelet at a steep angle, each stripe crisp enough that it almost looks machine-made rather than hand-knotted.
Design Breakdown
Diagonal Stripe looks far more advanced than it actually is. It’s built on the exact same forward knot as Candy Stripe, just knotted consistently across every single string in the row, which creates that clean, uninterrupted diagonal line.
Expert Tip
Work one full row all the way across before starting the next. Skipping around between strings is the fastest way to lose the pattern’s alignment.
Why It Works
The uninterrupted diagonal draws the eye along the entire length of the wrist, making the bracelet look intentional and polished even for a first-time crafter.
Best For
- Budget makeovers
- Families
- Renters
Common Mistake To Avoid
Using too many colors at once. Diagonal Stripe looks cleanest with three or four colors max, more than that and the diagonal effect gets visually muddled.
Quick Wins
- Looks more advanced than it actually is
- Works beautifully with an ombre color set
- Simple, repeatable knot pattern throughout
- Great for making matching sets for a group of friends
You might also love our guide on 10 Easy Handmade Birthday Card Ideas for Friends if you’re planning to pair one of these bracelets with a handmade card for someone’s birthday.
You May Also Like:
- 17 Amazing DIY Birthday Gifts for Friends Ideas
- 10 DIY Rainbow Birthday Party Ideas and Decorations
- Homemade Squishy Ideas
- Driftwood Craft for Kids
- 10 Easy Pine Cone Crafts and Ideas for Kids and Adults
4. Fishtail Braid Pattern
What You’re Seeing
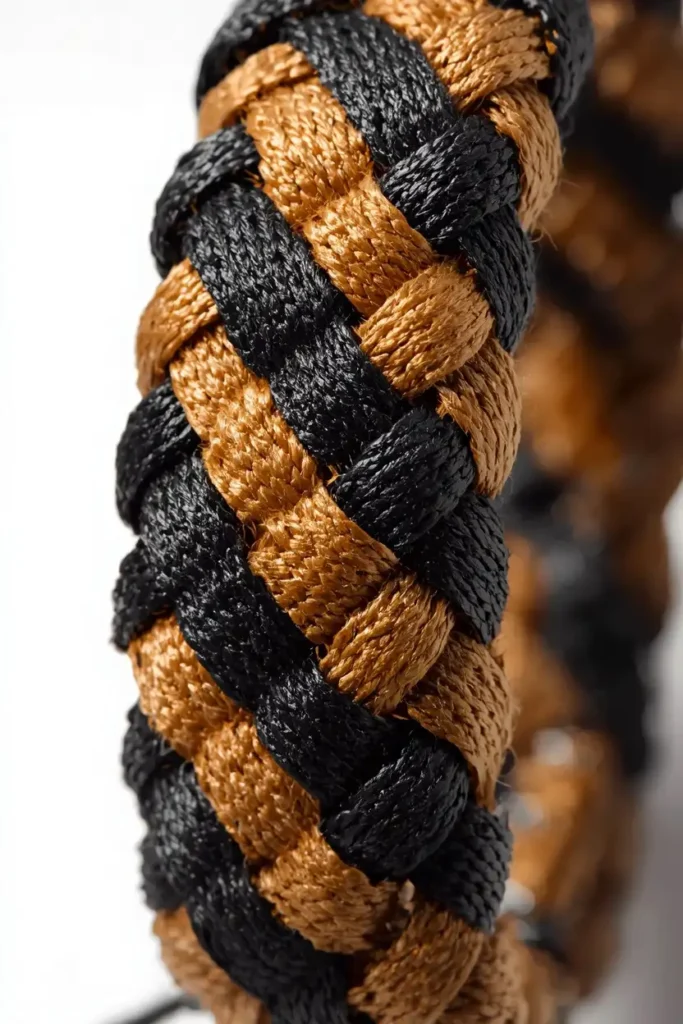
Think about how much easier a bracelet looks finished when tightly woven strands create a textured, herringbone-like braid running down the center, dense and rope-like compared to the flatter knotted patterns above it.
Design Breakdown
Fishtail moves away from knotting and into braiding, using a technique closer to a fishtail hairstyle than a typical friendship bracelet. It’s slightly more advanced but produces one of the sturdiest, most durable bracelets on this entire list.
Expert Tip
Keep consistent tension on both sides as you alternate strands. Uneven tension is the main reason fishtail bracelets come out lumpy instead of smooth and rope-like.
Why It Works
The dense, interlocking structure makes fishtail bracelets noticeably more durable than knotted patterns, which is why it’s a favorite for bracelets that’ll get heavy daily wear.
Best For
- Budget makeovers
- Families
- Luxury homes
Common Mistake To Avoid
Rushing the braid before your fingers learn the rhythm. Fishtail has a slight learning curve, and going slowly for the first inch or two pays off in the overall evenness of the finished bracelet.
Quick Wins
- One of the most durable patterns on this list
- Great texture contrast next to flatter knotted bracelets
- Works beautifully in just two colors
- Doesn’t require a clipboard or anchor point to start
5. Arrow Pattern
What You’re Seeing
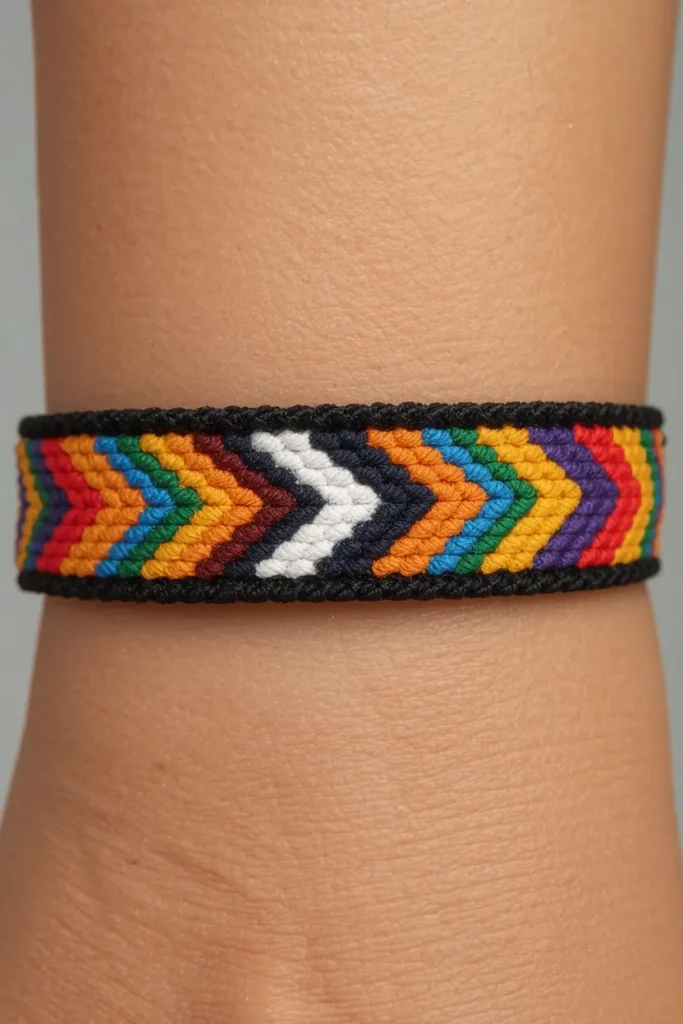
Picture a bold, pointed arrow shape running straight down the center of the bracelet, flanked by clean colored borders on either side, giving it a sharper, more graphic look than a standard chevron.
Design Breakdown
Arrow pattern is essentially a variation on chevron, but with the V-shapes stacked directly on top of each other rather than spaced out, creating a continuous arrow effect instead of separate chevrons. It’s a small tweak that makes a noticeably different finished look.
Expert Tip
Use a single bold, dark color for the arrow itself against two lighter border colors, so the arrow really stands out rather than blending into the surrounding pattern.
Why It Works
The continuous, unbroken line draws the eye directly down the center of the wrist, creating a bolder, more graphic statement than the softer, spaced-out chevron pattern.
Best For
- Small spaces
- Budget makeovers
- Families
Common Mistake To Avoid
Choosing colors too close in shade for the arrow versus the border. Without enough contrast, the arrow shape disappears into the background instead of standing out.
Quick Wins
- Bold, graphic look that stands out on a stack of bracelets
- Uses the same knots as chevron, easy to learn if you already know one
- Looks great layered with simpler stripe patterns
- Customizable arrow width for a thinner or bolder look
Here’s where it gets interesting: most people assume more colors automatically means a better-looking bracelet. In my experience, the opposite is usually true. A bracelet with just two or three well-contrasted colors almost always reads as more polished and intentional than one with six or seven competing shades. If you’re ever unsure, start with fewer colors than you think you need, you can always make a second bracelet with more.
The next idea is one designers secretly love.
6. Heart Pattern
What You’re Seeing
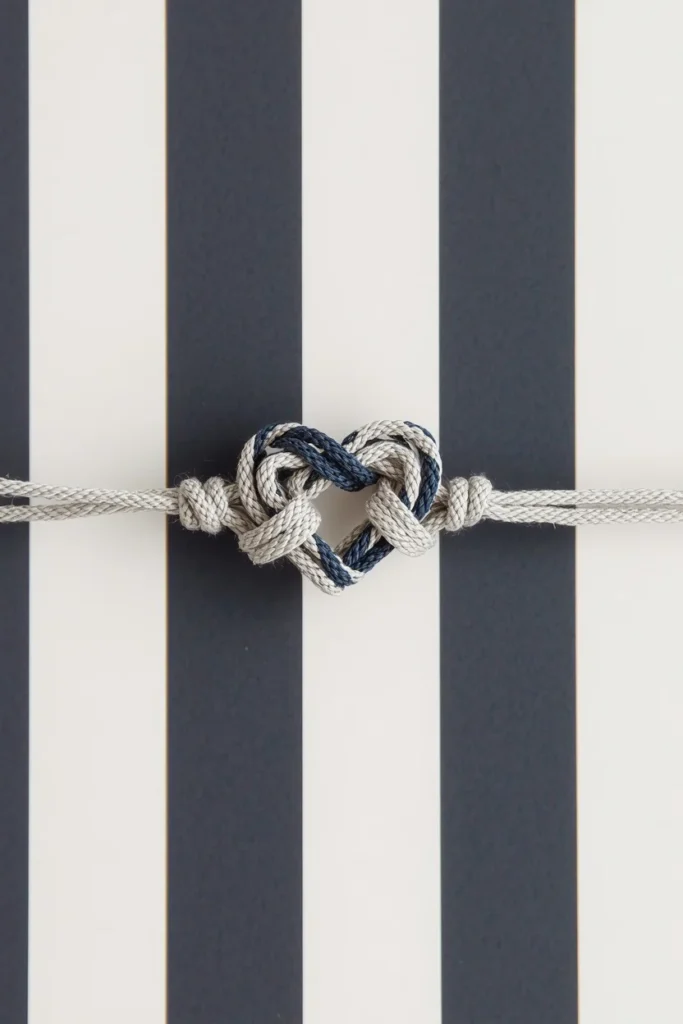
Imagine a small, symmetrical heart shape knotted directly into the center of the bracelet using a contrasting color, floating clearly against a simple striped or solid background band.
Design Breakdown
Heart pattern takes a bit more planning than the earlier patterns since it requires building a shape rather than a repeating sequence, but it’s one of the most rewarding bracelets to give as a gift because the symbolism is built right into the design.
Expert Tip
Sketch the heart shape on paper first and count exactly which knots need to be which color before you start. This prevents the common mistake of the heart coming out lopsided.
Why It Works
A recognizable shape woven directly into the pattern adds emotional meaning beyond the craft itself, which is exactly why heart bracelets are consistently one of the most requested gift patterns among kids and teens alike.
Best For
- Budget makeovers
- Families
- Luxury homes
Common Mistake To Avoid
Attempting the heart pattern as your very first bracelet ever. It’s much easier to nail the shape correctly once you’re already comfortable with basic forward and backward knots.
Quick Wins
- Meaningful, symbolic design perfect for gifting
- Works beautifully as a matching best-friend set
- Customizable heart size for a subtle or bold look
- A great next step once chevron feels easy
7. Ombre Wave Pattern
What You’re Seeing

Visualize a bracelet that shifts smoothly from a deep, saturated color at one end to a soft, pale version of the same color at the other, creating a gradient wave effect down the entire length of the band.
Design Breakdown
Ombre Wave uses the same basic knotting structure as candy stripe or diagonal stripe, but instead of alternating between two fixed colors, you gradually swap in progressively lighter or darker shades of embroidery floss as you work.
Expert Tip
Buy embroidery floss in a pre-packaged ombre or gradient set rather than trying to match individual shades yourself. It guarantees a smooth, professional-looking transition every time.
Why It Works
Gradient color transitions are one of the most Pinterest-friendly visual effects across every craft category, and applying that same principle to a friendship bracelet gives it an elevated, modern look beyond the traditional multicolor style.
Best For
- Budget makeovers
- Luxury homes
- Families
Common Mistake To Avoid
Jumping too abruptly between shades instead of gradually stepping through the gradient. A sudden color jump breaks the smooth ombre effect you’re going for.
Quick Wins
- Elevated, modern take on a classic craft
- Photographs beautifully for social sharing
- Works with any color family, not just pastels
- Makes a stunning matching set in varying shades
You May Also Like:
- 10 Easy Bath Bomb Recipes You’ll Love
- 10 Best DIY Bath Bombs for Kids
- Chalk Obstacle Course for Kids
- Reading Corner Ideas
- Book Nook Ideas
Mid-Article Deep Dive: A Buying Guide for Friendship Bracelet Supplies
This is where many crafters make a mistake — they grab whatever embroidery floss is nearest at the craft store without thinking through quantity, color coordination, or tools, and end up with a tangled mess halfway through their first bracelet.
What you actually need to get started
- Embroidery floss in your chosen colors, the standard material for nearly every pattern on this list
- A clipboard, safety pin, or piece of tape to anchor your strings while you work
- Small scissors for trimming ends cleanly
- A bracelet-sized ruler or measuring tape to size wrist length accurately before you start
How much floss to buy
- Each bracelet typically uses two to three strands of each color, roughly arm’s length long before folding
- A single skein of floss usually makes two to four bracelets depending on the pattern’s complexity
- Buying floss in multi-packs of ten to twenty colors is almost always more cost effective than buying single skeins individually
Choosing the right pattern for your skill level
- Absolute beginners should start with Candy Stripe or Diagonal Stripe, since both use only one knot direction
- Intermediate crafters ready for a challenge should try Chevron, Arrow, or Heart, which require switching knot direction
- More advanced crafters looking for texture should attempt Fishtail or Ombre Wave, which involve slightly more planning
Common buying mistakes to avoid
- Buying floss in colors that are too similar in value, which makes patterns hard to distinguish once knotted
- Skipping a clipboard or anchor point, which is one of the biggest reasons beginner bracelets come out uneven
- Underestimating length, cutting strings too short leaves no room to finish knots properly, especially for wider patterns like chevron
Realistic cost expectations
- A basic starter kit with floss, scissors, and a clipboard is very affordable and typically enough for several bracelets
- Buying in bulk multi-packs brings the cost per bracelet down significantly compared to single-skein purchases
- This remains one of the most budget-friendly crafts available, especially for making bracelets in bulk for a group of friends or a party favor table
Which of these patterns would work best for your first attempt? If you’re brand new to this, start with the simplest stripe pattern before working your way toward chevron and beyond.
8. Braided Round Pattern
What You’re Seeing
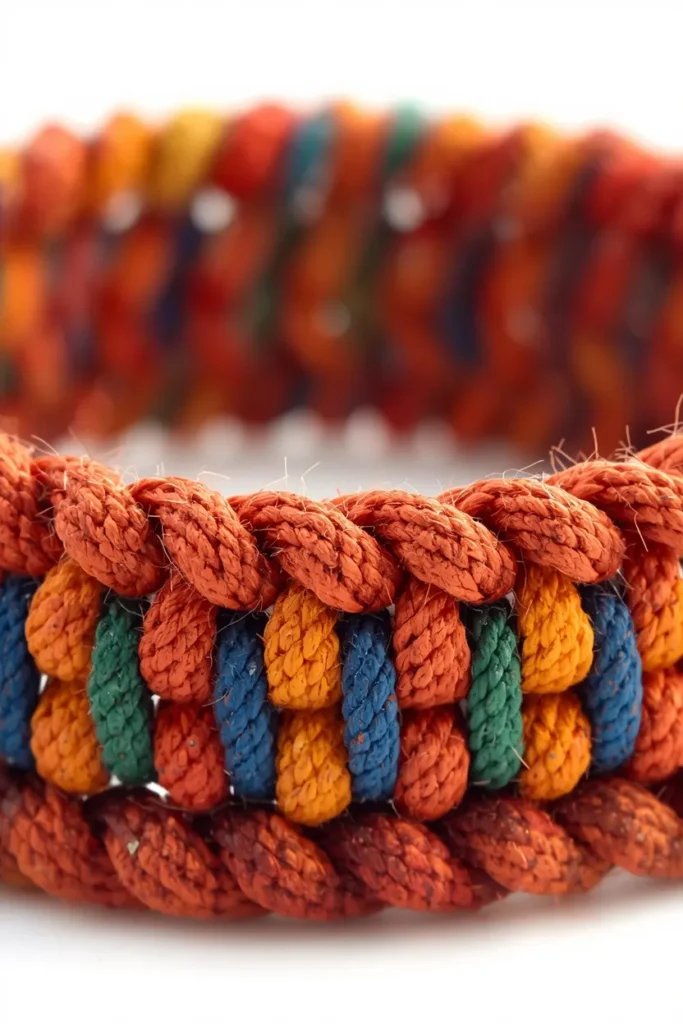
Picture a smooth, rounded, rope-like bracelet with colors spiraling neatly around the entire circumference, giving it a finished, almost store-bought look compared to the flatter knotted patterns earlier on this list.
Design Breakdown
Braided Round moves away from flat knotting entirely and uses a circular braiding technique, sometimes done with a simple cardboard disk, that produces a rounder, sturdier bracelet. It’s a great pattern for anyone who wants variety beyond the classic flat friendship bracelet look.
Expert Tip
A basic cardboard disk with slits cut around the edge, similar to a kumihimo disk, makes this pattern significantly easier and more consistent than braiding freehand.
Why It Works
The rounded shape distributes tension evenly around the entire bracelet, which is part of why this style tends to hold up exceptionally well over months of daily wear.
Best For
- Budget makeovers
- Luxury homes
- Families
Common Mistake To Avoid
Skipping the cardboard disk method and trying to braid all strands freehand right away. It’s doable, but the disk method dramatically speeds up learning the correct color rotation.
Quick Wins
- Sturdy, rounded shape that holds up well over time
- Looks distinctly different from flat knotted patterns
- Great for using up short leftover floss scraps
- Works beautifully with three or four alternating colors
One thing I’ve learned: the biggest difference between a bracelet that looks handmade and one that looks polished usually comes down to consistent string tension, not the pattern itself. Whatever pattern you choose, pulling every single knot with roughly the same amount of tightness throughout the whole bracelet is what makes the finished piece look clean and even, rather than the specific pattern you picked.
This simple change can completely transform the bracelet.
9. Diamond Pattern
What You’re Seeing
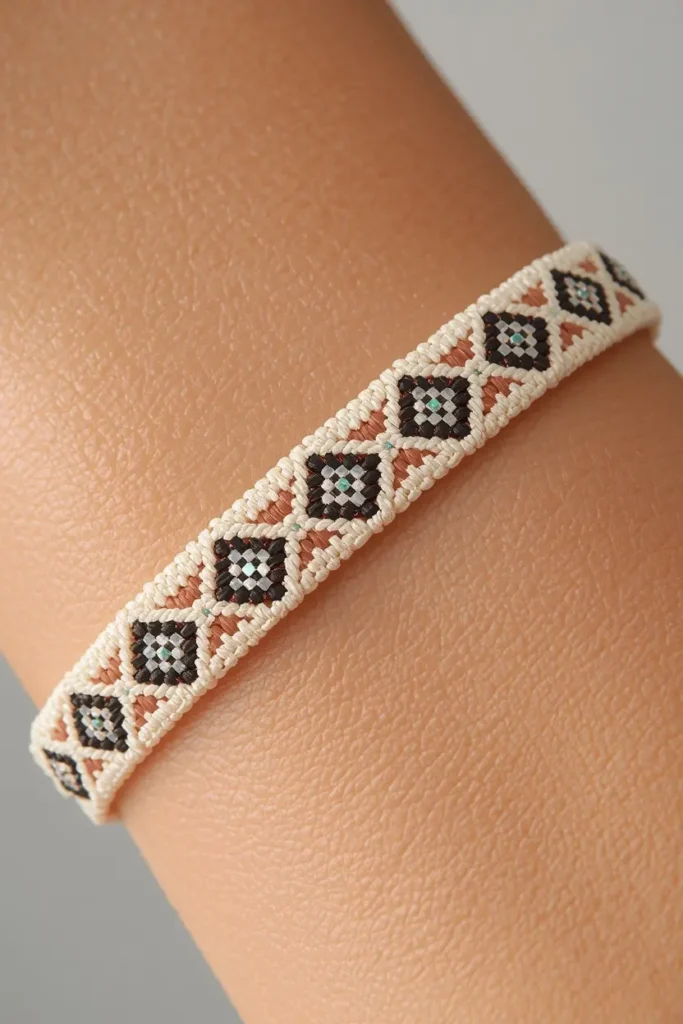
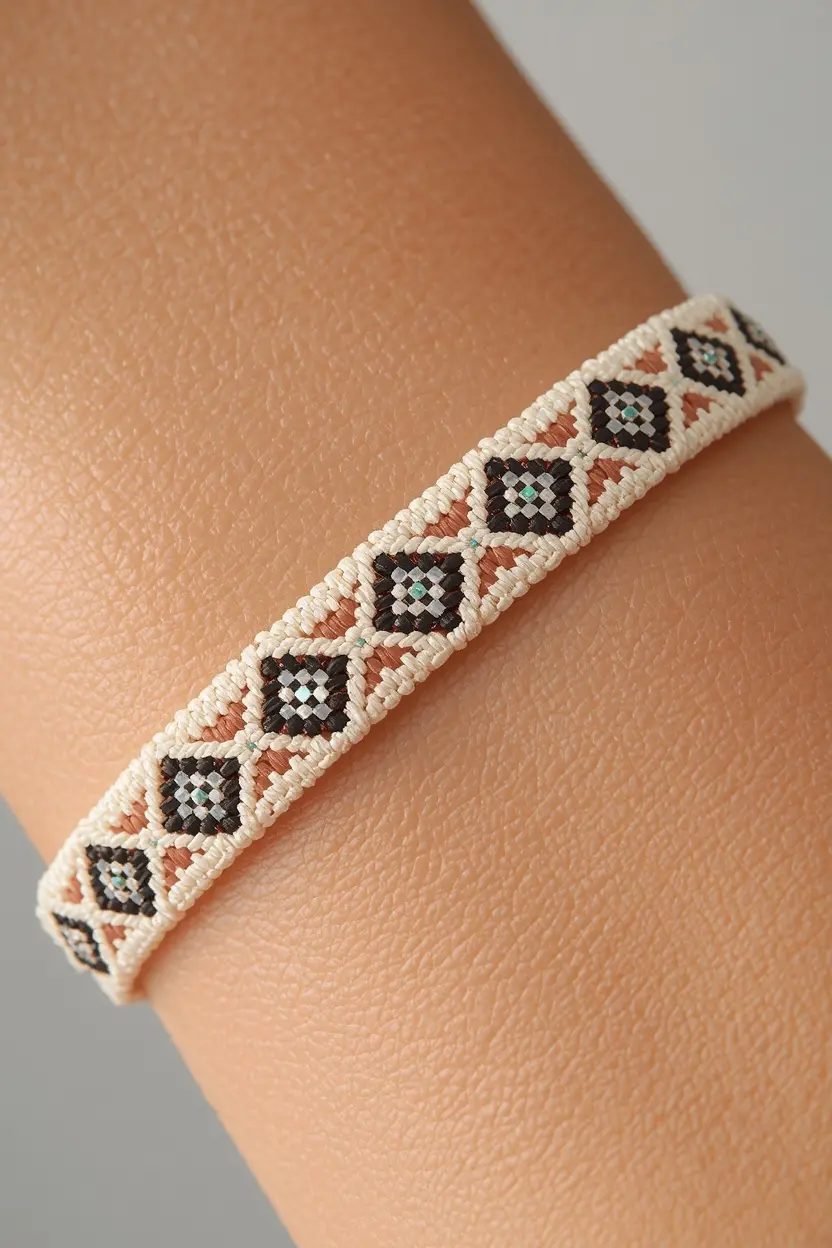
Imagine a series of small, evenly spaced diamond shapes running down the center of the bracelet, each one outlined clearly against a simpler background band, giving the whole piece a geometric, almost tribal-inspired look.
Design Breakdown
Diamond pattern builds on the same chevron knotting technique, but instead of continuing the V shape all the way across, you reverse direction partway to close each shape into a diamond. It’s a natural next step once chevron feels comfortable.
Expert Tip
Count your rows carefully as you knot the top half of each diamond, so you know exactly where to reverse direction and start closing the shape on the bottom half.
Why It Works
Repeating geometric shapes create a strong visual rhythm down the length of the bracelet, giving it a more structured, deliberate look than a simple stripe or chevron alone.
Best For
- Budget makeovers
- Families
- Luxury homes
Common Mistake To Avoid
Losing count of rows partway through and closing the diamond shape too early or too late, which throws off the spacing of every diamond that follows.
Quick Wins
- Striking geometric look that stands out in a stack
- Natural next pattern to learn after chevron
- Customizable diamond size and spacing
- Looks great in both bold and pastel color combinations
What’s your biggest challenge right now, learning the basic knots, or picking which pattern to try first? Diamond tends to be the reward pattern once chevron finally clicks.
10. Rainbow Twist Pattern
What You’re Seeing
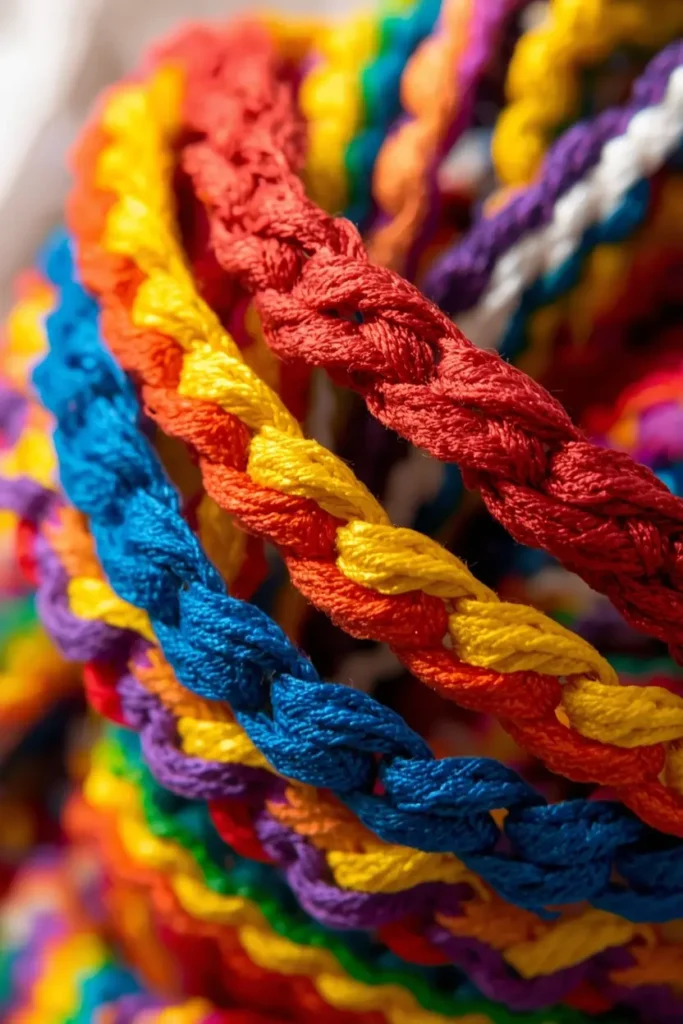
Visualize a bracelet bursting with every color of the rainbow, twisted together in a spiral that wraps continuously around the band from clasp to clasp, cheerful, bold, and instantly recognizable.
Design Breakdown
Rainbow Twist takes the simplest twisting technique on this entire list, just two twisted cords, but multiplies the visual impact by using every color of floss at once. It’s proof that a simple technique can still produce a genuinely eye-catching result.
Expert Tip
Twist the strands tightly and secure both ends with a temporary knot or tape before letting go, or the twist will unravel before you can tie it off properly.
Why It Works
The full rainbow spectrum taps into the same joyful, nostalgic color association that’s driving a lot of the current Pinterest craft resurgence, making this one of the most shareable patterns on the entire list.
Best For
- Small spaces
- Budget makeovers
- Families
- Renters
Common Mistake To Avoid
Using floss that’s too thin for a twist. Thicker strands or doubled-up floss hold a visible, defined twist far better than single thin strands.
Quick Wins
- Fastest bold, colorful bracelet on this entire list
- Perfect for using up small floss scraps of every color
- Great group activity since it requires zero prior skill
- Instantly recognizable, joyful finished look
Let me know which one is your favorite, I’d love to know if you’re drawn to the classic chevron or the bold simplicity of rainbow twist.
Related Craft Ideas
If this list has you ready to stock up on floss and start a full crafting afternoon, don’t stop here, the next idea changes everything once you start pairing bracelets with other handmade gifts.
- 17 Amazing DIY Birthday Gifts for Friends Ideas
- 10 Easy Handmade Birthday Card Ideas for Friends
- Homemade Squishy Ideas
- 10 DIY Rainbow Birthday Party Ideas and Decorations
- Driftwood Craft for Kids
- 10 Easy Pine Cone Crafts and Ideas for Kids and Adults
- Diy 3d Wall Art Ideas
- Chalk Obstacle Course for Kids
Final Thoughts on Trying These String Friendship Bracelets Patterns
Here’s the truth, you don’t need to master all ten of these patterns in one afternoon.
Start with just one, Candy Stripe if you’re brand new, or Chevron if you’ve knotted before, and let your fingers learn the rhythm before moving on to anything more advanced.
Pick one pattern this week. Just one. Gather your floss, tape down your strings, and give yourself permission to make a slightly imperfect first attempt.
Which pattern are you most excited to try first, and who’s it for?
If you’re already thinking about turning this into a bigger gifting project, our guide on 17 Amazing DIY Birthday Gifts for Friends Ideas is the natural next stop for pairing a handmade bracelet with something equally personal.
And if you loved the color and texture of these patterns, don’t miss what’s coming next on the blog, because there’s a whole world of easy, colorful crafts using the exact same embroidery floss sitting in your craft drawer right now.
Frequently Asked Questions About String Friendship Bracelets Patterns
1. What is the easiest friendship bracelet pattern for beginners? Candy Stripe and Diagonal Stripe are widely considered the easiest patterns since they use only one knot direction throughout the entire bracelet.
2. How much embroidery floss do I need for one bracelet? Most bracelets use two to three strands per color, each roughly an arm’s length long, with a single skein typically making two to four bracelets.
3. What knots are used in friendship bracelets? The vast majority of patterns rely on just two knots, the forward knot and the backward knot, arranged in different sequences to create different designs.
4. How long does it take to make a friendship bracelet? Simple patterns like Candy Stripe can take under thirty minutes, while more detailed patterns like Heart or Diamond may take an hour or more depending on width and length.
5. Do I need special tools to make friendship bracelets? No special tools are required, though a clipboard, safety pin, or tape to anchor your strings makes the process significantly easier and more consistent.
6. What is the best pattern for a best friend bracelet set? Heart pattern and Ombre Wave are especially popular for matching sets since they carry symbolic meaning and coordinate beautifully across two bracelets.
7. How do I keep a friendship bracelet from unraveling? A small dab of clear nail polish or fabric glue on the final knot, combined with trimming the ends at an angle, helps prevent fraying over time.
8. Can kids make these friendship bracelet patterns? Yes, simpler patterns like Candy Stripe and Rainbow Twist are especially well suited for kids since they require minimal prior skill and come together quickly.
9. What is the difference between chevron and arrow patterns? Chevron creates separate, evenly spaced V shapes down the bracelet, while Arrow stacks those V shapes directly on top of each other for a continuous, unbroken line.
10. Is fishtail braiding harder than knotted friendship bracelets? Fishtail has a slightly steeper learning curve than basic knotting, but most crafters pick up the rhythm within the first inch or two of practice.