4 Easy Steps to DIY Fire Pit Landscaping (Even Total Beginners Can Pull Off)
Most people don’t realize this.
Their backyard already has everything it needs for a stunning fire pit space.
The good news? Getting there is way easier than you think.
If you’ve ever scrolled past a gorgeous backyard fire pit and thought “that could never be mine,” I want you to pause right there. I’ve built one from a patch of dead grass and a weekend’s worth of stubbornness, and I promise the process is far more forgiving than it looks in photos.
You might also love our guide on outdoor fire pit design ideas — it pairs perfectly with everything we’re covering here, especially if you’re still deciding on a style direction.
This post breaks DIY fire pit landscaping into four manageable steps, with ten specific design ideas tucked inside them. No contractor jargon, no unrealistic budgets, just a real plan you can actually follow this season.
Grab a coffee (or honestly, a cold drink — this is a backyard post after all) and let’s get into it.
Step 1: Plan Your DIY Fire Pit Landscaping Layout First
Here’s where it gets interesting.
Most backyard fire pit failures don’t happen because of bad materials. They happen because of a rushed layout. Before you touch a single paver, you need a plan that accounts for space, sightlines, and safety.
1. Map Out Your Fire Pit’s “Zone of Influence”
What You’re Seeing
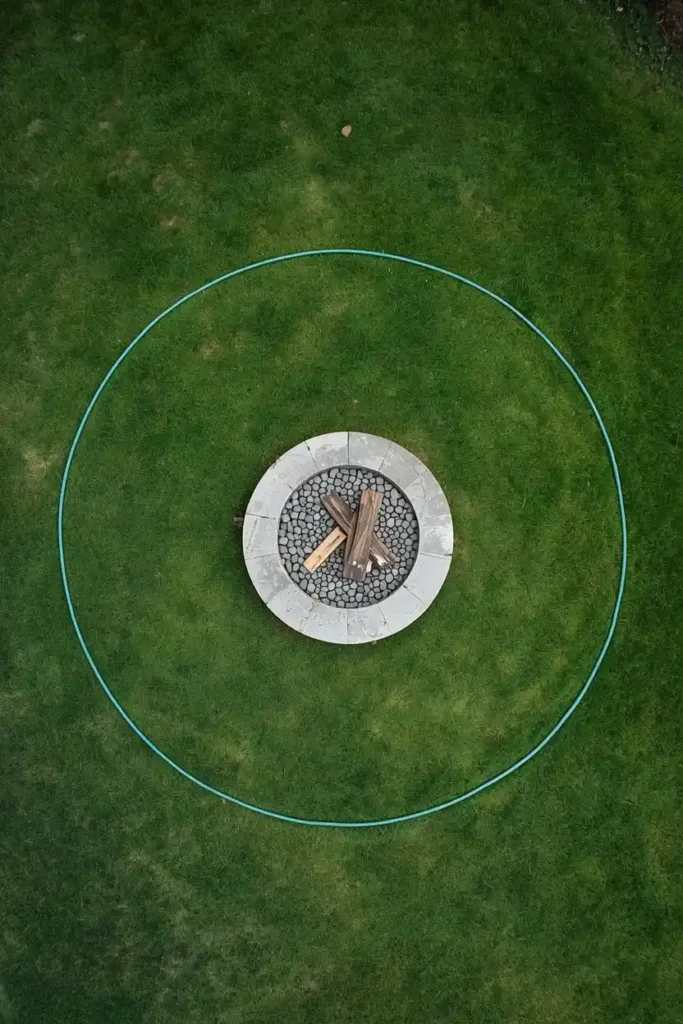
Picture a circular gravel or paver zone roughly 12–14 feet across, with the fire pit dead center and open sightlines to the house, garden beds, and the horizon beyond the yard.
Design Breakdown
Think of your fire pit not as a single object but as the anchor of an entire outdoor room. That “room” needs enough radius for seating, walking space, and a safety buffer from structures, fences, and overhanging branches.
Expert Tip
Use a garden hose or rope to physically lay out the circle before you commit. Walk around it. Sit where a chair would go. It reveals sightline problems paper plans never show.
Why It Works
Mapping the zone first prevents the single biggest DIY fire pit landscaping mistake: building a beautiful pit that’s too close to the fence, the deck, or a low tree limb.
Best For
- Small spaces
- Large spaces
- Budget makeovers
Common Mistake To Avoid
Skipping the physical mock-up and eyeballing distances instead — this is how people end up rebuilding a patio months later.
Quick Wins
- Check local fire codes for minimum clearance distances before digging.
- Aim for at least 3 feet of walking space around the seating ring.
- Face the pit toward your best view, not just toward the house.
2. Choose a Shape That Matches Your Yard’s Natural Flow
What You’re Seeing
Imagine walking into a backyard where the fire pit sits inside a gently curved gravel path, echoing the shape of a nearby garden bed instead of fighting against a rigid rectangular lawn.
Design Breakdown
Circular pits feel casual and social. Square or hexagonal pits feel more architectural and modern. The trick is matching the shape to your yard’s existing lines rather than picking whatever looks trendiest on Pinterest.
Expert Tip
If your yard is full of straight fence lines and square garden beds, a round fire pit actually softens the space beautifully by contrast.
Why It Works
Shape continuity is a quiet psychological trick — when a fire pit’s form echoes something else in the yard, the whole space reads as intentional instead of randomly assembled.
Best For
- Small spaces
- Large spaces
- Renters
- Families
Common Mistake To Avoid
Choosing a kit shape without ever standing in the yard to see how it interacts with existing paths, beds, or the patio edge.
Quick Wins
- Sketch your yard’s existing lines before choosing a fire pit shape.
- Round shapes suit casual, family-style gatherings.
- Angular shapes suit modern, minimalist landscaping.
- Let one dominant shape repeat through paving, beds, and furniture for cohesion.
One thing I’ve learned: the layout stage is where most people want to rush straight to buying the fire pit itself. Don’t. Here’s where it gets interesting — a $40 bag of marking flags and one lazy Saturday afternoon spent walking your yard will save you from a fire pit that never quite feels “right” no matter how much you spend on it later. Sit in different spots, watch where the afternoon shade falls, and notice which direction smoke will drift on a typical evening. That fifteen minutes of observation is worth more than any material upgrade.
Which of these layout ideas would work best in your home?
Step 2: Build a Solid, Safe Base
Most people waste more space than they realize.
The base is the unglamorous part of DIY fire pit landscaping, but it’s also the part that determines whether your setup lasts one season or fifteen.
3. Create a Fire-Safe Gravel or Paver Foundation
What You’re Seeing
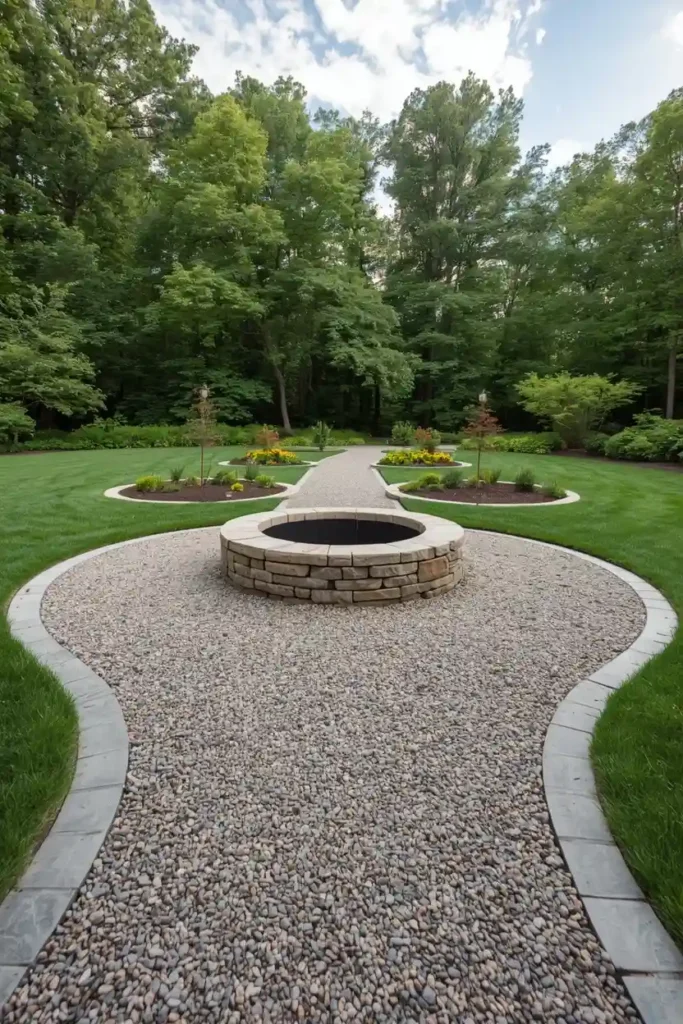
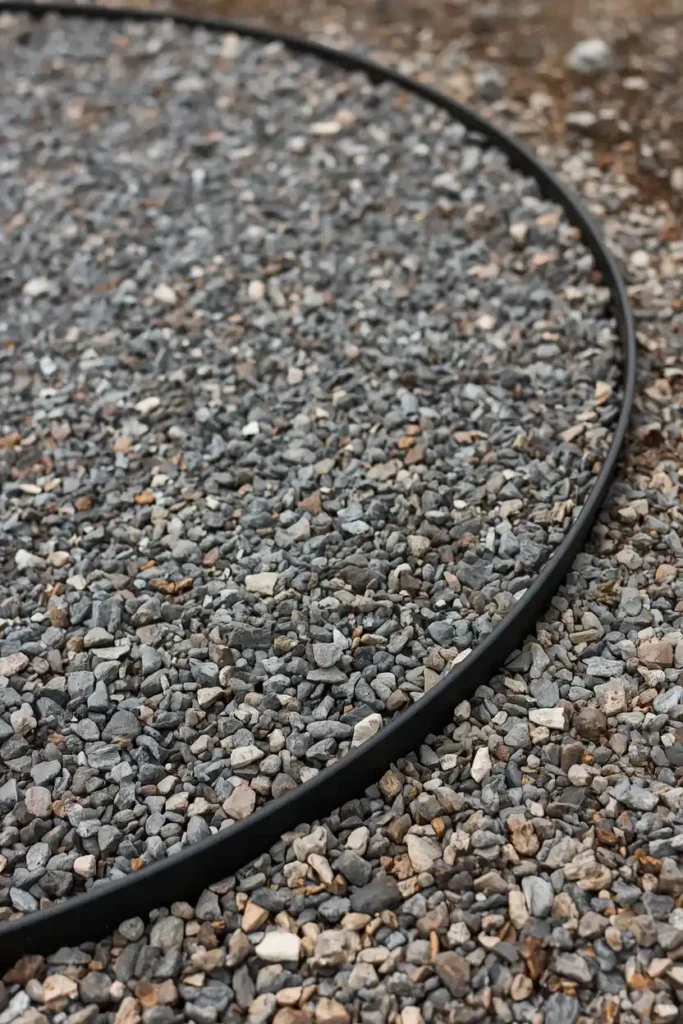
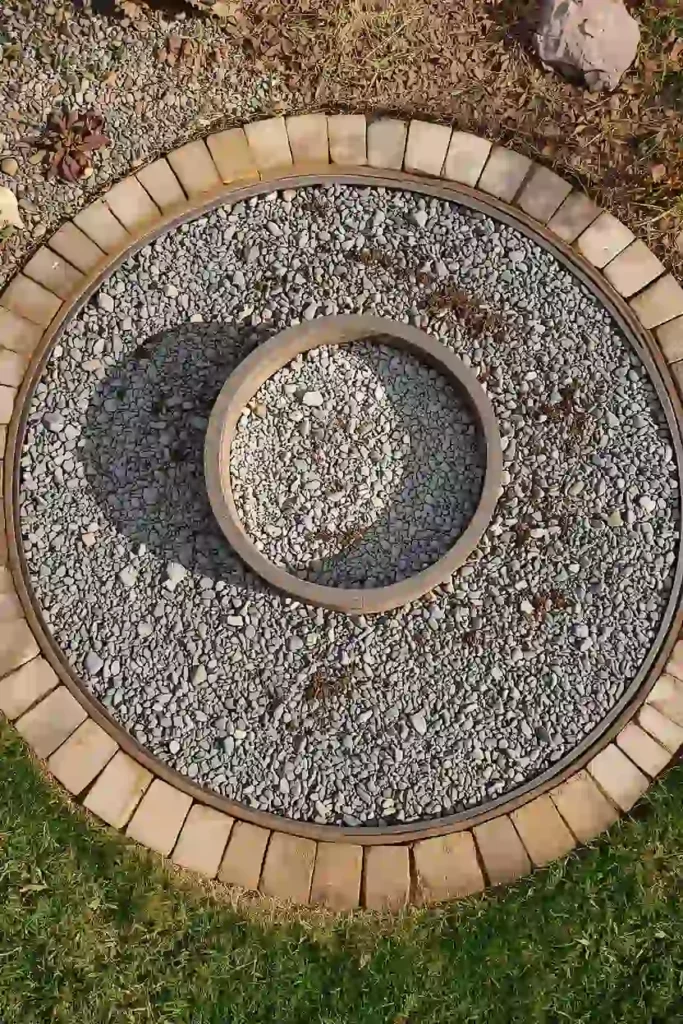
A crushed gravel base extending well beyond the fire pit ring itself, edged with steel or paver borders, with the surrounding lawn kept a clear distance away from any embers.
Design Breakdown
A proper base isn’t just decorative — it’s functional fireproofing. Compacted gravel or fire-rated pavers prevent scorch marks, drainage issues, and heat damage to grass or mulch nearby.
Expert Tip
Dig down 4–6 inches before laying gravel, and always compact each layer as you go instead of dumping it all at once.
Why It Works
A solid base resists shifting, sinking, and puddling — the three things that quietly ruin most DIY patios within their first year.
Best For
- Budget makeovers
- Large spaces
- Families
Common Mistake To Avoid
Laying pavers or gravel directly on unpacked soil, which almost always leads to uneven settling within a few months.
Quick Wins
- Rent a plate compactor for a weekend instead of buying one.
- Use landscape fabric under gravel to block weeds long-term.
- Slope the base slightly away from the house for drainage.
Don’t skip the next tip — it’s the one most first-time DIYers get wrong.
4. Add a Heat-Resistant Border Ring
What You’re Seeing
A neat ring of stacked natural stone or steel edging that frames the gravel base and visually separates the fire pit area from the surrounding lawn or garden beds.
Design Breakdown
A border does double duty: it contains loose gravel so it doesn’t migrate into your grass, and it gives the whole zone a finished, intentional edge instead of a fuzzy transition.
Expert Tip
Steel edging bends smoothly into perfect circles and holds up better long-term than plastic landscape edging, which tends to warp in direct heat.
Why It Works
Clean borders are one of the fastest ways to make a DIY project look professionally installed, because they create a crisp visual boundary the eye reads as “designed.”
Best For
- Small spaces
- Budget makeovers
- Renters
Common Mistake To Avoid
Using flammable wood edging directly against the fire pit’s heat radius — always check the manufacturer’s clearance recommendations first.
Quick Wins
- Natural stone borders blend well with garden-style yards.
- Steel edging suits modern, minimalist landscaping.
- Keep border height low enough to avoid a tripping hazard at night.
5. Choose Between a Built-In Pit or a Portable Fire Bowl
What You’re Seeing
Side by side, picture a permanent stacked-stone fire pit built into the landscape versus a freestanding metal fire bowl that could be moved to a new spot entirely.
Design Breakdown
Built-in pits feel more custom and permanent, while portable bowls are ideal if you’re renting, still finalizing your layout, or simply want flexibility season to season.
Expert Tip
If you’re not 100% sure of your final layout yet, start with a portable fire bowl on your gravel base for a full season before committing to permanent stonework.
Why It Works
This approach removes the pressure of a “perfect first try” and lets your landscaping evolve naturally around how you actually use the space.
Best For
- Renters
- Small spaces
- Budget makeovers
- Families
Common Mistake To Avoid
Committing to expensive built-in masonry before living with the space for at least one full outdoor season.
Quick Wins
- Portable bowls are ideal for renters and frequent movers.
- Built-in pits add long-term home value.
- Both options work equally well with gravel or paver bases.
- Test your layout with a portable option before going permanent.
Most people don’t know this: the fire pit itself is almost never the expensive part of the project. It’s everything around it — the base, the seating, and the finishing touches — that adds up. Keep that in mind as we move into the next section, because it changes how you should budget from the very start.
What’s your biggest challenge right now — space, budget, or just knowing where to start?
Budget Breakdown: What DIY Fire Pit Landscaping Actually Costs
This is the part most blog posts skip, and it’s exactly why projects go over budget. Let’s talk real numbers.
DIY fire pit landscaping costs vary wildly depending on materials, but most backyard projects fall into three tiers.
The Budget Build ($150–$400)
- A portable steel fire bowl or basic ring kit
- Pea gravel base spread over landscape fabric
- Folding or existing outdoor chairs repurposed for seating
- Minimal edging, or none at all initially
This tier is perfect for renters or anyone testing the waters before committing further.
The Mid-Range Build ($500–$1,200)
- A stacked concrete block or natural stone fire pit ring
- Compacted gravel base with steel edging
- A few Adirondack chairs or a small bench
- Basic landscape lighting (solar stake lights are a great starting point)
This is the sweet spot for most homeowners — durable, attractive, and achievable in a single weekend with a helper.
The Elevated Build ($1,500–$4,000+)
- A custom stone or brick built-in fire pit
- Paver patio surrounding the entire seating zone
- Built-in bench seating or a full outdoor furniture set
- Layered lighting, planting beds, and a pergola or shade structure nearby
Where People Overspend
- Buying an oversized fire pit kit that doesn’t match their actual yard size.
- Skipping the gravel base to “save money,” then repairing drainage issues later.
- Purchasing patio furniture before finalizing the layout, leading to a mismatched fit.
Where It’s Worth Spending More
- A quality heat-rated fire pit ring or insert — cheap metal warps and rusts fast.
- Proper base preparation, since this is nearly impossible to fix after the fact without tearing everything up.
- Comfortable seating, since this is what actually keeps people outside longer.
A Realistic Timeline
Most DIY fire pit landscaping projects take one focused weekend for the budget or mid-range tier — one day for layout and base prep, one day for the fire pit and finishing touches. Elevated builds with paver patios typically need two to three weekends, especially if you’re working solo.
A Simple Rule of Thumb
Spend roughly 40% of your budget on the base and fire pit structure, 35% on seating, and 25% on lighting, planting, and finishing details. This ratio keeps the space functional first, beautiful second — which, ironically, is what makes it beautiful in the end.
Would you choose function or style first when planning your own space?
Step 3: Design the Seating Zone
The next idea changes everything.
A fire pit without comfortable, well-placed seating is just a hole with rocks around it. This is where your space actually becomes a gathering spot.
6. Arrange Seating in a Broken Circle, Not a Perfect Ring
What You’re Seeing
Picture four or five chairs arranged in a loose, slightly staggered circle around the fire pit, with one gap left open for easy walking access rather than a perfectly symmetrical ring.
Design Breakdown
A perfect unbroken circle looks tidy on paper but actually feels rigid and formal in real life. Leaving a natural gap makes the space feel more social and easier to move through.
Expert Tip
Angle chairs slightly inward rather than facing them dead-center — it encourages conversation between neighbors, not just staring at the flames.
Why It Works
This is where many homeowners make a mistake: they design for the photo, not for the conversation. A slightly imperfect arrangement almost always gets used more often.
Best For
- Families
- Large spaces
- Budget makeovers
Common Mistake To Avoid
Bolting or permanently anchoring seating in a fixed ring, which removes flexibility as your group size changes night to night.
Quick Wins
- Leave at least one clear walking gap in the seating circle.
- Mix chair types for a relaxed, collected look.
- Angle seats slightly inward, not straight-on.
7. Mix Seating Heights and Materials for Visual Interest
What You’re Seeing
A combination of low Adirondack chairs, a couple of woven outdoor stools, and a small side table scattered around the fire pit rather than one matching furniture set.
Design Breakdown
Uniform furniture sets look nice in a showroom but often feel flat outdoors. Mixing heights and textures — wood, metal, woven wicker — adds the kind of visual depth that makes a space feel curated over time.
Expert Tip
Start with two matching anchor chairs, then add one or two different pieces as budget allows. This avoids a chaotic look while still building in variety.
Why It Works
Varied textures and heights mimic how naturally collected outdoor spaces evolve, which reads as far more inviting than a matched patio set fresh out of the box.
Best For
- Budget makeovers
- Renters
- Small spaces
Common Mistake To Avoid
Buying an entire matching furniture set all at once, which limits future flexibility and often costs more upfront.
Quick Wins
- Thrift or repurpose one seating piece for texture and character.
- Keep a small side table nearby for drinks or snacks.
- Use outdoor cushions to soften mixed materials visually.
You May Also Like:
- Patio Dining Set Ideas
- Outdoor Patio Ideas
- Paver Patio Ideas
- Outdoor Winter Seating Ideas
- Backyard Bar Ideas
8. Add a Low Coffee Table or Log Rounds as a Center Touchpoint
What You’re Seeing
Envision a low, weatherproof coffee table — or a cluster of sanded log rounds — positioned just outside the fire pit’s heat radius, holding drinks, a lantern, or a small plant.
Design Breakdown
A central touchpoint gives the seating area a functional heart, similar to how a coffee table anchors an indoor living room. It also breaks up empty gravel space visually.
Expert Tip
Keep the table low — below seat height — so sightlines to the fire and to other guests stay open.
Why It Works
Small functional details like this are what separate a fire pit that feels like an afterthought from one that feels like a true outdoor room.
Best For
- Small spaces
- Families
- Budget makeovers
Common Mistake To Avoid
Placing furniture too close to the fire pit’s actual heat radius — always check manufacturer clearance guidelines first.
Quick Wins
- Log rounds are a nearly free option if you have access to fallen wood.
- Keep tabletop items minimal to avoid clutter near the flames.
- Weatherproof materials save you from nightly furniture shuffling.
Here’s where it gets interesting: the seating zone is honestly the section people redo the most after their first season. Not because the furniture was wrong, but because they didn’t test it with a real group first. Before you finalize anything, host one low-key evening with mismatched chairs pulled from around the house. Watch where people naturally gravitate. That’s your real seating plan — everything else is just guessing.
Which design would you try first — the broken circle, mixed materials, or the center touchpoint?
Step 4: Layer in Landscaping Details
This simple change can completely transform the space.
Everything up to this point has been structure. This last step is where DIY fire pit landscaping actually starts to feel like a finished, magazine-worthy corner of your yard.
9. Frame the Space with Layered Planting
What You’re Seeing
Visualize the difference between a fire pit sitting alone on bare gravel versus one framed by tiered plantings — tall ornamental grasses at the back, mid-height shrubs on the sides, and low, heat-tolerant groundcover near the edges.
Design Breakdown
Layered planting gives the eye a natural transition from lawn to fire pit zone instead of an abrupt gravel edge. It also adds movement and softness against all the hard materials nearby.
Expert Tip
Choose drought-tolerant, fire-safe plants like lavender, ornamental grasses, or sedum near the border — they handle heat exposure and low water better than lush, leafy plants.
Why It Works
Softscaping balances the hardscape of stone, gravel, and metal, which keeps the whole area from feeling cold or overly industrial.
Best For
- Large spaces
- Luxury homes
- Families
Common Mistake To Avoid
Planting anything highly flammable — like dry ornamental grasses — too close to the actual fire ring.
Quick Wins
- Keep flammable plantings at least 3–5 feet from the fire pit edge.
- Use groundcover to soften hard gravel transitions.
- Repeat one plant type around the whole circle for cohesion.
10. Add Layered Lighting for Evening Ambience
What You’re Seeing
Picture soft solar path lights lining the walkway to the fire pit, paired with a few hanging string lights overhead and a couple of flickering lanterns placed near the seating.
Design Breakdown
Good lighting design uses at least two or three light sources at different heights — path level, seated eye level, and overhead — rather than one single bright source.
Expert Tip
Warm-toned bulbs (2700K or lower) mimic firelight and keep the whole space feeling cohesive after sunset, instead of clashing with the flames.
Why It Works
Layered lighting extends how long people want to stay outside, since it removes the harsh contrast between a bright fire and a pitch-dark yard.
Best For
- Small spaces
- Large spaces
- Luxury homes
- Renters
Common Mistake To Avoid
Relying on one single overhead light, which creates harsh shadows and actually makes the space feel smaller at night.
Quick Wins
- Solar lights are a renter-friendly, no-wiring lighting option.
- Warm white tones pair best with natural fire light.
- Add path lighting for safety, not just aesthetics.
- Dimmable string lights let you adjust the mood as the night goes on.
Think about how much easier your evenings become once this space is fully finished — no more dragging random lamps outside or squinting to find your drink in the dark.
Let me know which one is your favorite — the layered planting or the layered lighting?
Related Landscaping & Outdoor Ideas
If this project has you in full backyard-planning mode, you’re going to want to keep exploring. These guides pair especially well with everything covered above.
- Outdoor Fire Pit Design Ideas
- Small Garden Design Ideas
- Small Front Yard Landscaping Ideas
- Outdoor BBQ Ideas
- Patio Floor Ideas
- Garden Shed Landscaping Ideas
- Patio Umbrella Design Ideas
- Tiny Garden Ideas
Final Thoughts on DIY Fire Pit Landscaping
If you take away just one thing from this post, let it be this: DIY fire pit landscaping isn’t about buying the perfect fire pit. It’s about building the four layers around it — layout, base, seating, and finishing details — in the right order.
The layout stage prevents costly mistakes. The base keeps everything safe and long-lasting. The seating zone is what actually gets used. And the final layer of planting and lighting is what makes neighbors slow down and ask who did your landscaping.
My honest advice? Don’t try to do all four steps in one weekend. Pick just one idea from this list — maybe it’s finally marking out your zone with a garden hose, or swapping mismatched patio chairs into a broken-circle arrangement — and implement that this week. Momentum builds from there.
So, which of these ten ideas would work best in your own backyard?
If you’re already dreaming about what comes next, our guide on outdoor patio ideas is the natural next step once your fire pit zone is finished. And if you’ve got a smaller yard to work with, stick around — our next post digs into stretching a tiny outdoor space further than you’d think possible.
Frequently Asked Questions About DIY Fire Pit Landscaping
1. How far should a fire pit be from my house? Most local codes recommend at least 10–15 feet from structures, fences, and overhanging trees, though this varies by municipality, so always check local regulations first.
2. What’s the cheapest way to do DIY fire pit landscaping? Start with a portable fire bowl, a pea gravel base, and repurposed seating — this budget approach can come in under $200 for a functional first version.
3. Do I need a permit for a backyard fire pit? Many areas don’t require a permit for portable or small built-in pits, but it’s worth a quick call to your local building department before starting.
4. What’s the best base material for a DIY fire pit? Compacted gravel over landscape fabric is the most beginner-friendly, affordable, and effective base for most yards.
5. Can I build a fire pit patio without pavers? Yes — a well-compacted gravel base with steel edging looks clean and works perfectly well without any paving stones at all.
6. How big should my fire pit seating area be? Plan for roughly 12–14 feet of total diameter to comfortably fit a fire pit, seating, and walking space around the edges.
7. What plants are safe near a fire pit? Low-flammability, drought-tolerant options like sedum, lavender, and low groundcovers work well when kept a few feet from the actual flame.
8. Should I choose a wood-burning or gas fire pit? Wood-burning pits feel more traditional and rustic, while gas options offer more control and less smoke — the right choice depends on your priorities and local regulations.
9. How do I keep my fire pit area from flooding? Slope your gravel base slightly away from your house and any low points in the yard to keep water from pooling after rain.
10. Can renters still do DIY fire pit landscaping? Absolutely — portable fire bowls, solar lighting, and movable seating make it entirely possible to build a beautiful, temporary setup with no permanent construction required.