10 DIY Home Decor Ideas That’ll Make Your Home Feel Brand New
This article was created in line with Trends Oraa’s research and content standards.
Most people don’t realize this.
Their home doesn’t feel “off” because of money. It feels off because of a few missing details.
The good news? Fixing it is easier than you think.
If you’ve ever scrolled through Pinterest wondering why your living room never quite looks like the inspiration photos, you’re not alone. The gap usually isn’t a full renovation — it’s a handful of small, intentional choices repeated room after room.
That’s exactly what these DIY home decor ideas are built to fix, one weekend project at a time.
You might also love our guide on DIY Organization Hacks if clutter is part of what’s holding your space back — but for now, let’s talk about the visual changes that make the biggest difference first.
Most people don’t know this, but designers lean on the same five or six tricks over and over. Once you see them, you’ll notice them everywhere. And once you try them yourself, you won’t be able to unsee how much they change a room.
Keep scrolling. The first idea alone could change how your entryway feels every time you walk through the door.
10 DIY Home Decor Ideas Worth Trying This Month
These aren’t generic “add a throw pillow” tips. Each one comes with the exact reasoning behind why it works, so you can adapt it to your own space instead of just copying a photo.
1. The Repurposed Gallery Wall That Doesn’t Look “Thrown Together”
What You’re Seeing
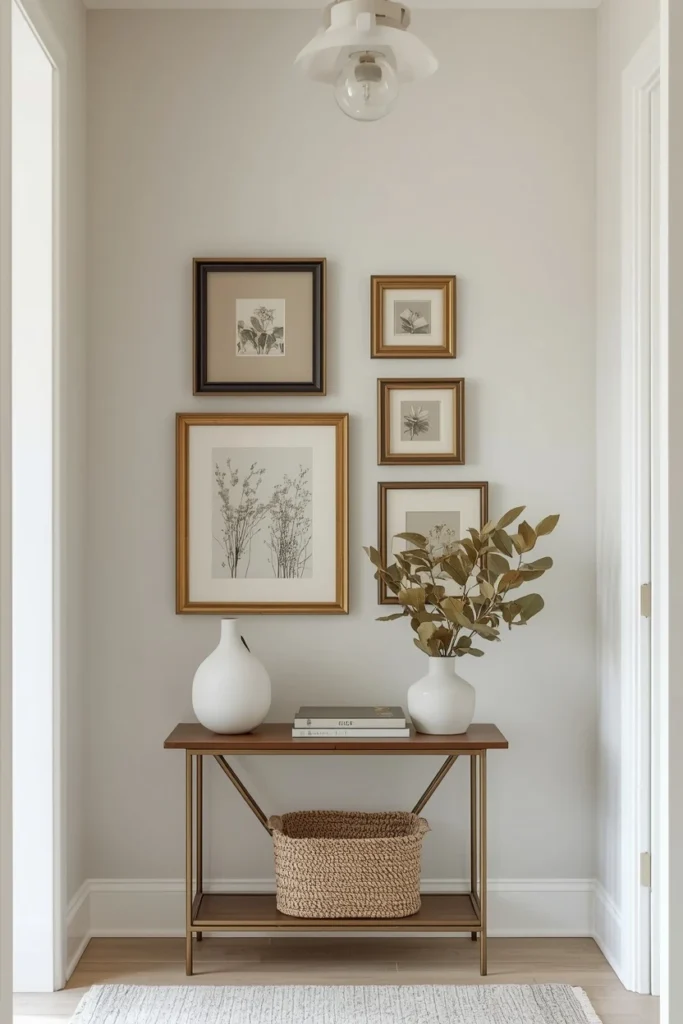
Picture a hallway wall holding eight mismatched frames — thrifted gold ones, a few plain black ones, one with a textured mat. They’re not the same size, but they’re arranged with intention, not randomness.
Design Breakdown
A gallery wall fails when every frame matches perfectly and the spacing feels mechanical. It succeeds when there’s variety in frame style but consistency in color palette or theme.
The trick is choosing one unifying element — black-and-white photography, a single accent color, or all-vintage frames — and letting everything else stay loose.
Expert Tip
Lay your frames out on the floor first using painter’s tape to mark the wall layout. Live with the tape grid for 24 hours before committing to nail holes.
Why It Works
Asymmetry photographs better and feels more “collected over time,” which is the lived-in look most people are actually chasing without knowing the name for it.
Best For
- Renters
- Budget makeovers
- Small spaces
Common Mistake To Avoid
Centering the gallery perfectly above furniture instead of letting it breathe slightly off-center, which often looks more curated, not less.
Quick Wins
- Use painter’s tape to test layouts before drilling
- Mix two to three frame finishes max
- Anchor the grouping around one larger statement piece
2. Floating Shelves Styled Like a Boutique Display
What You’re Seeing
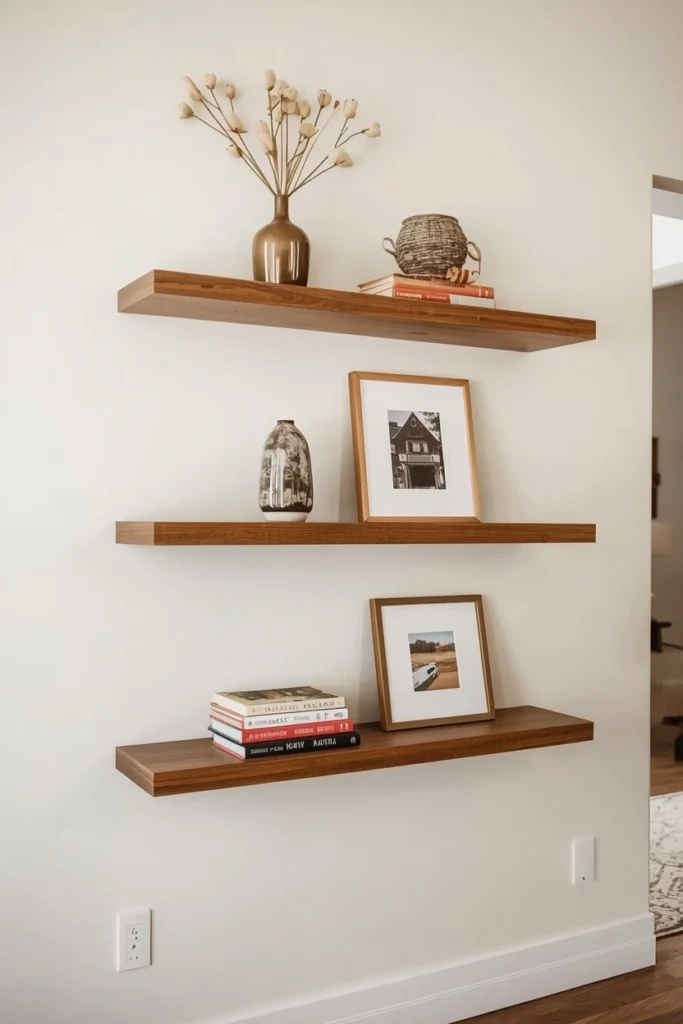
Three slim wood shelves staggered on a living room wall, each holding two or three objects with visible negative space between them — not crammed corner to corner.
Design Breakdown
Most floating shelves fail because people treat them like extra storage instead of a display. The goal is curated, not full.
Group items in odd numbers — one, three, or five — and vary height using books as risers under smaller objects.
Expert Tip
Anchor every shelf with one taller item like a vase or a small framed print to break up the horizontal line.
Why It Works
Negative space gives the eye somewhere to rest, which is exactly what makes styled shelves read as intentional rather than cluttered.
Best For
- Small spaces
- Renters
- Budget makeovers
Common Mistake To Avoid
Hanging shelves at perfectly even spacing — slightly uneven gaps usually look more natural and less like a kit.
Quick Wins
- Style in odd-numbered groupings
- Use books as hidden risers
- Leave at least 30% of each shelf empty
If you want more inspiration for arranging open storage, our Bedroom Bookshelf Ideas guide covers this same styling logic in more detail.
But here’s the important part — shelves are only half the equation. What you put underneath them matters just as much, and that’s where idea three comes in.
One thing I’ve learned doing this for years: the biggest visual upgrade in any room rarely comes from buying something new. It comes from changing the finish on something you already own.
Paint, new hardware, or a different stain can make a $40 thrift store dresser look like a $400 designer piece. This is the kind of project that photographs well for Pinterest and actually holds up in daily life — which is rarer than it sounds.
Most people skip this step because it feels intimidating. It isn’t. It just takes patience.
Most people waste more space than they realize.
3. Furniture Makeover With Paint, New Hardware, and One Bold Move
What You’re Seeing
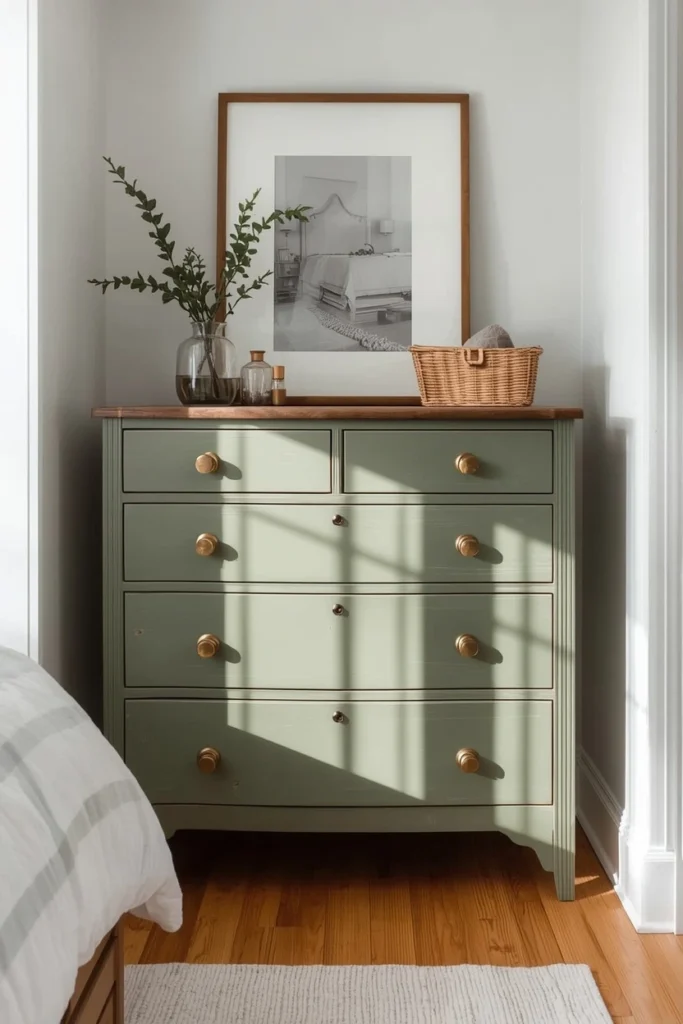
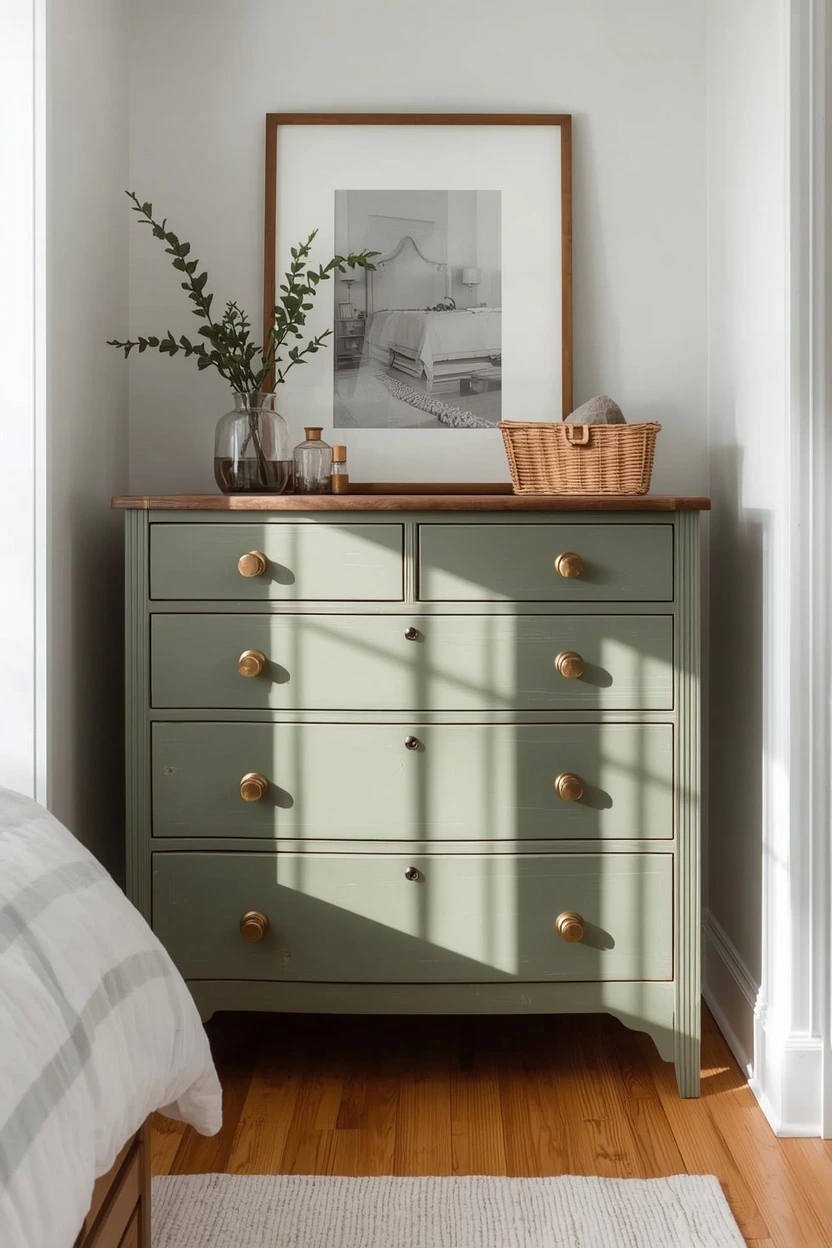
An old wood dresser, sanded and repainted in a deep sage green, fitted with brass cup pulls that catch the light differently than the original hardware did.
Design Breakdown
A full furniture makeover usually involves three layers: surface prep, color, and hardware. Skipping the prep step is why most DIY furniture paint jobs chip within months.
Sand lightly, prime if the wood is glossy or dark, then apply two thin coats rather than one thick one.
Expert Tip
Always change the hardware, even if you keep the original color. New pulls or knobs instantly modernize a piece without touching the paint at all.
Why It Works
Color and hardware are the two fastest visual cues our brains use to judge whether something is “new” or “old,” so updating both resets the entire perception of the piece.
Best For
- Budget makeovers
- Renters
- Families
Common Mistake To Avoid
Painting over dust or grease without cleaning first, which causes peeling within weeks no matter how good the paint brand is.
Quick Wins
- Clean and sand before priming
- Use two thin coats instead of one thick coat
- Swap hardware even on pieces you’re not repainting
For more ideas in this exact category, check out our DIY Furniture Makeover Ideas guide for project-by-project inspiration.
You May Also Like:
- DIY 3D Wall Art Ideas
- Cabinet Makeover Ideas
- 20 Brilliant DIY IKEA Dresser Hacks
- Small Console Tables Ideas
- Tall Wall Decor Ideas
Here’s where it gets interesting. Furniture paint gets a lot of attention, but soft textures — fabric, fiber, texture on walls — are quietly the thing most rooms are missing entirely.
4. No-Sew Fabric Wall Art for an Instant Focal Point
What You’re Seeing
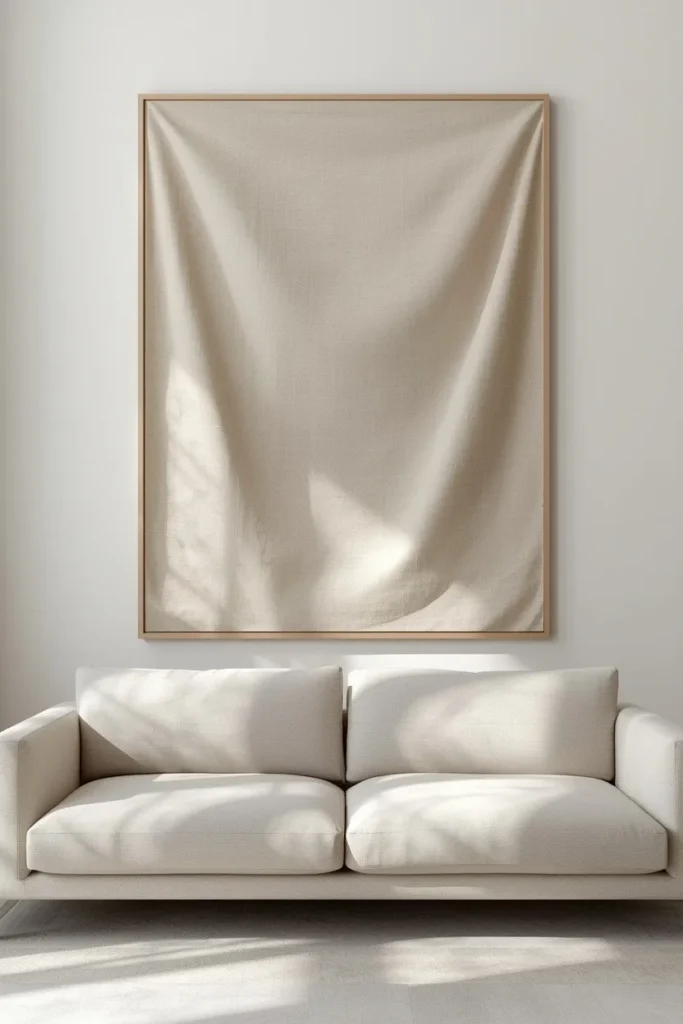
A large piece of textured linen stretched over a simple wood frame, hung above a sofa where a traditional canvas print would usually go.
Design Breakdown
Fabric wall art adds warmth and texture that flat prints can’t replicate, and it costs a fraction of framed canvas art at this scale.
You don’t need to sew anything — a staple gun and a wood frame (even a repurposed picture frame) is enough.
Expert Tip
Choose a fabric with visible weave or texture, like linen, boucle, or a patterned cotton, rather than a flat solid — texture is what sells the “designer” look.
Why It Works
Soft materials absorb sound slightly and soften a room visually, which is why textile-heavy rooms tend to feel cozier even at the same temperature.
Best For
- Budget makeovers
- Renters
- Large spaces
Common Mistake To Avoid
Choosing fabric that’s too thin, which sags and shows the frame edges through the front after a few weeks.
Quick Wins
- Use a staple gun, not glue, for a tighter finish
- Pick textured over flat fabric
- Go bigger than you think you need — oversized reads as intentional
Picture yourself enjoying a living room where the largest piece of art cost less than a takeout dinner for two. That’s genuinely achievable here. Our Fabric Wall Decor Ideas guide has even more variations on this technique.
Don’t skip the next tip — it’s the one most people get backwards.
5. The Upcycled Planter Corner That Brings a Room to Life
What You’re Seeing
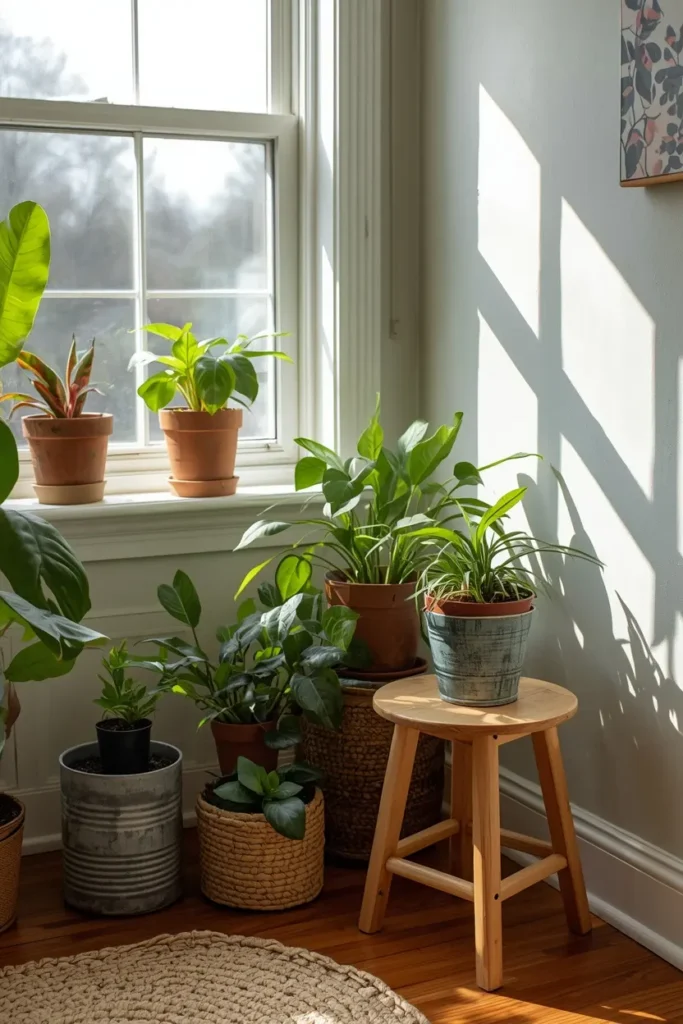
A cluster of plants in mismatched-but-coordinated containers — a vintage tin, a ceramic pot, a woven basket liner — grouped in a previously empty corner near a window.
Design Breakdown
Greenery is the cheapest way to make a room feel finished, but one lonely plant rarely does the job. Clustering three plants at different heights does.
Use risers (an upside-down bowl, a small stool, a stack of books) to vary height before you even think about the pots themselves.
Expert Tip
Repurpose containers you already own — old paint cans, ceramic bowls, even a clean tin can with a coat of spray paint — instead of buying matching planters.
Why It Works
Varied height mimics how plants grow in nature, which our brains read as organic and calming rather than staged.
Best For
- Small spaces
- Budget makeovers
- Renters
- Families
Common Mistake To Avoid
Buying one large plant and calling it done — single plants read as an afterthought, while clusters read as a deliberate decor choice.
Quick Wins
- Group in clusters of three at varied heights
- Repurpose containers instead of buying new ones
- Place near a light source, even if it’s faux greenery
Our Houseplant Pot Ideas guide has dozens of upcycled container ideas if this one catches your eye.
Most people don’t know this: the order you decorate in matters almost as much as what you choose.
I’ve watched friends buy art, then furniture, then rugs — and end up with a room that never quite ties together, because each piece was chosen in isolation.
The fix is picking one anchor item first — usually a rug or a piece of furniture — and pulling every other color and texture decision from that single piece. It sounds restrictive, but it’s actually what makes a space feel cohesive instead of accidental.
DIY Home Decor Budget Breakdown: What You’ll Actually Spend
This is where many homeowners make a mistake — they assume “DIY” automatically means “cheap,” and then get frustrated when a project costs more than expected.
Here’s a realistic breakdown by project type, so you can plan instead of guess.
Under $25 Projects
- No-sew fabric wall art using a thrifted frame
- Upcycled planters using items already in your home
- A small gallery wall using frames from a thrift store or dollar store
These work well if you’re testing a style before committing further, or decorating a rental where you might move soon.
$25–$75 Projects
- Floating shelves (hardware plus wood, or a pre-cut kit)
- New hardware and paint for a small piece of furniture
- A statement mirror from a discount home store
This range covers most of the projects in this guide and tends to deliver the best value-to-impact ratio.
$75–$200 Projects
- A full dresser or cabinet makeover including primer, paint, and brass hardware
- A DIY upholstered headboard with batting and fabric
- Multiple coordinated planters plus live plants
Where People Overspend
- Buying premium paint for a small accent piece instead of a sample-size can
- Purchasing matching frame sets instead of mixing thrifted finds
- Choosing real plants for low-light corners, then replacing them repeatedly
Where It’s Worth Spending More
- Hardware — cheap pulls and knobs visibly tarnish or loosen within a year
- Fabric for anything load-bearing, like a headboard, since thin fabric pills quickly
- A single statement piece per room rather than several mediocre ones
Common Mistakes in Budget Planning
- Not measuring before buying, leading to returns and wasted trips
- Starting with the most expensive project instead of building confidence with a small one first
- Forgetting tools you’ll need (sandpaper, brushes, painter’s tape) in the total cost
Would you choose function or style if you had to pick one for your next project? Most people don’t have to choose — but knowing your priority before you shop saves both money and time.
The next idea is one designers secretly love, and it has almost nothing to do with what’s on your walls.
6. The DIY Headboard That Makes a Bed Look Custom-Built
What You’re Seeing
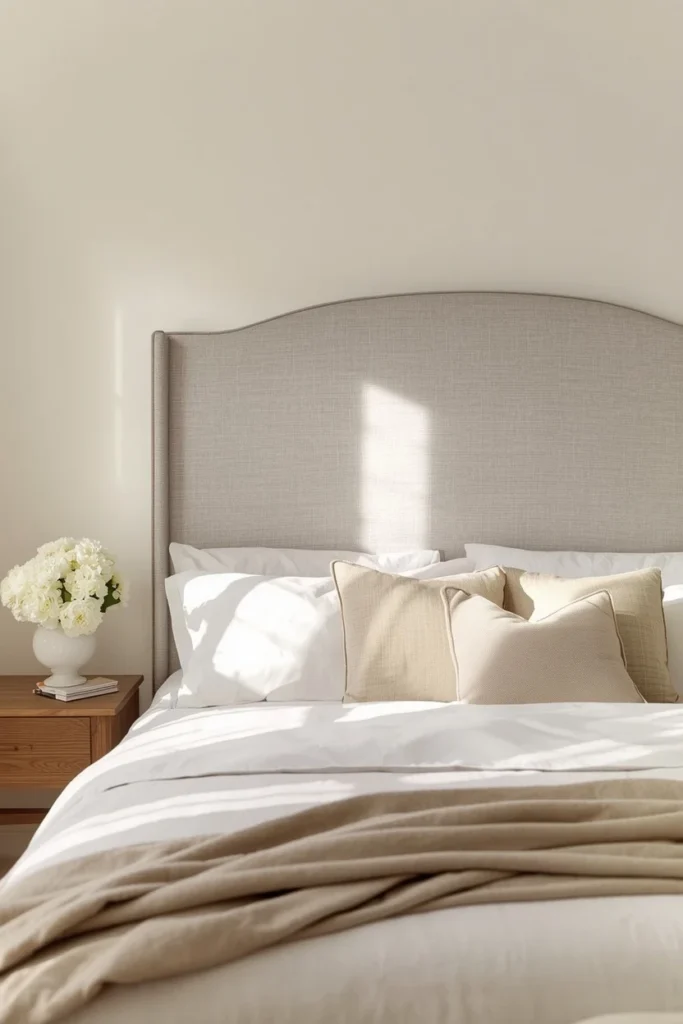
A tall, slightly curved headboard upholstered in a soft neutral fabric, mounted directly to the wall behind a bed that previously had none.
Design Breakdown
A headboard — even a simple one — anchors a bedroom the way a rug anchors a living room. Without one, the bed visually “floats” against the wall.
A basic version is plywood, batting, fabric, and a staple gun, mounted with two L-brackets.
Expert Tip
Go taller and wider than the mattress itself. An undersized headboard is one of the most common reasons a DIY version looks homemade instead of custom.
Why It Works
Scale signals intention. A headboard that fills the wall space behind the bed reads as designed, while an undersized one reads as an afterthought.
Best For
- Budget makeovers
- Renters
- Large spaces
Common Mistake To Avoid
Skipping the batting layer to save money — thin fabric over bare plywood looks flat and cheap no matter how nice the fabric is.
Quick Wins
- Size the headboard wider than the mattress
- Always include a batting layer underneath the fabric
- Mount with brackets, not adhesive, for durability
Imagine walking into a bedroom where the bed finally looks like the centerpiece instead of just furniture against a wall. That’s the entire goal of this one project.
Which of these ideas would work best in your home so far? Keep that in mind — the next two ideas build on the same principle of scale.
7. The Statement Mirror Moment
What You’re Seeing
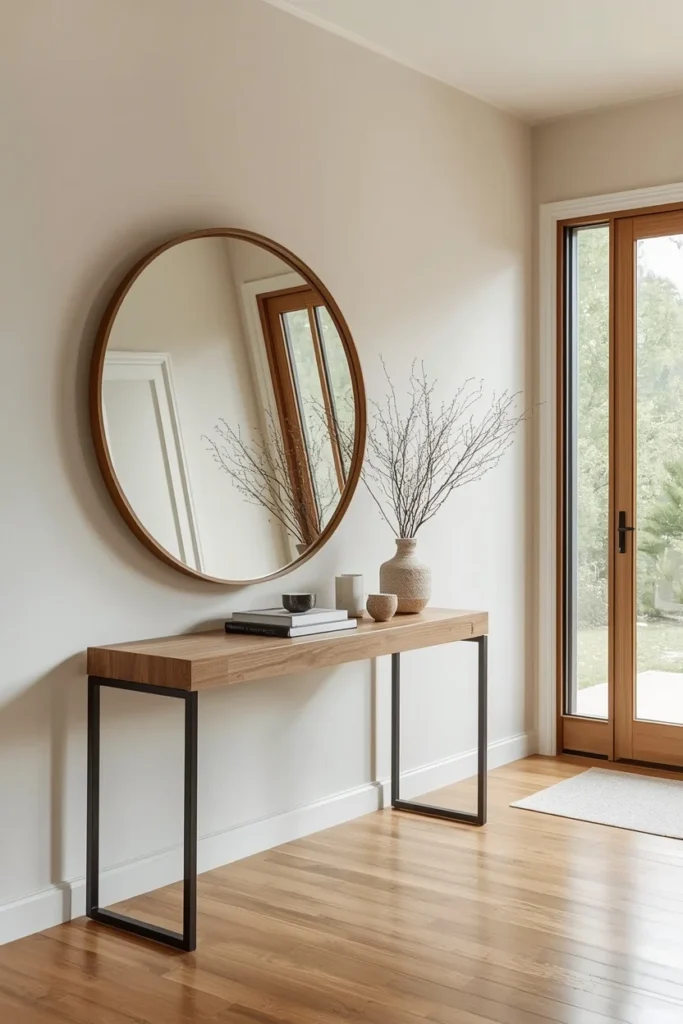
An oversized round mirror, slightly larger than expected for the wall, leaning against a console table instead of being mounted — catching light from a nearby window.
Design Breakdown
Mirrors do double duty: they reflect light to make a room feel brighter, and they add visual depth that makes small rooms feel larger than they are.
Leaning a mirror rather than hanging it instantly makes a space feel more relaxed and lived-in.
Expert Tip
Position the mirror to reflect something worth seeing — a window, a piece of art, or a plant — not a blank wall.
Why It Works
Reflected light and depth are two of the fastest tricks for making a room feel bigger and brighter without changing a single wall.
Best For
- Small spaces
- Renters
- Luxury homes
Common Mistake To Avoid
Hanging a mirror too high just because that’s where a picture would normally go — mirrors generally work best lower, closer to eye level.
Quick Wins
- Lean oversized mirrors instead of always hanging them
- Reflect a window or art piece, not a blank wall
- Choose a frame finish that contrasts with nearby metals
Visualize the difference a single oversized mirror makes in a hallway that currently feels narrow and dim. It’s one of the highest-impact, lowest-effort changes on this entire list. For more variations, see our Bedroom Mirror Design Ideas guide.
You May Also Like:
- Crystal Decor Ideas
- Capiz Shell Decor Ideas
- Marble Decoration Ideas
- Key Holder For Wall Ideas
- Sideboard Decor Ideas
The next idea changes everything for anyone who has an awkward, unused corner — and almost every home has one.
8. The Cozy Reading Nook Hiding in Your Empty Corner
What You’re Seeing
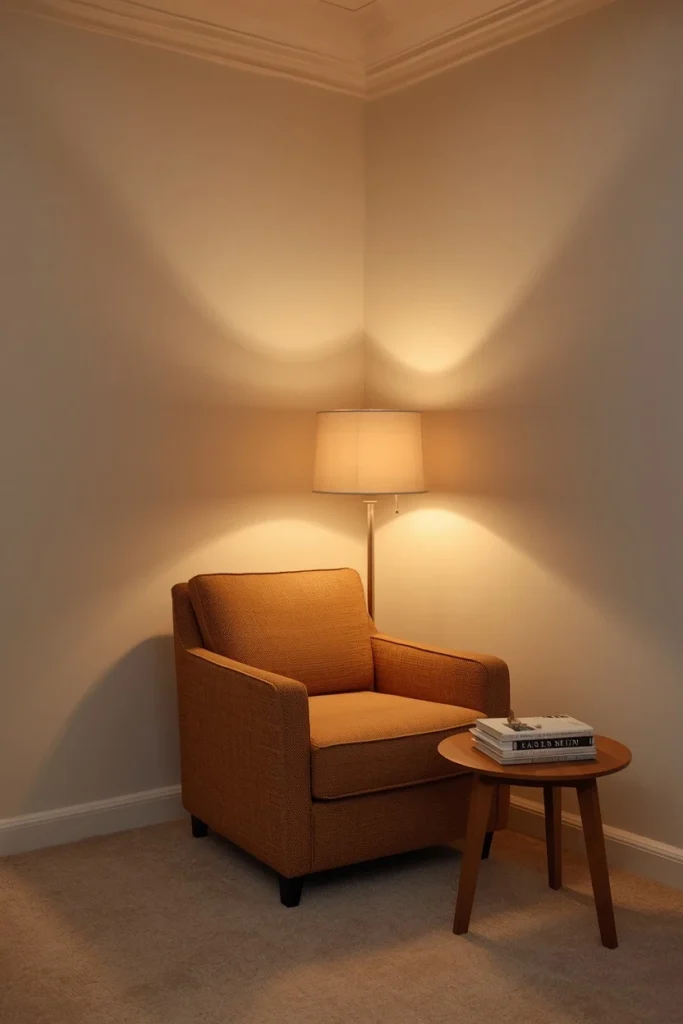
A small armchair angled into a previously empty corner, paired with a floor lamp, a side table, and a stack of books — turning dead space into a destination.
Design Breakdown
Empty corners feel unfinished because there’s nothing pulling your eye there. Adding one anchor piece, even a small one, gives the space a purpose.
You don’t need a full built-in bench — a single chair, good lighting, and one small surface is enough to transform the area.
Expert Tip
Layer in a floor lamp rather than relying on overhead light. Warm, low lighting is what makes a nook feel inviting instead of just “a chair in a corner.”
Why It Works
Humans are drawn to defined, cozy spaces — it’s the same psychological pull that makes a window seat or a booth at a restaurant feel more comfortable than an open table.
Best For
- Small spaces
- Families
- Renters
Common Mistake To Avoid
Choosing a chair that’s too large for the corner, which blocks walking paths and makes the space feel cramped instead of cozy.
Quick Wins
- Add a floor lamp for warm, layered lighting
- Use a small side table to anchor the layout
- Keep traffic flow in mind before placing furniture
Think about how much easier it is to actually relax in a space that was designed for sitting, rather than one that just happens to have a chair in it. Our Empty Corner Decoration Ideas and Book Nook Ideas guides go even deeper on this concept.
Here’s where it gets interesting: the most-saved Pinterest photos of cozy nooks almost never show an expensive chair. They show good lighting and a sense of enclosure.
That’s worth remembering before you spend money on furniture upgrades — lighting and layout often matter more than the price tag of what’s sitting in the corner.
What’s your biggest challenge right now — finding the right furniture, or just knowing where to start? Either way, the next idea solves a problem almost everyone has but rarely notices.
This simple change can completely transform the room.
9. The Hand-Painted Stencil Accent That Looks Custom-Tiled
What You’re Seeing
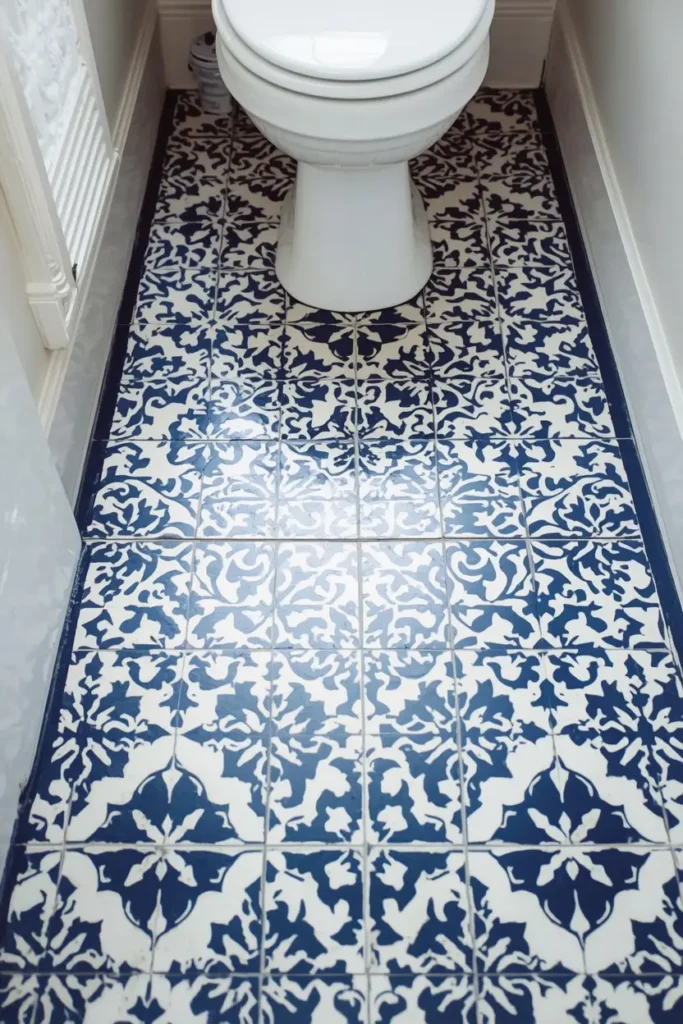
A small bathroom or entryway floor with a painted stencil pattern mimicking Spanish or Moroccan tile, in navy and white, covering what used to be plain beige tile.
Design Breakdown
Stencil painting over existing tile or flooring is one of the most dramatic, lowest-cost transformations possible — and it’s fully reversible if you’re renting and use peel-and-stick alternatives instead.
The key is a quality stencil, floor-rated paint, and a clear protective topcoat.
Expert Tip
Always test the stencil and paint combination on a hidden section first — tile texture can cause bleeding under the stencil edges if you skip this step.
Why It Works
Pattern adds personality in a way solid color rarely can, and our brains associate intricate tile patterns with higher-end, custom-built spaces.
Best For
- Budget makeovers
- Large spaces
- Luxury homes
Common Mistake To Avoid
Skipping the protective topcoat, which leads to scuffing and peeling within a few months of foot traffic.
Quick Wins
- Test paint and stencil on a hidden tile first
- Always seal with a floor-rated topcoat
- Choose a renter-safe peel-and-stick version if you’re not staying long-term
The following idea surprised me the most when I first tried it, mostly because it takes minutes, not weekends.
10. Layered Textiles and a Five-Minute Pillow Refresh
What You’re Seeing
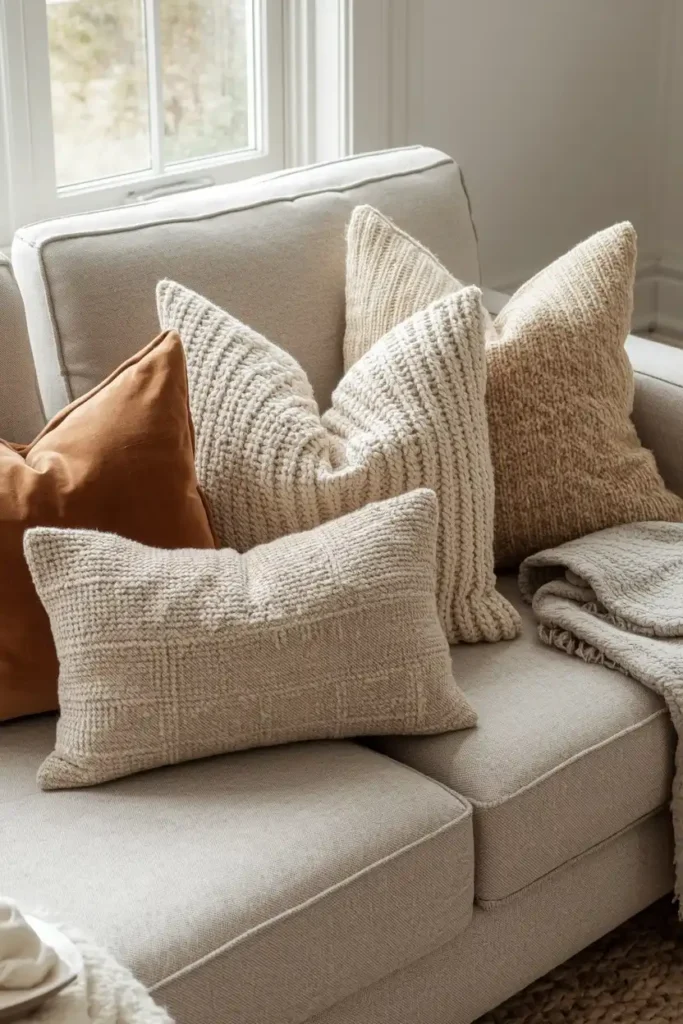
A sofa styled with five pillows in varying textures and two sizes, plus a folded throw blanket draped intentionally over one arm rather than smoothed flat.
Design Breakdown
This is the fastest, cheapest project on this entire list — and arguably the one with the best return on five minutes of effort.
Mix textures (velvet, boucle, linen) rather than matching patterns, and vary pillow size instead of using identical squares.
Expert Tip
Always use an odd number of pillows, and place the largest pair in the back corners with a smaller accent pillow layered in front.
Why It Works
Texture variation creates visual interest even within a single color palette, which is why neutral rooms styled this way never look boring.
Best For
- Small spaces
- Budget makeovers
- Renters
- Families
Common Mistake To Avoid
Matching every pillow exactly, which flattens the look instead of adding the texture and depth a sofa actually needs.
Quick Wins
- Mix textures, not just colors
- Use an odd number of pillows
- Drape, don’t fold, your throw blanket
Let me know which one is your favorite so far — this last idea genuinely costs almost nothing and takes less time than making coffee.
Related Home Decor Ideas You’ll Want to Pin Next
If any of these projects sparked an idea for a specific room, these guides go even deeper into the styles and spaces that pair well with what you just read.
- Country Farmhouse Decor Ideas
- Western Home Decor Ideas
- Girly Apartments Ideas
- Cozy Living Room Ideas
- Bedroom Bookshelf Ideas
- Indoor House Plants Aesthetic Ideas
- Small Bedroom Storage Ideas
- 10 Useful IKEA Hacks To Keep Your Home Organized
Final Thoughts on These DIY Home Decor Ideas
If there’s one thing worth taking away from all ten of these DIY home decor ideas, it’s this: the biggest changes rarely come from the most expensive purchase in the room.
A gallery wall, a clustered set of plants, new hardware on an old dresser, or even five minutes spent re-fluffing pillows — these are the details that actually get noticed, even if no one can say exactly why a room suddenly feels finished.
Don’t try to tackle all ten this weekend. Pick the one that solved the problem bothering you most, and start there. Momentum matters more than speed.
So, which one are you trying first?
If storage and clutter are still nagging at you more than style, go back and read our DIY Organization Hacks guide next — it pairs naturally with everything covered here.
And if you’ve ever wondered why some living rooms feel expensive even when nothing in them actually is, that’s not an accident either. There’s a specific reason designers keep reaching for the same handful of layout tricks — and that’s exactly what we’re breaking down next