

This article was created in line with Trends Oraa’s research and content standards.
Most people don’t realize this.
Their garden is missing one tiny feature that changes everything.
The good news? Fixing it costs less than a trip to the garden center, and it takes about ten minutes.
That missing piece is a bee bath. It’s the small, shallow, often-overlooked detail that separates a “nice yard” from a garden that actually feels alive. Bees need water just as much as flowers do, and once you give them a safe place to drink, you’ll start noticing them everywhere — hovering over your herbs, drifting between your roses, doing exactly what they’re supposed to do.
You might also love our guide on Garden Ideas if you’re already thinking about a bigger backyard refresh, because a lot of these bee bath concepts pair beautifully with a wider garden glow-up.
Here are 10 bee bath garden decor ideas that are easy, affordable, and genuinely beautiful — no beekeeping experience required.
Why Bee Bath Garden Decor Ideas Are Having a Moment
Pollinator gardening has quietly become one of the biggest backyard trends of the year, and bee baths are the easiest entry point.
They’re small. They’re cheap. They photograph beautifully for Pinterest boards.
But here’s the important part: a bee bath isn’t just decoration. Bees can’t land on deep water without drowning, so a shallow dish with stones or marbles gives them a literal landing pad.
That’s why the design of your bee bath matters just as much as the idea itself.
Which of these ideas would work best in your home? Keep that question in mind as you scroll, because by the end, one will probably stand out.
1. The Classic Shallow Stone Bee Bath
What You’re Seeing
Picture a wide, shallow terracotta saucer sitting low on a garden bed, filled with smooth river stones poking just above the waterline.
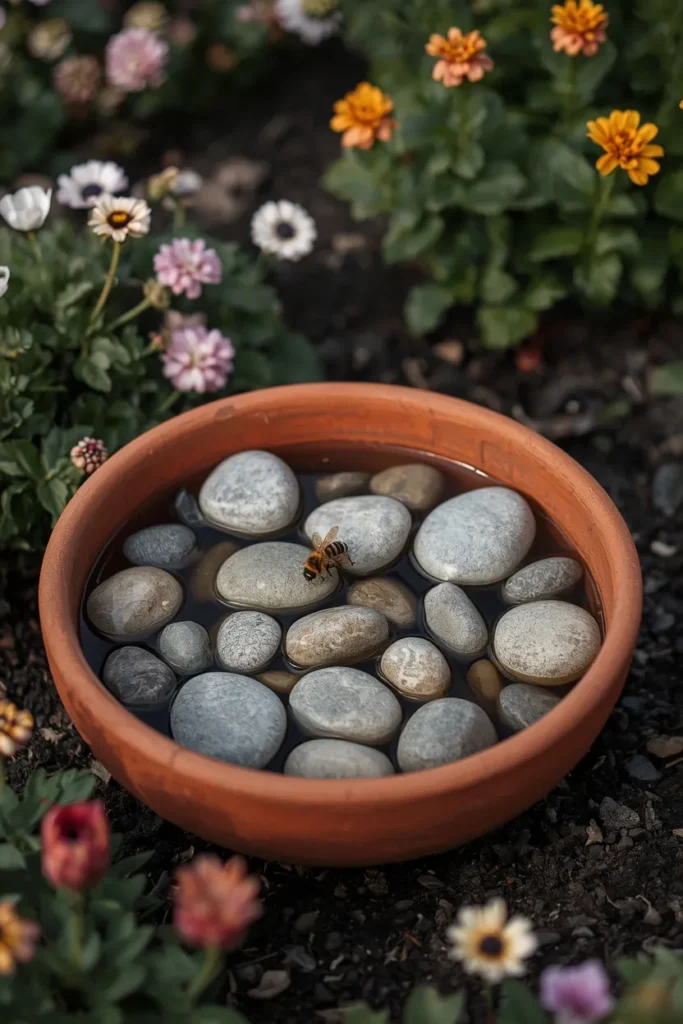
The stones create little dry islands. Bees land, sip, and lift off without ever touching water.
Design Breakdown
This is the original bee bath, and for good reason — it’s the simplest design that actually works. You’re essentially building a tiny beach inside a dish.
The key is depth. Water should sit no more than half an inch deep at its lowest point, with stones rising above the surface in several spots.
Expert Tip
Use stones in varying sizes so you get multiple “dry landing zones” at different heights. This makes the bath usable even as water evaporates throughout the day.
Why It Works
Imagine walking into your garden in the early morning and seeing three or four bees lined up along the rim, taking turns. That visual alone is worth the five minutes it takes to set this up.
It works because it solves a real survival problem in the simplest possible way.
Best For
- Small spaces
- Budget makeovers
- Renters
Common Mistake To Avoid
Filling the dish too deep. If bees can’t see a dry landing spot, they’ll skip it entirely, no matter how pretty it looks.
Quick Wins
- Use a terracotta saucer you already own
- Add stones before adding water, not after
- Refill water every 1–2 days in summer heat
- Place it near flowering plants for best results
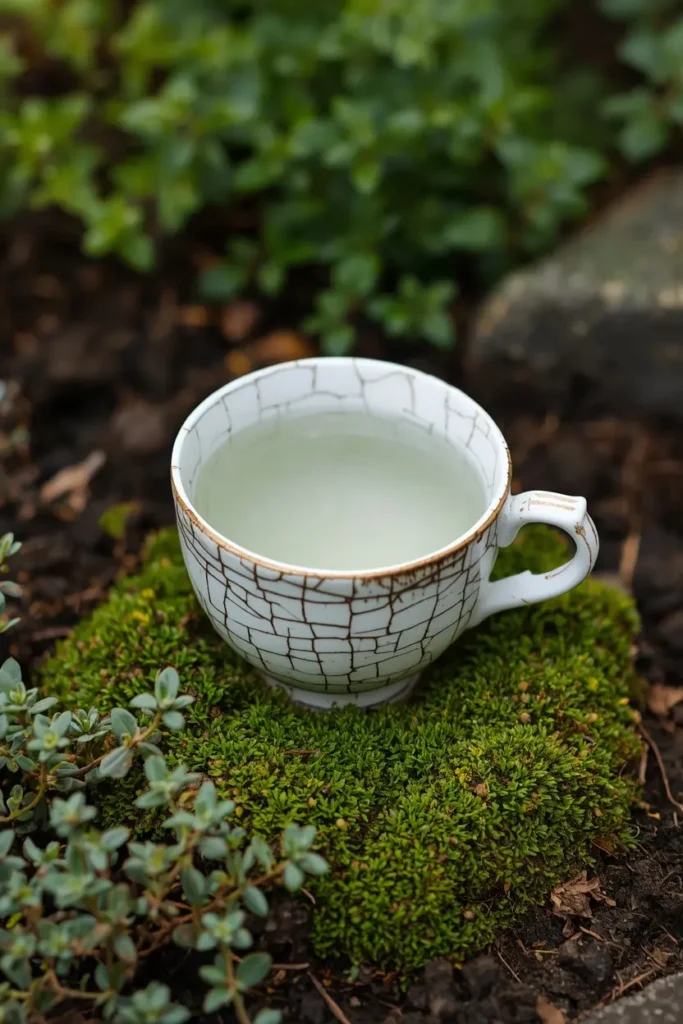
2. The Repurposed Vintage Dish Bee Bath
What You’re Seeing
Think about how much easier garden decor gets when you stop buying new things. This idea uses a chipped vintage teacup, an old ceramic plate, or a thrifted bowl, set into a flower bed and surrounded by moss.
Design Breakdown
Vintage and imperfect pieces add instant character. A bee bath doesn’t need to be brand new or perfectly matched — in fact, the slightly worn look often photographs better.
Set the dish into the soil so it sits stable and level, then style around it with low groundcover.
Expert Tip
Look for dishes with a slightly textured or crackled glaze finish. Bees grip rough surfaces far better than smooth, slick ceramic.
Why It Works
There’s something deeply satisfying about giving a forgotten object a second purpose. It’s sustainable, it’s charming, and it doesn’t cost a dime if you’re shopping your own cabinets first.
Best For
- Budget makeovers
- Renters
- Small spaces
Common Mistake To Avoid
Choosing a dish with a glossy, ultra-smooth interior. Bees can struggle for grip on slippery glaze, so add a few pebbles even on textured pieces.
Quick Wins
- Thrift stores often have these for under $3
- Crackled or matte glazes work best
- Nestle the dish into soil for stability
- Pair with moss or creeping thyme for a finished look
Most people don’t know this: the placement of a bee bath matters more than the design itself. Bees are drawn to water near food sources, so the most successful bee baths sit within a few feet of flowering plants, not tucked away in a quiet corner where nothing is blooming. One thing I’ve learned after experimenting with several setups is that a bee bath placed beside lavender or salvia gets visited within hours, while the same exact dish placed near bare mulch can sit untouched for days.
But here’s the important part — the next idea changes everything about how low-maintenance this hobby can actually be.
Most people waste more space than they realize when they design garden features. The next idea fixes that completely.
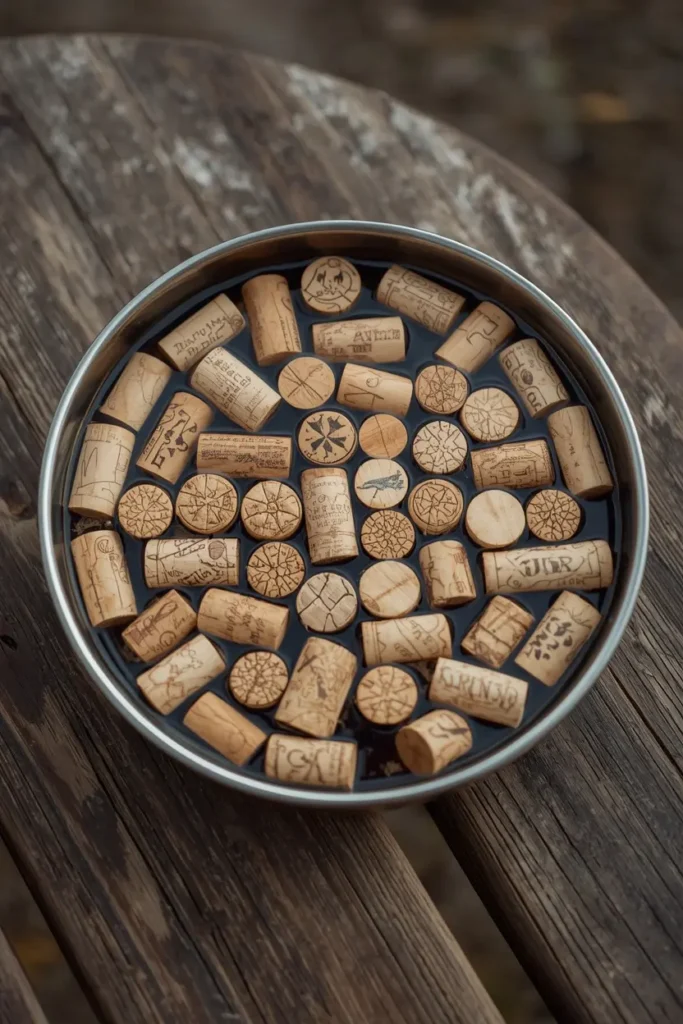
3. The Floating Wine Cork Bee Bath
What You’re Seeing
A wide, low bowl filled with water, with a dozen wine corks bobbing on the surface like tiny rafts.
It’s playful, it’s unexpected, and it’s one of the most Pinterest-saved bee bath styles out there.
Design Breakdown
Corks float naturally, which means they self-adjust as water levels rise and fall — something stones can’t do. This makes the cork method one of the lowest-maintenance options on this list.
You can use plain natural corks for a rustic look, or paint them in soft pastel colors for something more decorative.
Expert Tip
Drill a tiny hole through a few corks and thread them onto a thin garden stake. This keeps them clustered together instead of drifting to the edges of the bowl.
Why It Works
Visualize the difference between a static stone bath and a bowl of floating corks catching the breeze. It’s movement, texture, and function all in one.
It also solves the evaporation problem stones struggle with, since corks always float regardless of water depth.
Best For
- Small spaces
- Budget makeovers
- Families
Common Mistake To Avoid
Using too few corks. If they’re spaced too far apart, bees have nowhere safe to land between them. Aim for a tightly packed cluster covering at least half the surface.
Quick Wins
- Save corks from wine nights instead of recycling them
- Paint corks for a custom color palette
- Cluster them tightly for safer landing spots
- Works in almost any shallow container
You May Also Like:
- Vintage Garden Decor Ideas
- Garden Bird Feeders Ideas
- Small Garden Design Ideas
- Front Porch Flower Pot Ideas
- Patriotic Painted Rocks Ideas
This is where many homeowners make a mistake — they assume bee baths only work in big, sprawling gardens. The next few ideas prove that wrong.
4. The Hanging Macrame Bee Bath
What You’re Seeing
A small shallow dish suspended in a macrame plant hanger, swaying gently from a tree branch or pergola beam.
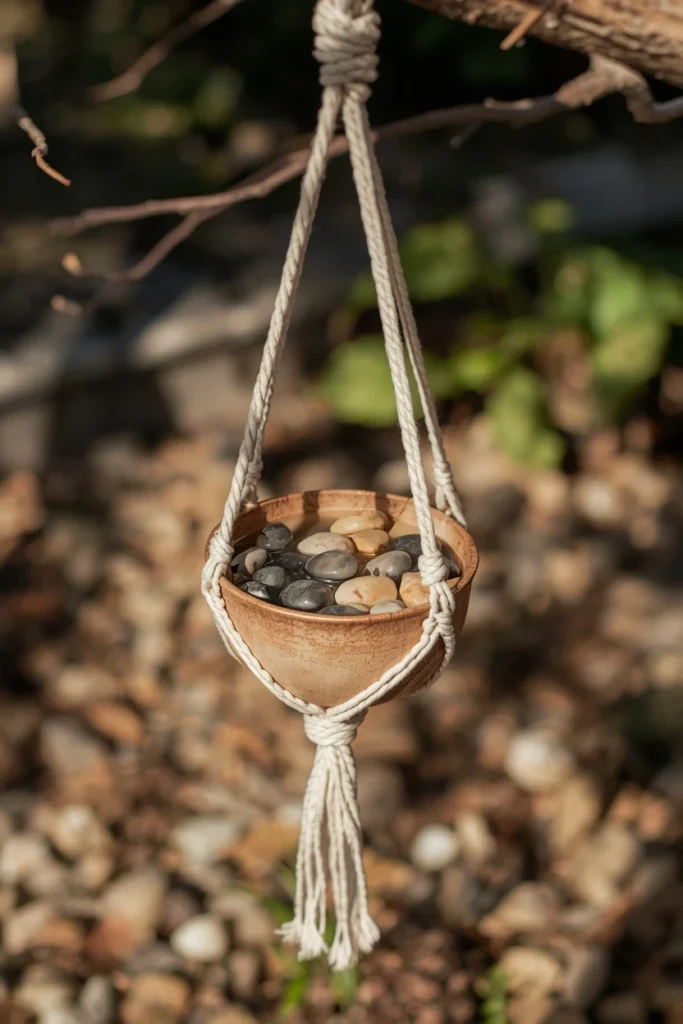
It looks like a hanging planter, but instead of soil, it holds water and pebbles.
Design Breakdown
This idea works especially well if ground space is limited or already crowded with plants. You’re essentially borrowing vertical space that would otherwise go unused.
The macrame adds texture and warmth, turning a purely functional object into something that looks intentional and styled.
Expert Tip
Choose a dish with a slightly raised lip so water doesn’t slosh out when it swings in the wind. A shallow ceramic bowl works better here than a flat plate.
Why It Works
What’s your biggest challenge right now — limited space, or limited style? This idea solves both at once, since it takes up zero ground space while adding a genuinely decorative element.
Best For
- Small spaces
- Renters
- Luxury homes
Common Mistake To Avoid
Hanging it too high. Bees need to find it easily, so keep it within a few feet of blooming plants and at a height where it’s visible from the ground.
Quick Wins
- Use a leftover plant hanger you already own
- Keep the dish shallow with a slight lip
- Hang near flowering vines or climbing roses
- Check water levels more often since wind speeds up evaporation
5. The Mosaic Tile Bee Bath
What You’re Seeing
A concrete or ceramic base covered in hand-set mosaic tiles in blues, greens, and golds, with a shallow water-filled center surrounded by tiny pebbles.
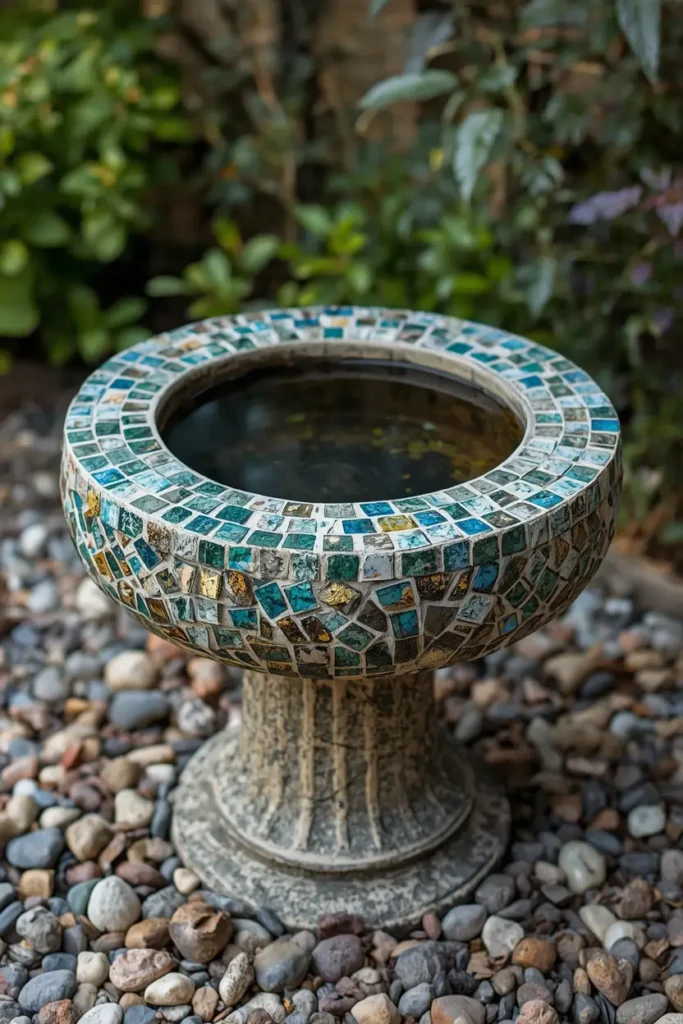
It looks like a piece of garden art that just happens to serve bees too.
Design Breakdown
This is the idea designers secretly love because it bridges art and function. You’re not just adding a water source — you’re adding a focal point.
Mosaic bee baths work best as a standalone garden feature rather than tucked behind other plants, since the detail deserves to be seen.
Expert Tip
Seal the grout with a waterproof sealant before placing it outdoors. Untreated grout can crack or discolor after repeated wet-dry cycles.
Why It Works
Picture yourself enjoying your morning coffee while sunlight catches the tile pattern and a few bees drift in and out. It’s the kind of detail that makes guests stop and ask where you found it.
Best For
- Luxury homes
- Large spaces
Common Mistake To Avoid
Skipping the sealant step. Without it, the piece won’t survive more than one season outdoors, no matter how beautiful the tile work is.
Quick Wins
- Use leftover tile scraps from other home projects
- Always seal grout for outdoor durability
- Place it as a standalone focal point
- Pair with a small surrounding flower bed
Here’s where it gets interesting: the most successful mosaic bee baths I’ve seen aren’t perfectly symmetrical. Slightly irregular tile patterns actually photograph better and feel more handmade, which is exactly the look most Pinterest boards are chasing right now. If you’re worried about your DIY skills not being “good enough,” that imperfection is often the most charming part of the finished piece. Don’t skip this idea just because it sounds advanced — even a beginner mosaic kit can produce a piece that looks custom-made.
The next idea is one designers secretly love, and it’s coming up right after we talk budget.
What to Look For Before You Shop
Before you grab the first shallow dish you see, it helps to know what actually makes a bee bath work long-term. This is the part most blog posts skip, and it’s exactly where many people waste money.
Material matters more than style.
- Terracotta — Affordable, porous, gives bees better grip. Cracks in freezing temps if left outdoors year-round.
- Glazed ceramic — Beautiful finish, but can be slippery. Always add stones or marbles.
- Concrete — Heavy, durable, withstands weather extremely well. Best for permanent garden features.
- Resin or plastic — Budget-friendly and lightweight, but can fade or crack under direct sun over time.
Size and depth guidelines:
- Ideal depth: ¼ to ½ inch of water at the shallowest point
- Diameter: 10–18 inches is plenty for most backyard gardens
- Avoid anything deeper than 1 inch unless it’s heavily filled with stones
Cost estimates:
- DIY using items you already own: $0–$5
- Thrifted dish or saucer: $3–$10
- New decorative terracotta or ceramic bath: $15–$35
- Designer mosaic or concrete garden feature: $40–$120
Common mistakes when buying or building:
- Choosing a container that’s too deep without enough stones
- Picking a glossy, slippery surface with no texture
- Placing it in full shade where water sits stagnant and grows algae
- Forgetting that it needs refilling almost daily in summer heat
Decision-making advice:
If you want something quick and free, start with the stone-and-saucer method from Idea #1. If you want a statement piece that doubles as garden art, the mosaic version from Idea #5 is worth the extra effort. Renters should lean toward portable, lightweight options that can move with them, while homeowners planning to stay long-term can invest in concrete or built-in designs.
Would you choose function or style? Honestly, the best bee baths manage to give you both, and that’s exactly what the remaining ideas on this list deliver.
6. The Bundt Pan Bee Bath
What You’re Seeing
An old metal or ceramic bundt pan, filled with water and a ring of pebbles tracing the pan’s natural grooves, sitting flat on a garden table or stump.
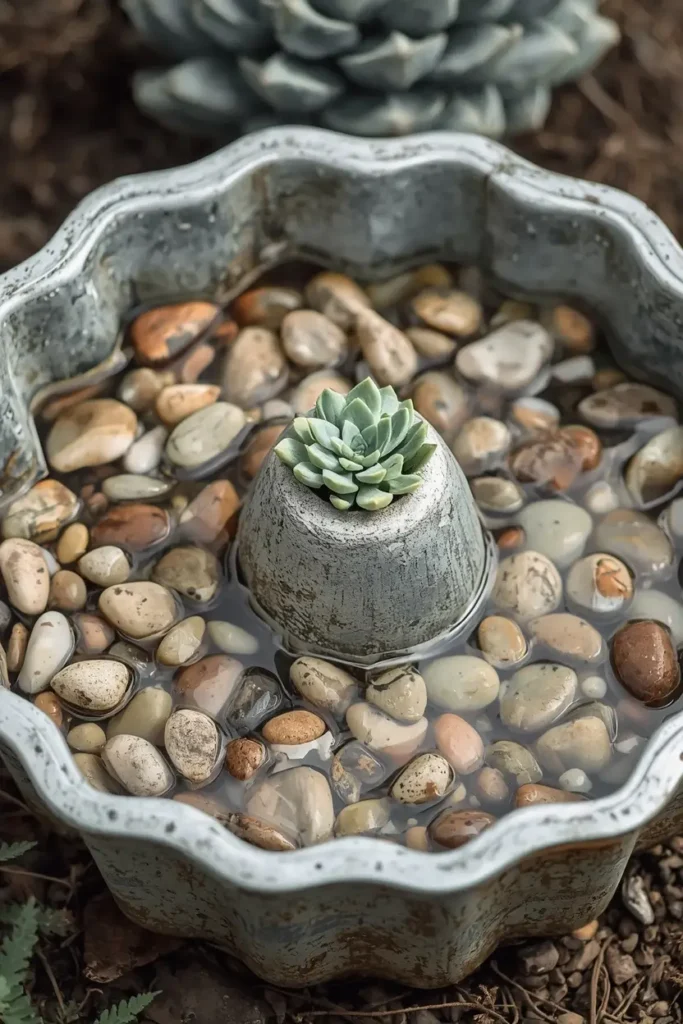
Design Breakdown
The center hole of a bundt pan can be filled with soil and a small succulent, creating a built-in planter and bee bath combo in one piece.
It’s a clever upcycle that takes something purely decorative and gives it a second life outdoors.
Expert Tip
If you’re using a metal pan, drill a tiny drainage hole near the center planting area so the soil doesn’t stay waterlogged after rain.
Why It Works
This idea surprised me the most because it’s so unexpected. Nobody walks into a garden expecting to see a bundt pan, and that novelty is exactly what makes people stop and look twice.
Best For
- Budget makeovers
- Families
- Renters
Common Mistake To Avoid
Forgetting to clean and dry metal pans thoroughly before reuse, since rust can leach into the water and discolor the dish over time.
Quick Wins
- Great use for a damaged or unused bakeware piece
- Combine planting and watering in one object
- Works beautifully on a stump, table, or low bench
- Easy to move indoors during winter storage
7. The Multi-Tiered Fountain Bee Bath
What You’re Seeing
A small tiered fountain with the top layer modified to stay shallow and still, while lower tiers handle the moving water.
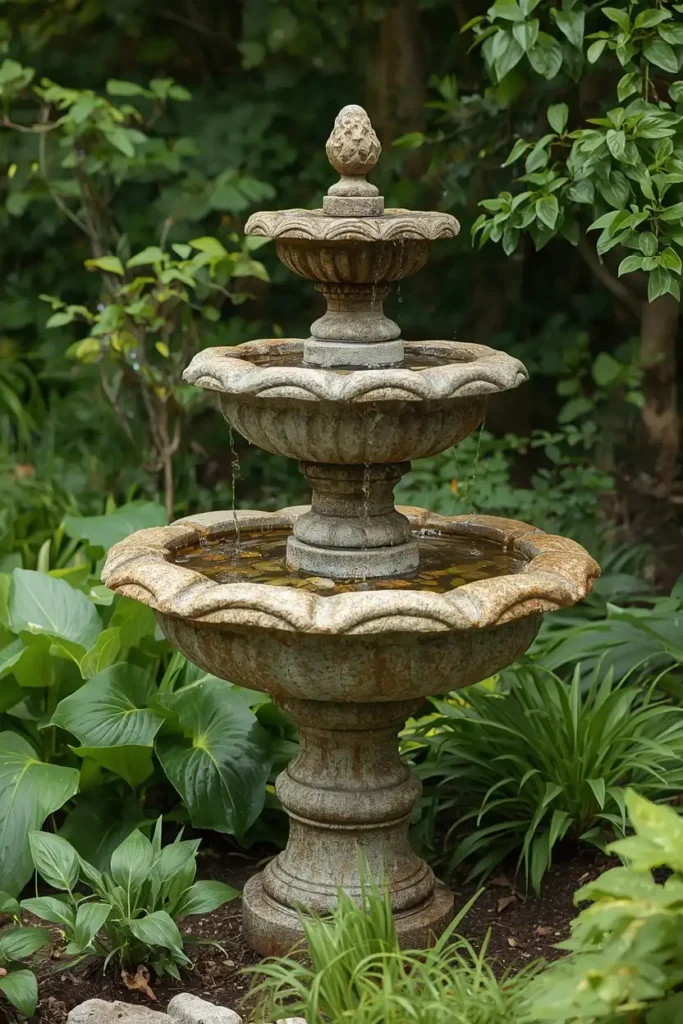
The top tier becomes the bee-safe zone, while the rest of the fountain adds ambient sound and movement.
Design Breakdown
This is one of the more advanced ideas on the list, combining a decorative water feature with a functional pollinator station.
Bees actually prefer still or barely-moving water, so the trick is keeping the very top tier calm even if the rest of the fountain flows.
Expert Tip
Add a layer of flat stones to the top tier to break up any ripple effect from the pump below, keeping that section bee-friendly.
Why It Works
Imagine walking into a backyard that has both the soothing sound of trickling water and the gentle hum of bees nearby. It’s a sensory upgrade that goes far beyond basic garden decor.
Best For
- Large spaces
- Luxury homes
Common Mistake To Avoid
Letting the entire fountain move and ripple. Constant motion on every tier will keep bees away entirely, since they can’t safely land on disturbed water.
Quick Wins
- Choose a fountain with at least two tiers
- Keep the top tier calm and stone-lined
- Pair with surrounding pollinator-friendly plants
- Clean the pump filter monthly to prevent algae buildup
You May Also Like:
- Outdoor Bathroom Ideas
- Modern Garden Shed Ideas
- Tiny Garden Ideas
- Balcony Garden Ideas
- Diy Garden Trellis Ideas
This simple change can completely transform the room — or in this case, the entire backyard. The next idea takes things in a more playful, kid-friendly direction.
8. The Painted Pebble Bee Bath
What You’re Seeing
A shallow dish filled with hand-painted pebbles in bright patterns — polka dots, stripes, tiny flowers — creating a colorful, almost whimsical landing zone for bees.
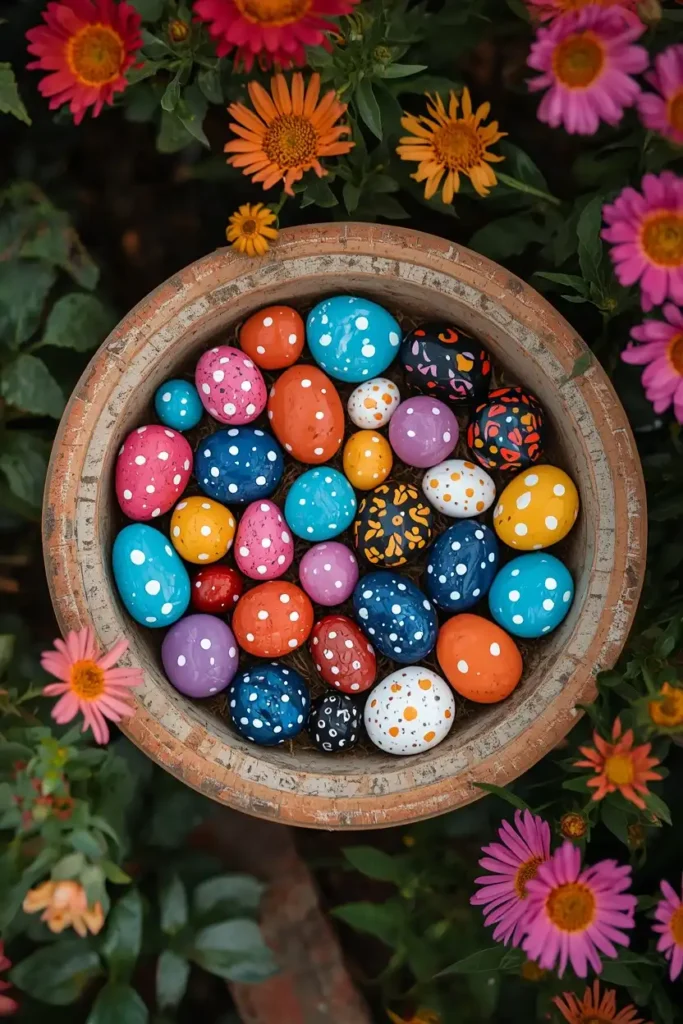
Design Breakdown
This is the most family-friendly idea on the list, since painting pebbles is a simple weekend craft project kids genuinely enjoy.
Once painted and sealed, the pebbles double as both function and decoration, giving the bath a personality of its own.
Expert Tip
Use outdoor acrylic paint and a clear waterproof sealant. Regular craft paint will fade and chip within weeks once exposed to sun and rain.
Why It Works
Think about how much easier it is to get kids excited about gardening when there’s a craft involved first. This idea turns pollinator care into a hands-on family activity instead of a chore.
Best For
- Families
- Budget makeovers
- Small spaces
Common Mistake To Avoid
Skipping the sealant. Unsealed painted pebbles will leach color into the water, which isn’t safe for the bees you’re trying to help.
Quick Wins
- A great rainy-day craft project for kids
- Use outdoor-rated paint and sealant only
- Swap pebble designs seasonally for variety
- Pairs beautifully with garden stepping stones
One thing I’ve learned from doing this project with kids is that letting them choose the color palette makes them far more invested in checking the bath daily to see if bees showed up. It becomes a little science experiment in disguise. Here’s where it gets interesting — that daily checking habit often turns into genuine interest in pollinator gardening overall, which is a pretty great unintended outcome from what started as a simple craft project.
Let me know which one is your favorite so far, because the final two ideas are about to raise the bar even further.
This is where many homeowners make a mistake by assuming a bee bath has to be a separate project entirely, when it can actually live inside something you’re already building.
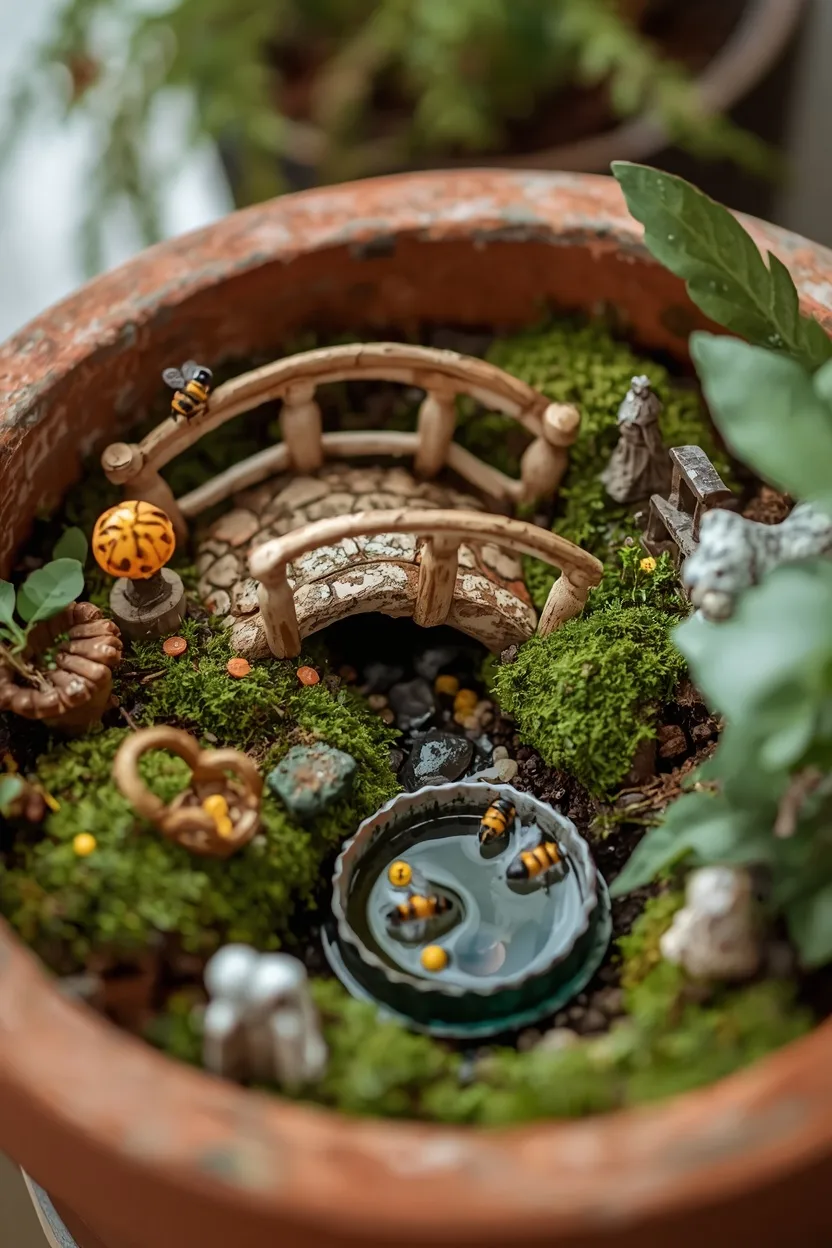
9. The Fairy Garden Bee Bath
What You’re Seeing
A miniature fairy garden scene tucked into a planter, complete with a tiny bridge, miniature furniture, and a bottle-cap-sized bee bath nestled among moss and mini succulents.

Design Breakdown
This idea works because it turns a functional water source into part of a larger storytelling display. The bee bath isn’t the star — it’s a charming detail within a bigger scene.
Using a bottle cap or small jar lid filled with pebbles is plenty sized for this miniature scale.
Expert Tip
Use moss as the base layer to help retain a little moisture around the tiny water dish, keeping the whole scene looking fresh longer between waterings.
Why It Works
The following idea surprised me the most because of how much joy it brings for such a tiny amount of effort. Visualize a small corner of your patio transformed into its own little world, complete with real visiting bees.
Best For
- Small spaces
- Families
- Renters
Common Mistake To Avoid
Using a water dish too small to actually hold water consistently. Even tiny scenes need a dish deep enough to avoid drying out within an hour.
Quick Wins
- Bottle caps and jar lids work perfectly at this scale
- Moss helps maintain ambient moisture
- Great for patios, balconies, and windowsills
- A fun project to build together with kids
10. The Year-Round Seasonal Bee Bath Station
What You’re Seeing
A dedicated bee bath “station” on a small table or stand, designed to be easily adjusted across seasons — shallow stone dishes in summer, swapped for a covered or stored setup once temperatures drop.
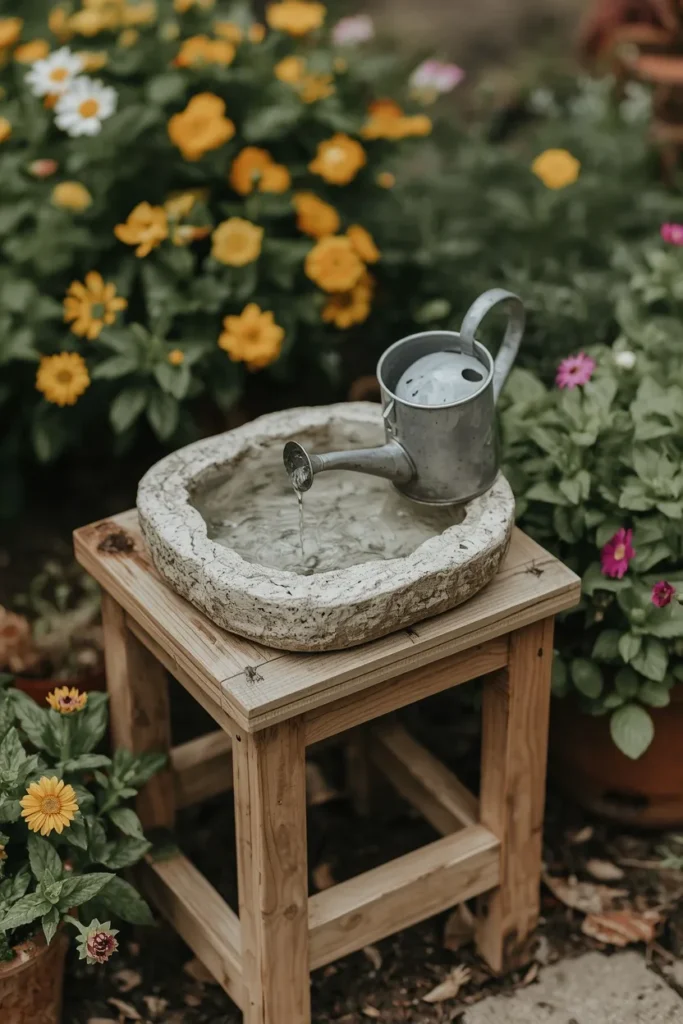
Design Breakdown
Most people only think about bee baths during peak summer, but pollinators benefit from a thoughtfully designed, easy-to-maintain station they can rely on for as long as the season allows.
Setting it up on a small stand or table also makes refilling and cleaning far easier than bending down to a ground-level dish every day.
Expert Tip
Keep a small watering can specifically for bee bath refills near the station. It sounds minor, but having a dedicated tool nearby genuinely increases how consistently you’ll keep up with it.
Why It Works
Picture yourself enjoying a garden that supports pollinators reliably, not just on the days you remember to fill a random dish. Consistency is what actually makes a difference for local bee populations.
Best For
- Large spaces
- Luxury homes
- Families
Common Mistake To Avoid
Setting it up once in spring and forgetting about it by midsummer. Bee baths need regular refilling and occasional cleaning to stay effective and algae-free.
Quick Wins
- Use a small plant stand or side table as a base
- Keep a dedicated refill watering can nearby
- Clean the dish weekly to prevent algae
- Store delicate dishes indoors during freezing months
Related Garden Ideas
If bee bath garden decor ideas have you thinking about a bigger backyard refresh, these related guides are worth exploring next.
- Garden Ideas
- Garden Bird Feeders Ideas
- Vintage Garden Decor Ideas
- Small Garden Design Ideas
- Tiny Garden Ideas
- Balcony Garden Ideas
- Cut Flower Garden Layout Ideas
- Diy Elevated Garden Bed Plans
Final Thoughts on Bee Bath Garden Decor Ideas
Here’s the recap, in case you skimmed straight to the bottom.
The shallow stone method is the easiest place to start, the floating cork bath is the lowest-maintenance option, and the mosaic or tiered fountain versions are where you go once you want a true statement piece. Each of these bee bath garden decor ideas solves the same core problem in a slightly different way, which is exactly why there’s one here that fits your space, your budget, and your style.
Don’t try to do all ten at once. Pick the one that matched your space best as you were reading, and set it up this week while the idea is still fresh in your mind. A shallow dish, a handful of stones, and ten minutes of your time is genuinely all it takes.
So, which design are you trying first — the classic stone bath, the playful cork version, or something a little more elevated like the mosaic feature?
If this list got you thinking about your outdoor space in a new way, it’s worth looking at your garden as a whole next. A few small pollinator-friendly touches paired with the right layout can completely change how your backyard feels and functions.
And if you’ve ever wondered how something as small as a hanging chair or a cozy reading nook can quietly transform an entire outdoor corner the same way a bee bath does, that’s a rabbit hole worth falling into next — because once you start noticing these small, high-impact details, you’ll never look at an “empty” corner of your yard the same way again.